52
VERSION 03/2020 ORDER NUMBER DOC2330732
VU 1/VU 2/VU 3
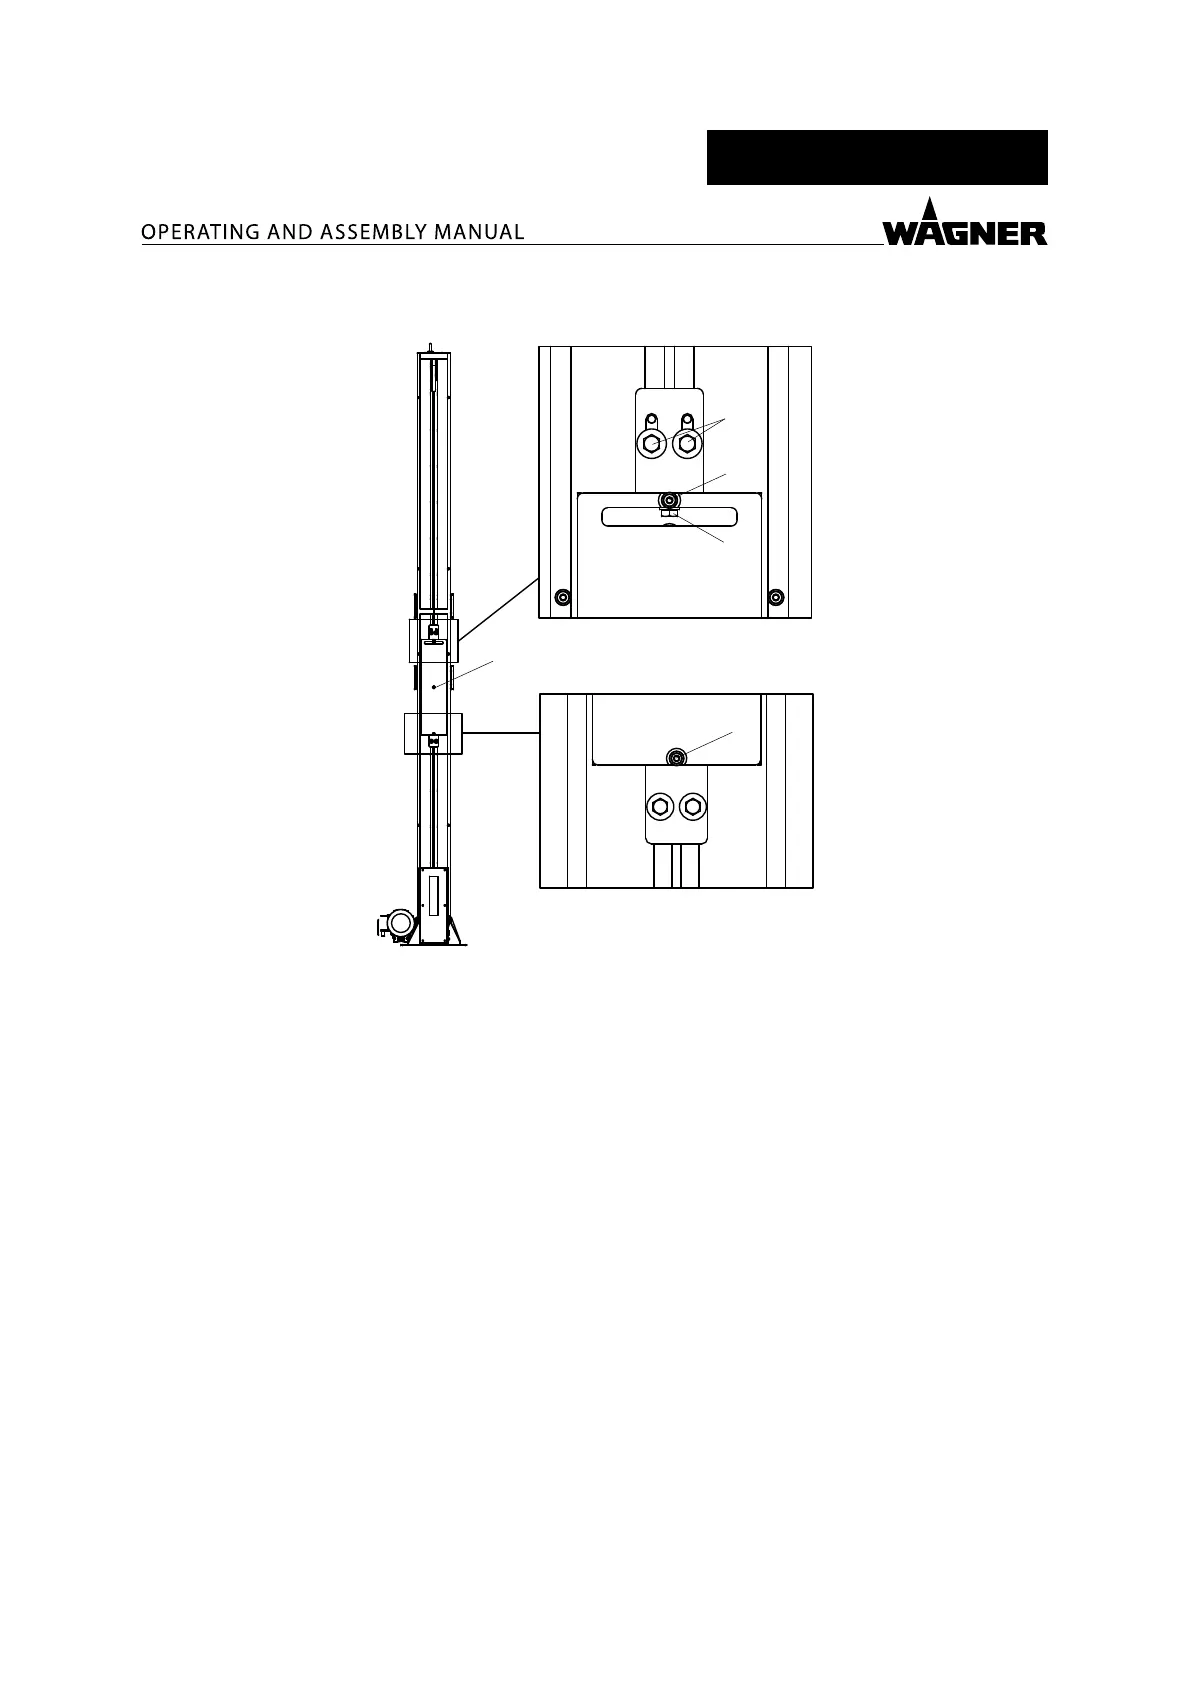
8.3.2.2 SETTING THE BELT TENSION FOR VU 2
1
2
3
P_02856
2
2
Procedure:
1. Remove lower cover at rear.
2. Move the guns all the way up.
3. Remove cover on counterweight (if necessary).
4. Open screws (1) by one revolution.
5. Tighten screw (3) to adjust the belt tension.
Next, tighten the drive belt to the extent that it can still be deected by hand with
little eort.
Tighten/loosen the drive belt in stages with half turns of tensioning bolt (3), until a
slight deection is perceptible.
6. Retighten bolts (1).
7. The drive belt should no longer be deected. If it is, then tighten tensioning bolt (3)
by a further quarter turn.
8. Attach cover to counterweight (if necessary).
9. Attach lower cover at rear.
Note:
Alternatively, the tensioning screw (3) can be tightened using torque. To do so, the screws (2)
and the counterweight cover must rst be removed. Then, tighten the tensioning screw (3)
using the following torque specications:
Reciprocator, VU 2–1800 = 1.8 Nm; 1.33 lb ft
Reciprocator, VU 2–2400 = 1.8 Nm; 1.33 lb ft