Installation and Initial Operation 40075165 Markoprint integra PP108
Page 49 of 104 GB
Connection to a network
A RJ-45-connection allows a connection of the print system to the customer LAN (Local
Aera Network).
The LED on the top of the system lights green if a network is available. The LED flashes
yellow with data communication.
The LED lights red if a failure exists.
Instruction
Please connect the print system with the network as follows:
If required connect the print system to the network via the RJ45 socket.
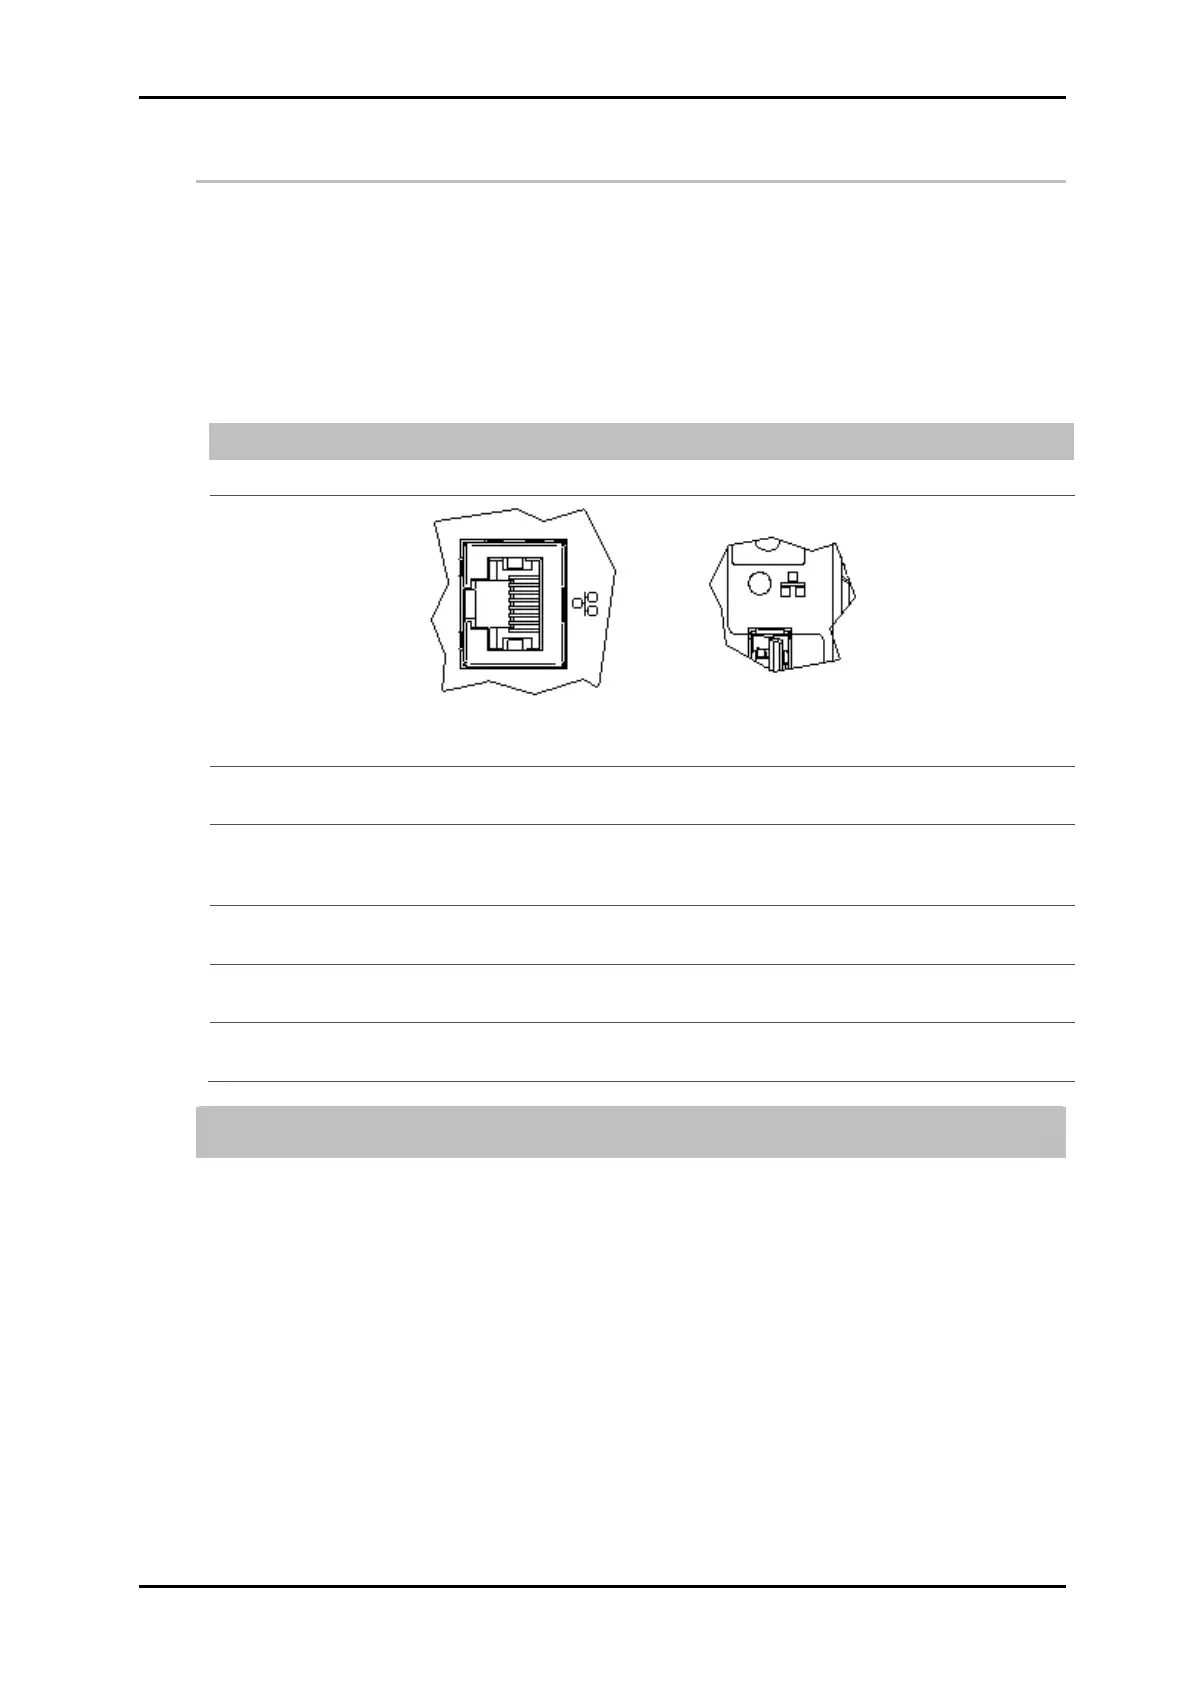
Fig. 12: Ethernet-socket (RJ 45) on the system-back and network LED on the top side of the
system.
Connect the USB-stick to the Markoprint integra PP108 to write a system
image on the stick.
Connect the USB-stick to a PC with iDesign and set the desired free IP
address for the system by the iDesign software. (System settings – System
Config – IP-Address)
Add the system in the iDesign software to operate it by the iDesign software.
(Connections – Add system – Enter name and IP address)
Connect the USB-stick to the Markoprint integra PP108 again to adopt the
new settings.
The Markoprint integra PP108 is now displayed as Ethernet system in
iDesign.
Each IP address can place in a network once only. Otherwise there is an address
conflict and the system can’t address. Please contact your system administrator.