EasyManua.ls Logo

Weber 4300 - User Manual

Weber 4300
98 pages
Print Icon
To Next Page IconTo Next Page
Loading...
Model 4300
Printer-Applicator
User’s Manual
Copyright 2012 Weber Packaging Solutions, Inc.
This documentation contains confidential information and
trade secrets of Weber Packaging Solutions, Inc. and its suppliers.
Version 1.0
Weber Packaging Solutions, Inc.
711 W. Algonquin Road
Arlington Heights, IL 60005-4457
Phone: 847-364-8500 Fax: 847-364-8575
www.weberpackaging.com
05/2012
Item Number 56121

Table of Contents

Questions and Answers

  • B
    Brad GuerreroAug 20, 2025
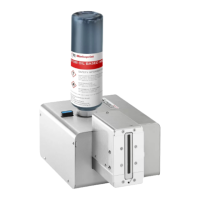
    Why is the label placement on the product consistently poor with my Weber 4300?
    • R
      Rebekah ThompsonAug 20, 2025
      If the label placement on the product is consistently poor with your Weber Printer, it could be due to a few reasons. The product might not be presented consistently to the tamp pad. To fix this, check that the conveyor speed is constant and adjust the guide rails or other product control devices to ensure consistent product presentation. Also, the tamp extend time or the air-blast might be set incorrectly, so refer to the setup instructions.
  • A
    Adam AndersonAug 23, 2025
    What causes the air assist to not function on a Weber Printer?
    • A
      Angel AndersonAug 23, 2025
      If the air assist on your Weber Printer does not function or is ineffective, the issue could stem from several factors. Check if the air assist flow is too low or too high and refer to the setup instructions. Also, the air assist tube might be incorrectly positioned, damaged, or disconnected; examine, adjust, repair, or replace it as necessary. Ensure that the labels are threaded correctly, making sure the label liner is threaded between the air assist tube and the peeler bar. A malfunctioning air assist solenoid may also be the cause; examine and replace it if necessary. If none of these steps resolve the issue, the applicator controller might be malfunctioning, and you should request qualified assistance.
  • J
    Joseph ValdezAug 26, 2025
    Why is my Weber 4300 label application rate too slow?
    • J
      Jennifer CruzAug 26, 2025
      If your Weber Printer's label application rate can't keep up with the product rate, it might be because the product conveyor is running too quickly for the label application rate. Check the machine specifications for rate versus the size of the label being applied, and slow down the conveyor if necessary. Excessive printer processing time, stemming from software, compiling/editing time, or print speed, can also be a factor. Refer to the print engine manual for more information. Additionally, incorrect setup adjustments might be the cause, so refer to the setup instructions.
  • J
    Jessica SimmonsAug 28, 2025
    What to do if labels are not being held onto the tamp pad of my Weber 4300?
    • J
      Johnny CampbellAug 28, 2025
      If labels aren't being held onto the tamp pad or the label placement is consistently poor on the tamp pad of your Weber Printer, the vacuum pump might not be operating. Check for air coming out of the muffler and repair or replace it as needed. The vacuum might also be too low, or the air assist could be too high or too low, or the air assist tube may be out of position. The tamp pad holes might not be punched out. Refer to the setup instructions to resolve these issues.
  • J
    John MillerAug 31, 2025
    Why is there no label feed from my Weber Printer?
    • C
      Corey BarreraAug 31, 2025
      If there is no label feed on your Weber Printer, the tamp home sensor may be broken or out of adjustment. Replace or adjust the sensor as needed. Also, the print engine configuration might be incorrect. Make sure that all the required parameter values are correctly entered in the print engine. Refer to the print engine manual for more information. Ensure that you load print information into the buffer.
  • W
    Wendy PopeSep 2, 2025
    How to fix label liner breaks on my Weber Printer?
    • G
      Gavin MarksSep 3, 2025
      If the label liner breaks on your Weber Printer, it could be due to incorrectly threaded labels; re-thread the labels. A damaged roll of labels, with nicks or label cutter die damage on the liner, a bruise on the side of the label roll, or a liner width varying significantly, can also cause this issue; replace the label roll. Adhesive buildup on the peeler bar may also be the reason; clean it as necessary and examine the label roll for damage, replacing the label roll if needed.
  • S
    smithjasonSep 5, 2025
    What causes the air-blast to not occur on a Weber 4300?
    • D
      Derek GonzalezSep 5, 2025
      If the air-blast does not occur on your Weber Printer, the air-blast time might be too short, so refer to the setup instructions. Alternatively, the air-blast solenoid may be malfunctioning; investigate and replace it if necessary.
  • K
    kaitlynkelleySep 8, 2025
    Why is the print compressed on labels in the feed direction on my Weber 4300 Printer?
    • D
      Devin HudsonSep 8, 2025
      If you notice compressed print on labels in the feed direction with your Weber Printer, the applicator unwind brake might be preventing labels from unwinding properly. Reduce the tension of the dancer arm brake to resolve this issue.
  • E
    Eric HartSep 12, 2025
    What to do if the label fails to leave the tamp on my Weber Printer?
    • J
      Jennifer HillSep 12, 2025
      If the label fails to leave the tamp on your Weber Printer, it could be due to no air-blast. Refer to the solutions provided for the 'Air-Blast does not occur' problem. Alternatively, there might be too much vacuum or the air-blast could be too low. Refer to the setup instructions to resolve these issues.
  • K
    Kristen FlowersSep 14, 2025
    Why do labels print continuously without being applied on my Weber Printer?
    • A
      Allison PowellSep 14, 2025
      If labels print continuously without being applied on your Weber Printer, the print engine configuration might be incorrect. Make sure that all the required parameter values are correctly entered in the print engine. Refer to the print engine manual for more information.

Summary

Introduction

Purpose and Scope of this Manual

Defines manual's purpose, scope, and user tasks.

Conventions Used in this Manual

Explains symbols, formatting, and terminology used throughout the document.

Manual Outline

Provides a chapter-by-chapter overview of the manual's content.

Customer Support

Information on contacting technical support representatives for assistance.

General Information

Specifications

Details machine dimensions, weight, electrical, air, and environmental requirements.

Where to Put the Machine

Criteria for optimal machine placement and positioning for operation.

Safety Considerations

Covers machine reliability, directives, guarding, and stop functions for safe operation.

Pneumatic Power Supply Failure

Addresses procedures and responsibilities for pneumatic power loss.

Machine Layout and Components

Illustrations and identification of the applicator's main parts and layout.

Preliminary Setup

Printer-Applicator Unpacking

Procedures for unpacking and mounting the applicator unit.

Moving and Transporting the Printer-Applicator

Steps for safely moving and transporting the applicator.

Ribbon and Label Loading

Instructions for loading printer ribbon and label stock into the machine.

Label Width Setting

Guidance on adjusting label width settings for the print engine.

Tamp Pad Setup

Procedures for setting up the tamp pad, including hole punching.

Air Filter Setup

Instructions for installing and connecting the air filter assembly.

Applicator Setup

Connection to AC Power

Steps to safely connect the applicator to the AC power source.

Compressed Air Setup

Connect and adjust compressed air supply, including air assist.

Tamp Home Adjustment

Procedure for setting the tamp pad's home position for label reception.

Tamp Pad;Label Alignment

Steps for aligning the tamp pad precisely with the label for proper application.

Vacuum and Air Assist Regulator Adjustment

How to adjust vacuum and air assist regulators for optimal label pickup.

Tamp Adjustment

Checking and adjusting tamp function, speed, and cushion settings.

Air Blast Adjustment

Guidance on adjusting air blast duration and pressure for label transfer.

Static Stack Test

Procedure to test applicator setup by applying multiple labels to a single product.

Low Label Sensor Functionality

Checks and verifies the operational status of the low label sensor.

Low Label Sensitivity Adjustment

Calibrating the low label sensor's sensitivity for accurate detection.

Low Label Sensor Trigger Point

Setting the point at which the low label sensor activates an alarm.

Machine Attitudes

Illustrations showing different orientations and positions of the applicator.

Rotatable Display

Instructions on how to rotate the controller display for better viewing.

Product Detector Setup

Positioning the Applicator

Ensuring correct applicator placement for accurate label application.

Product Detector Sensitivity Setup

Adjusting the product detector's sensitivity for reliable product detection.

Product Detector Position

Steps to position the product detector for accurate label placement.

Test Run

Performing a final test run to verify label application accuracy.

Controller Operation

Applicator Menu Flowchart

Visual guide to navigating the controller's menu structure and options.

Controller Keypad

Explanation of the applicator controller's buttons and their functions.

Setup Menu Overview

Accessing and configuring core applicator settings like options, timers, and run modes.

Diagnostics Screen Overview

Monitoring inputs, outputs, running test cycles, and viewing system status.

Maintenance

Daily Maintenance

Routine checks and cleaning tasks performed each day.

Weekly Maintenance

Tasks to be performed weekly for optimal machine performance.

Six-month Maintenance

Periodic maintenance actions required every six months.

Yearly Maintenance

Annual checks and replacements for long-term reliability.

Tamp Home Sensor Adjustment

Procedure for adjusting the sensor that detects the tamp's home position.

Rewind Flag and Sensor Adjustments

Aligning the rewind sensor flag for proper waste liner management.

Troubleshooting

Label liner breaks

Troubleshooting steps for issues with label liner breakage.

Labels Not Held Onto Tamp Pad

Resolving problems with labels not adhering correctly to the tamp pad.

Poor Label Placement on Product

Addressing issues causing inconsistent label placement on products.

Air Assist Not Functioning

Diagnosing and fixing problems with the air assist system.

Machine Will Not Cycle

Troubleshooting common causes for the applicator failing to cycle.

Label Rate Cannot Keep Up

Resolving issues where label application speed lags behind product rate.

Random Machine Functions

Investigating and correcting unexpected or random machine operations.

No Label Feed

Diagnosing and resolving problems preventing labels from feeding.

Compressed Print on Labels

Troubleshooting compressed label print issues.

Poor Print Quality

Addressing factors that lead to low-quality printing on labels.

Continuous Label Printing

Resolving labels printing without being applied to the product.

Air-Blast Not Occurring

Troubleshooting the absence of the air blast during label application.

Label Fails to Leave Tamp

Resolving issues where labels do not transfer from the tamp pad.

Rewind Motor Stalls

Diagnosing and fixing problems with the rewind motor stalling.

Appendix

Product Detector Jumpers

Configuration settings for the product detector using JMP2 jumpers.

Stack Light

Description and color codes for the optional stack light indicator.

External Tamp Disable Switch

Wiring and implementation of an external switch to disable the tamp.

I;O Interface

Overview of the I/O interface for external system coordination.

Input Connection Examples

Illustrations of common input signal connection configurations.

Outputs Specifications

Details on applicator output signals, voltage, and current ratings.

Output Connection Example

Example wiring diagram for a typical applicator output signal.

AC Wiring

Diagram and explanation of the applicator's AC power wiring.

DC Wiring

Diagram illustrating the DC wiring connections for sensors and components.

Redundant System Feature

Configuration for a master-slave setup for continuous operation.

Pneumatic Schematic

Diagram illustrating the pneumatic system layout and components.

Center of Gravity Drawings

Visual representations of the applicator's center of gravity.

CE Declaration of Incorporation

Manufacturer's declaration regarding conformity with CE directives.

CE Declaration of Conformity

Manufacturer's statement of compliance with CE electromagnetic directives.

Warranty

Weber Warranty Statement 4300 Applicator

Details the warranty coverage, period, and limitations for the applicator.

Limitation of Liability

Defines Weber's responsibilities and liabilities concerning product defects.

Weber 4300 Specifications

General IconGeneral
BrandWeber
Model4300
CategoryPrinter
LanguageEnglish

Related product manuals