Applicator Setup
Weber Packaging Solutions, Inc. 4-9
Tamp Adjustment
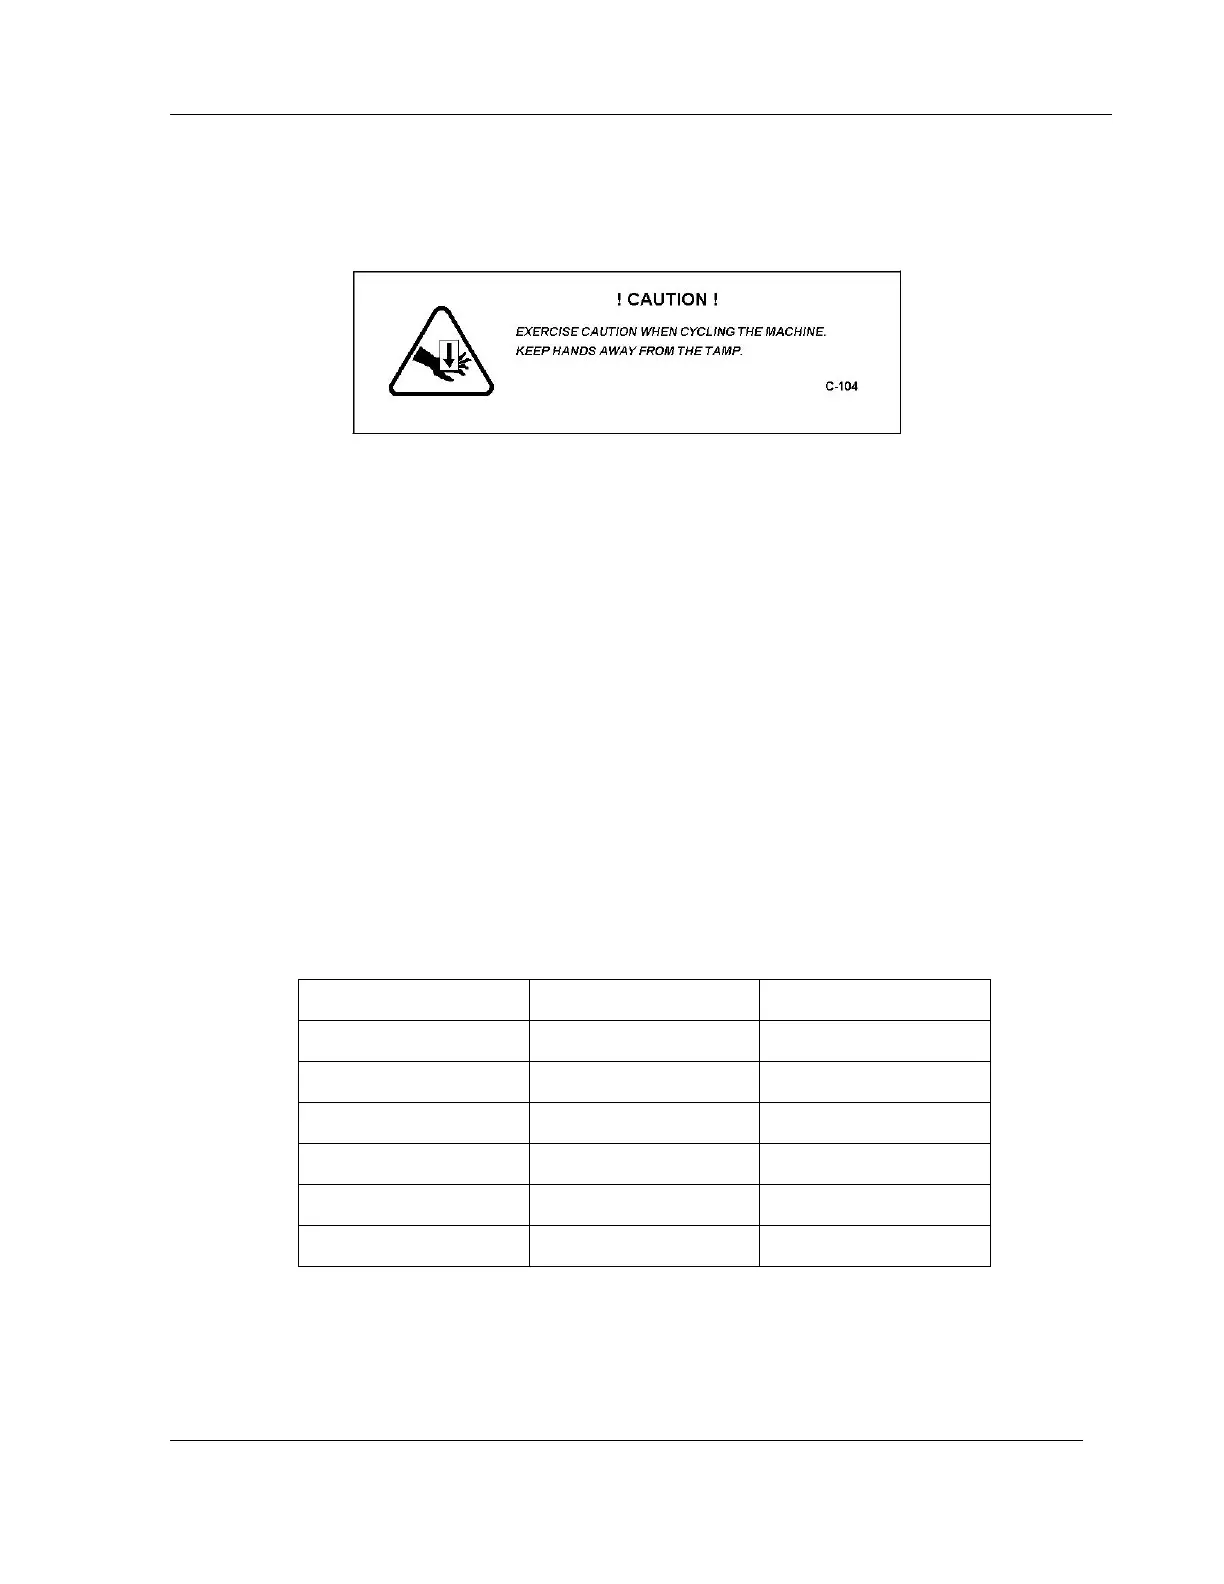
The tamp pressure, flow controls, and cylinder cushions are factory pre-set. Use the following
instructions to check the tamp function and to make adjustments only if necessary.
To adjust the tamp:
1. Check/adjust the filter-regulator to be sure it is set to 30 PSIG (2 bar).
2. Set the main [POWER ON/OFF] switch to the ON position. Wait for the applicator and
print engine to fully power up.
3. Press the [JOG] button to cycle several labels through the applicator to observe the tamp
action. It should move quickly & smoothly without slamming to a sudden stop at either
end of its stroke.
4. If the tamp does not move quickly and smoothly, or if it slams to a stop at either end of
its stroke, locate the two flow controls on the tamp assembly.
NOTE: These flow controls are meter-out function (see Figure 4-8).
5. Press the [JOG] button to dispense a label onto the tamp pad and trip the product
detector to cycle a label through the applicator. Adjust the air control valves until the
tamp extends and retracts quickly as the machine cycles, but does not slam to a stop at
either end.
6. See section regarding Measure Cycle Time. Required times are for the following
NOTE: Do not go lower than the time values in the chart or the tamp assembly may
be damaged and the product life reduced.
7. Tighten the lock nuts on both flow controls.