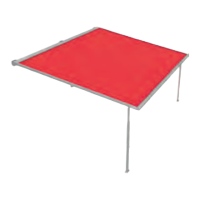
PergoTex II/ PergoTex II LED
Instructions for assembly
We reserve the right to make technical changes
• Choose the number and type of fixing material required on site based on the
structural conditions and static requirements. Maximum M12 screws may be used.
• Additional mounting holes must be drilled on the wall gap sealing profile on site and
must be drilled symmetrically to the existing bore holes.
Drilling holes for the wall gap sealing
profile
CAUTION:
Check that the wall is even.
Mark the position where the wall 1.
gap sealing profile should be fitted
to the wall. Always taking into
account the dimensions given in the
confirmation of the order.
Check for proper alignment. 2.
Note:
The slotted holes that have already
been drilled into the wall gap sealing
profile can be used as a template to
mark the wall.
Drill the holes. 3.
Installation tip: for uneven walls, secure the wall gap sealing profile in its intended place;
do not tighten the attachment screws. Carry out all further installation steps until you get
to the installation of the safety shield and only tighten the attachment screws in the wall
gap sealing profile when you have completed this.
Installation of the wall gap sealing
profile
• Hold the wall gap sealing profile and
drilled holes firmly against the wall
and tighten the corresponding
attachment screws.

 Loading...