REAR AXLE
L3301, L3901, L4701, WSM
4-S5
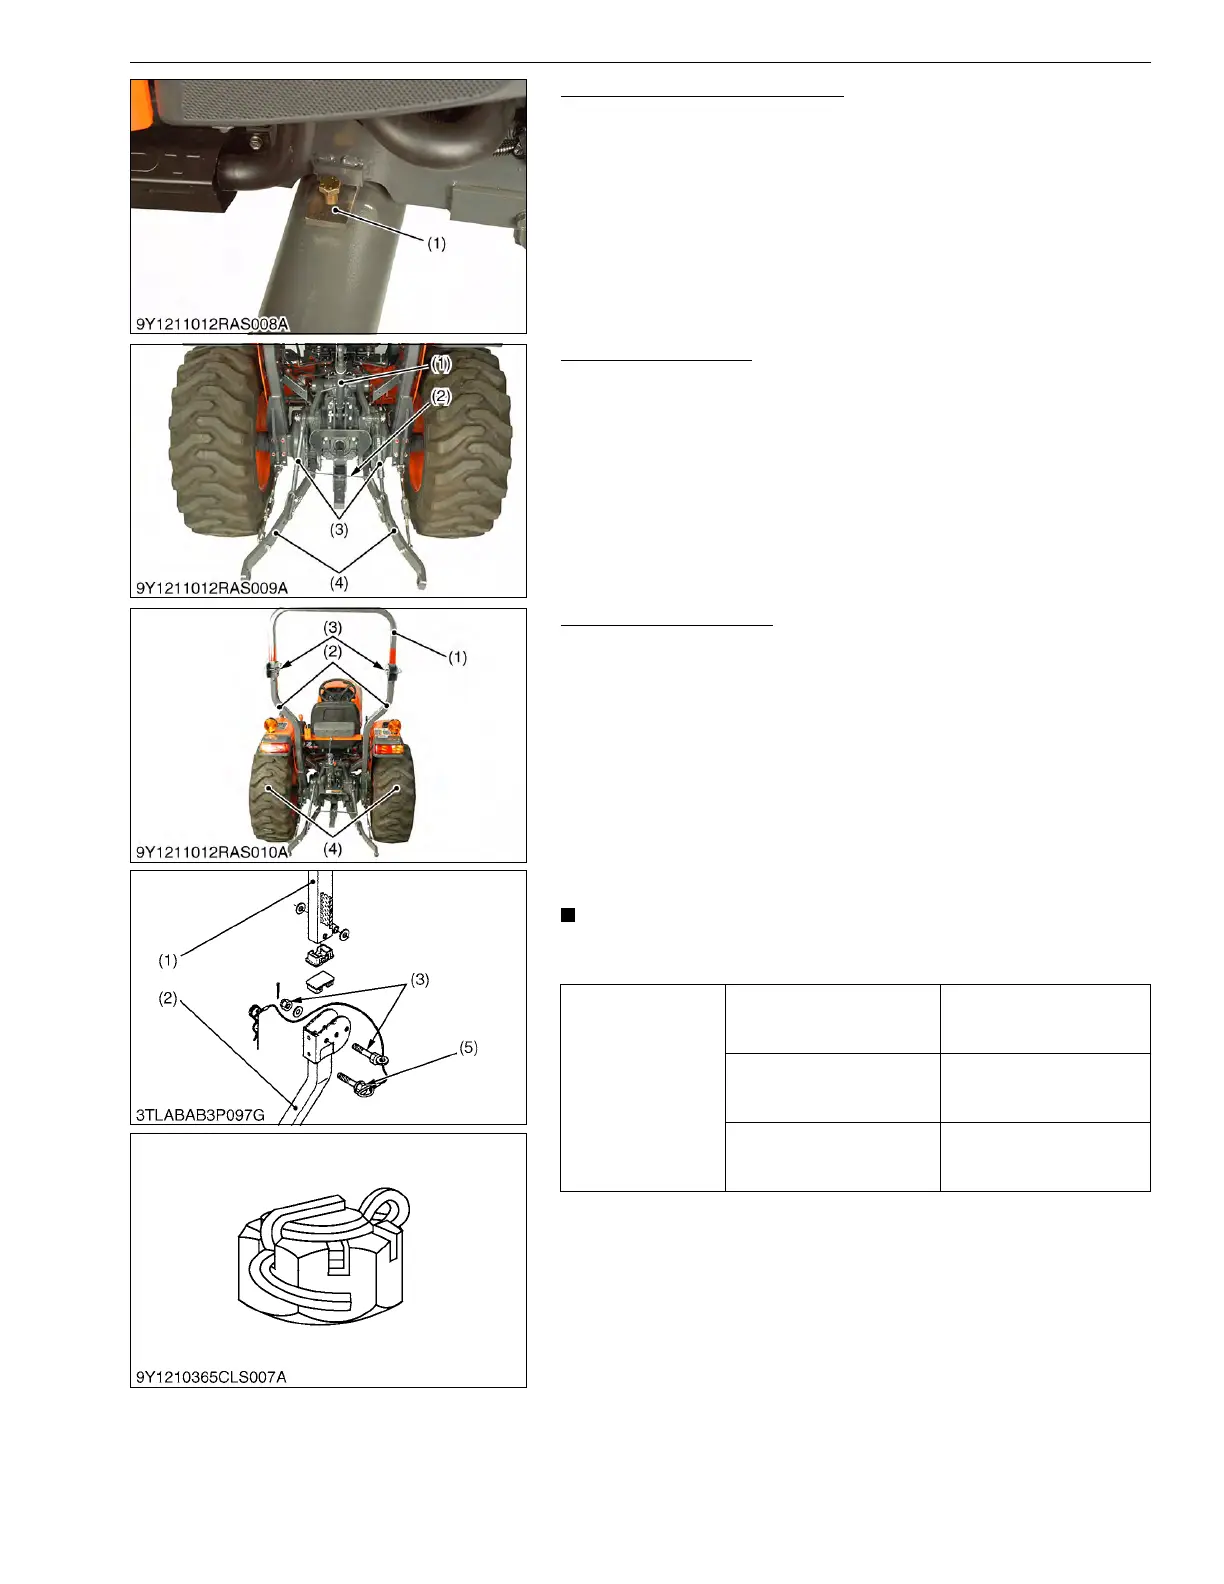
Front Axle Rocking Restrictor
1. Install the front axle rocking restrictor (1) (refer to "SPECIAL
TOOLS" (see page G-95.)) to the front axle bracket and chock
wheels.
9Y1211012RAS0006US0
Three Point Linkage
1. Remove top link (1).
2. Remove rubber spring (2), lift rod (3) and lower link (4).
9Y1211012RAS0007US0
ROPS and Rear Wheel
1. Place the disassembling stand under the transmission case.
2. Remove the ROPS upper frame (1).
3. Remove the ROPS lower frame (2).
4. Loosen and remove the rear wheel mounting bolts and nuts.
5. Remove the rear wheel (4).
(When reassembling)
• After tighten the ROPS lower frame mounting bolt and nut,
install the cotter pin as shown in the figure.
• Tighten the ROPS upper frame mounting bolts and nuts so that
the ROPS upper frame (1) does not fall down when the ROPS
upper frame (1) is set at horizontal.
• Do not firmly tighten all upper frame mounting bolts until
most components are attached.
9Y1211012RAS0008US0
(1) Front Axle Rocking Restrictor
(1) Top Link
(2) Rubber Spring
(3) Lift Rod
(4) Lower Link
Tightening torque
Rear wheel mounting bolt
and nut
197 to 225 N·m
20.0 to 23.0 kgf·m
145 to 166 lbf·ft
ROPS lower frame
mounting bolt
167 to 196 N·m
17.0 to 20.0 kgf·m
123 to 144 lbf·ft
ROPS fulcrum bolt and nut
118 to 137 N·m
12.0 to 14.0 kgf·m
86.8 to 101 lbf·ft
(1) ROPS Upper Frame
(2) ROPS Lower Frame
(3) ROPS Fulcrum Bolt and Nut
(4) Rear Wheel
(5) Lock Bolt
 Loading...