Installing and Configuring Novell Client 235
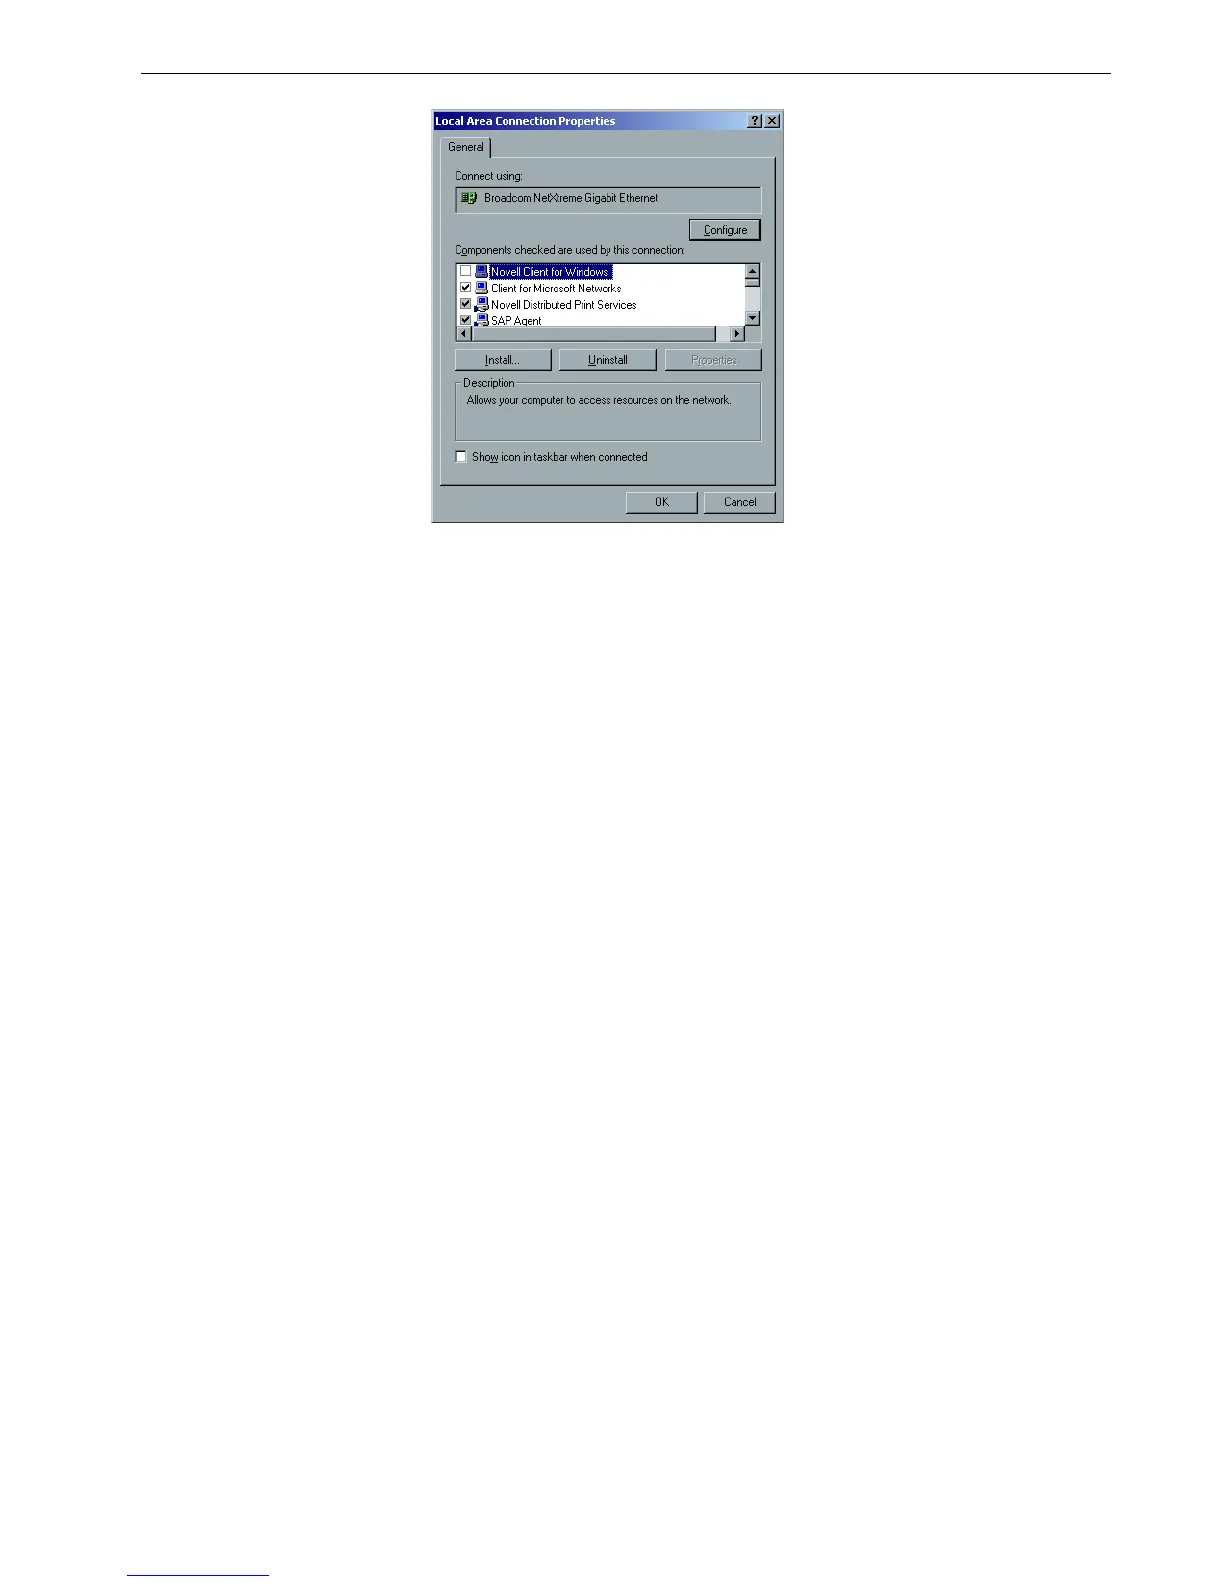
5. Make sure the Novell Client for Windows check box is selected, and then click
the Uninstall button.
6. Click Ye s twice.
The Spire CX260 restarts.
Backing Up the CX260 Last Image Configuration
See Backing Up the CX260 Last Image Configuration on page 216.
Performing a Test Print
1. From the File menu select Import Job.
2. Locate the ATF_A3.ps file at:
D:\Sample_Files\Color Files\ATF Europe (A4_A3)\ATF_A3.ps,
or locate the ATF_tab.ps file at:
D:\Sample_Files\Color Files\ATF US (Letter_Tabloid)\ATF_Tab.ps.
3. Double-click the file to add it to the list for importing.
4. In the Published Printer list, select ProcessPrint.
5. Click Import.
The file is processed, printed, and sent to the Storage window.
Note: To import a file and perform a test print on the CX260, you must be
connected to the remote server via the Remote Desktop Connection. See
Working Remotely on page 24.
Note: If the job is not printed or is waiting in the Print queue, check that
the finishing device is set properly in the Job Parameters window,
Finisher
tab.