MOTIF XS6/MOTIF XS7/MOTIF XS8
26
• End block assembly L
(拍子木LAssy)
<Bottom view>
PNB-RB
[E80A]
[E80C]
[E80C]
[E80C]
[E80A]
[E80D]
Wheel assembly
(ホイールAssy)
End block L shield plate
(拍子木Lシールド)
[E80B]
Touch volume angle
(リボンアングル)
<Bottom view>
Side panel R
(サイドパネルR)
Side panel L
(サイドパネルL)
[40F] [100] [100]
(タッチボリューム)
Touch volume
(タッチボリューム)
Touch volume
(拍子木 L)
(ピン穴)
(ピン穴)
End block L
(位置決めピン D)
Positioning pin D
Pin hole
Pin hole
(リボンアングル)
Touch volume angle
(リボンアングル)
Touch volume angle
* This fi gure shows the MOTIF XS6.(この図は MOTIFXS6 です。)
14-5
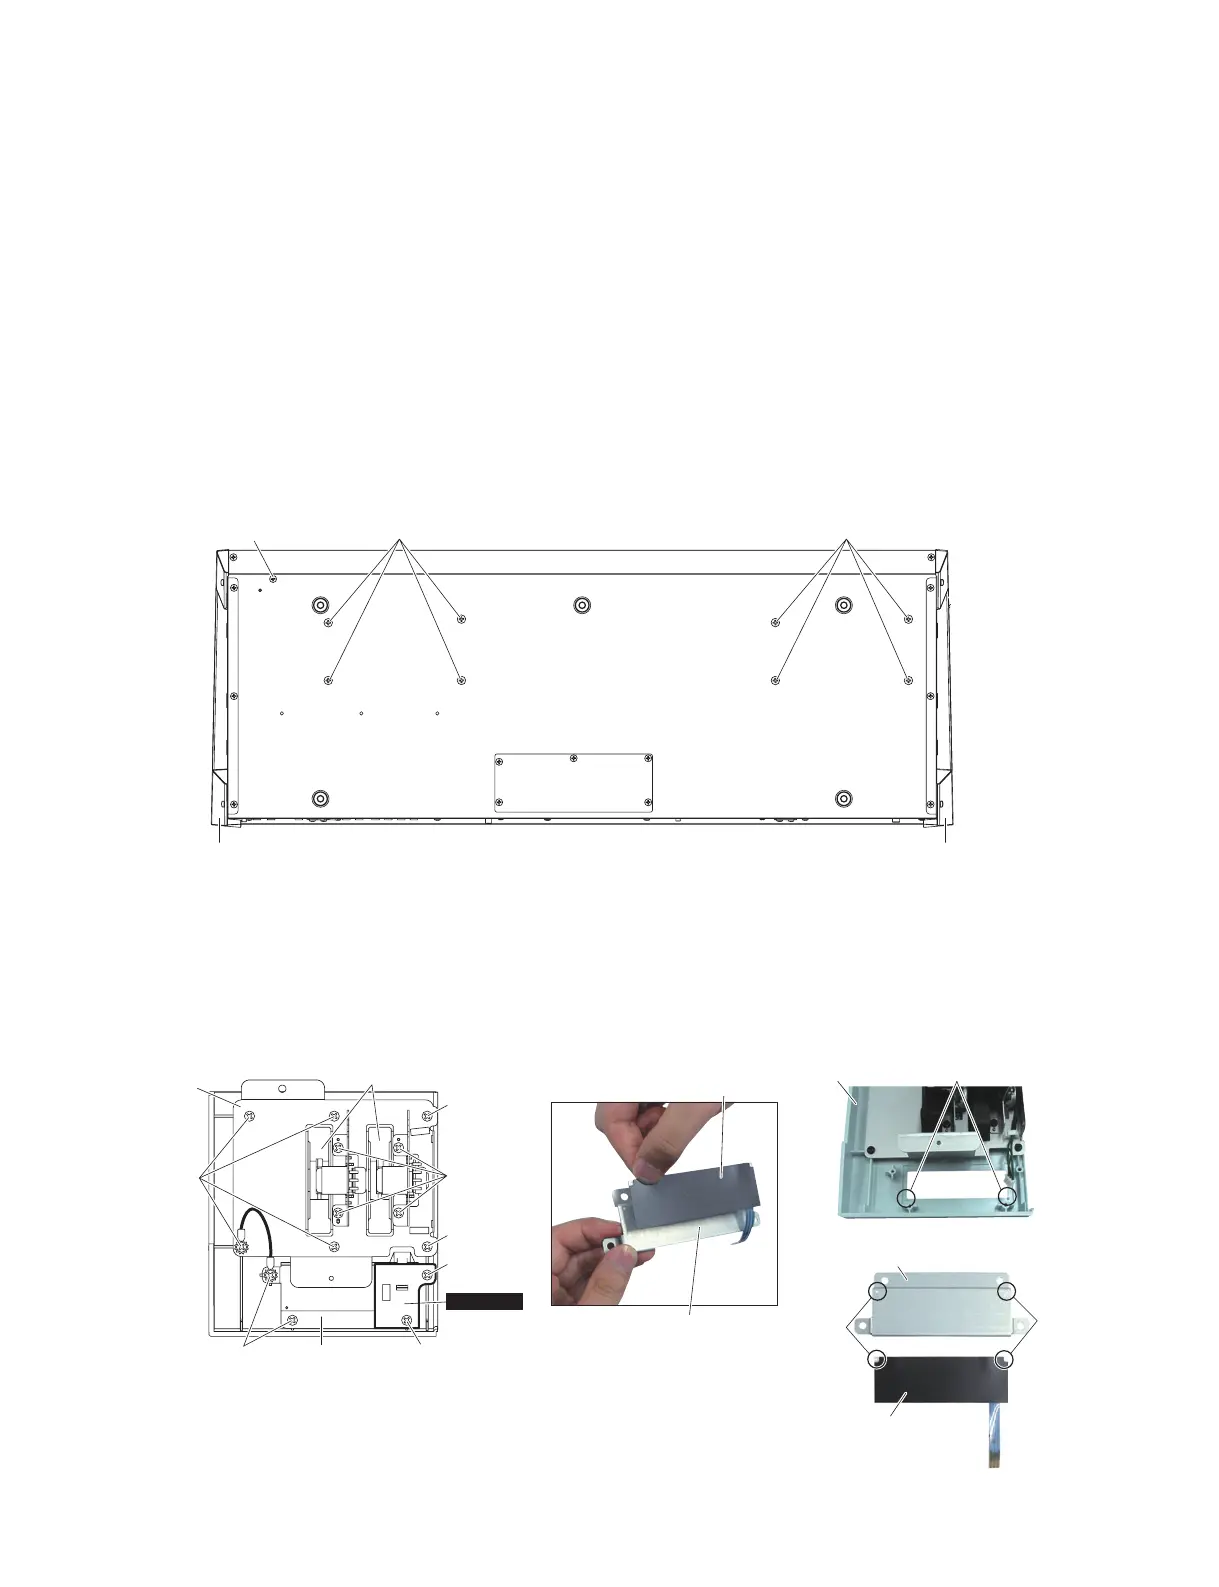
Remove the two (2) screws marked [E80D]. The
touch volume angle can then be removed with the
touch volume attached from the end block L. (Fig. 13)
14-6 Separate the touch volume angle from the touch
volume. (Photo 6)
* When installing touch volume, fi t the pin holes
of the touch volume and the pin holes of the
touch volume angle to the positioning pins D
fi rst, and then tighten the screws. (Photo 6)
14-5 [E80D] のネジ 2 本を外して、拍子木 L からリボ
ンアングルをタッチボリュームがついた状態で外
します。(図 13)
14-6 タッチボリュームとリボンアングルを分離しま
す。(写真 6)
※ タッチボリュームを取り付けるときは、拍子木 L
の位置決めピン D にタッチボリュームのピン穴を
合わせて置き、同じく位置決めピン D にリボンア
ングルのピン穴を合わせて置いてからネジを締め
てください。(写真 6)
Fig.12( 図 12)
[40F]:BindHeadTappingScrew-S(S タイト+ BIND)3.0X6MFZN2B3(WE877800)
[100]:BindHeadTappingScrew-B(B タイト+ BIND)4.0X8MFZN2B3(WE962000)
Fig.13( 図 13) Photo6( 写真 6)
[E80A],[E80B],[E80C],[E80D]:
BindHeadTappingScrew-B(B タイト+ BIND)
3.0X8MFZN2W3(WE774300)

 Loading...


