5 First Operating Steps | 5.7 Working with Specific Specimen Types ZEISS
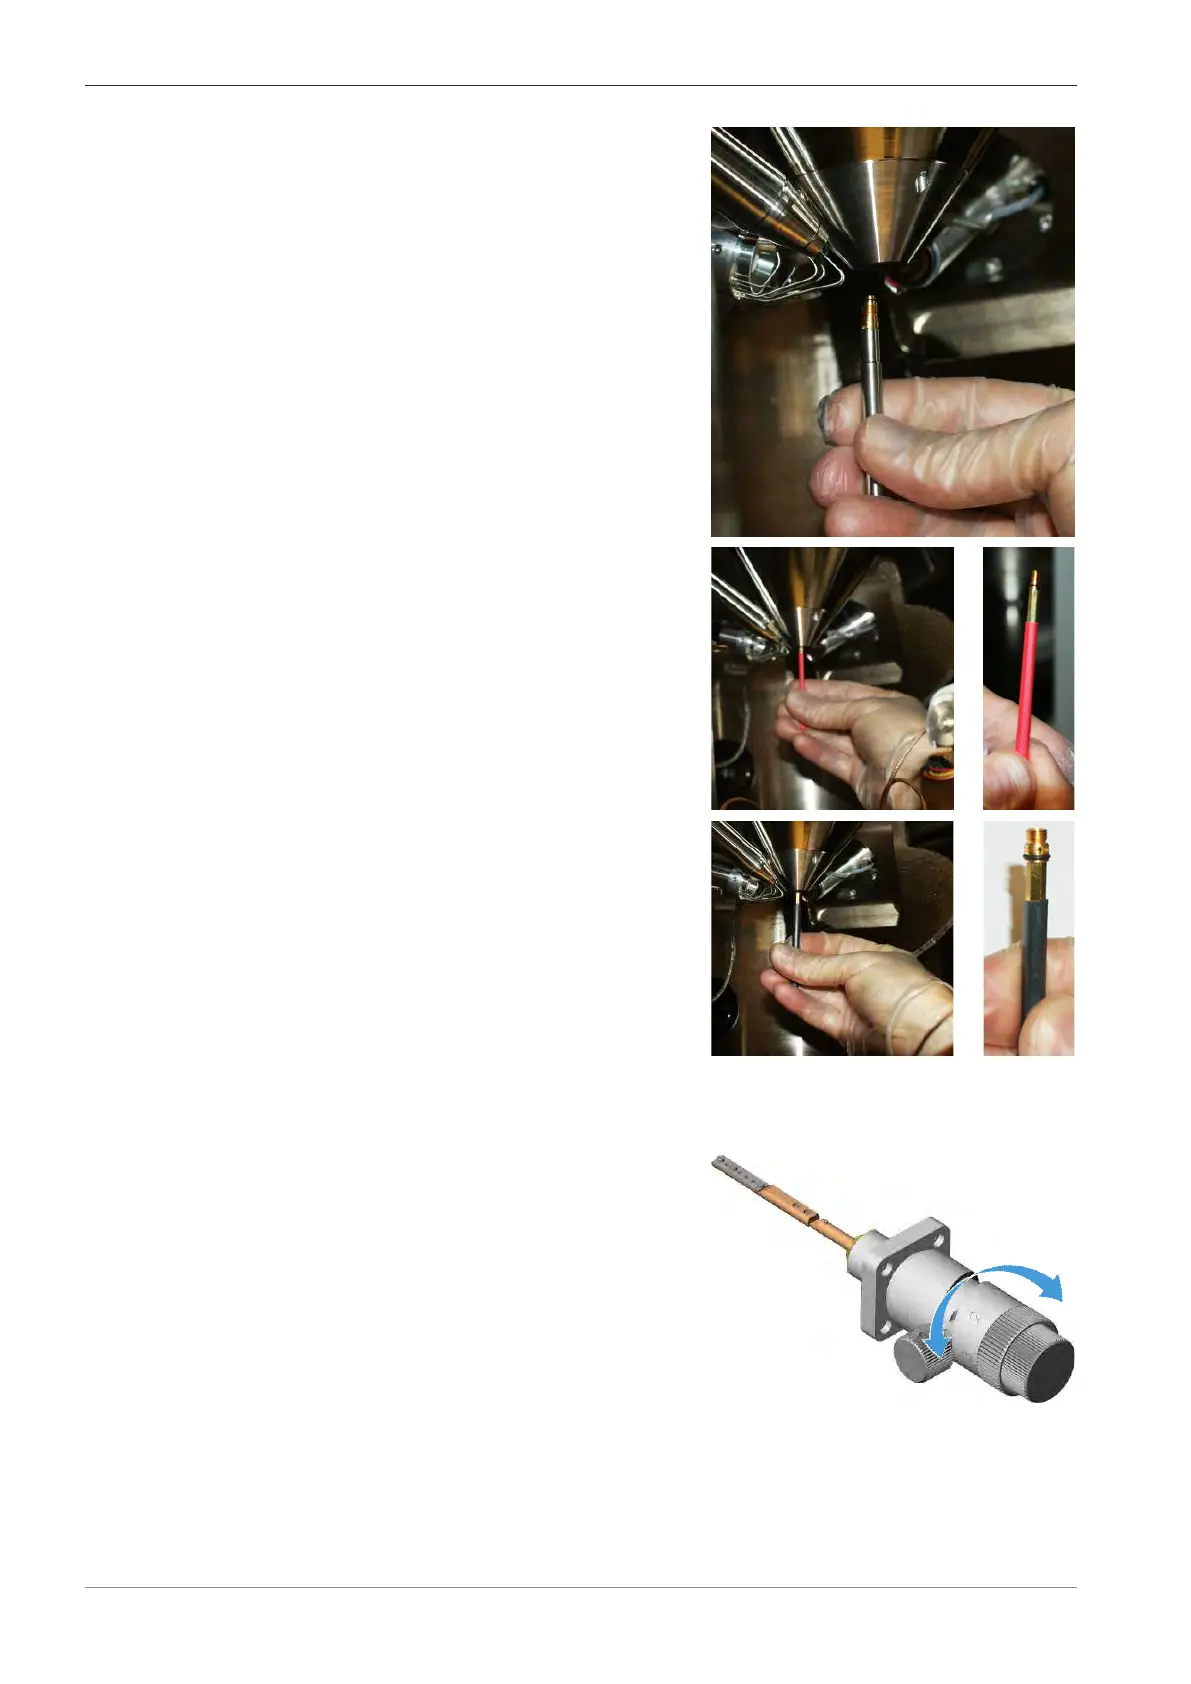
5. If another pressure-limiting aperture is fitted,
remove the aperture with the aperture removal
tool.
6. Use the red upper aperture tool to install the EP
aperture.
INFO: This should be finger-tight only.
7. Use the black lower aperture tool to insert the
beamsleeve aperture.
INFO: Screw in until the O-ring is completely
inserted (cannot be seen) and the beamsleeve
aperture hits a hard stop. Do not over tighten.
The O-ring will give some resistance which is
normal.
8. In the SEM Controls panel, select the Apertures tab.
9. Click Select Aperture.
10. Select EP Aperture and select the appropriate beamsleeve aperture.
11. Turn the knob of the mid-column aperture
changer, to select the 750μm aperture (posi-
tion 3).
à In the Apertures tab, the 100μm EP aperture is automatically selected.
100 Instruction Manual ZEISS EVO | en-US | Rev. 10 | 354706-0780-006