293D SYSTEMS, INC.
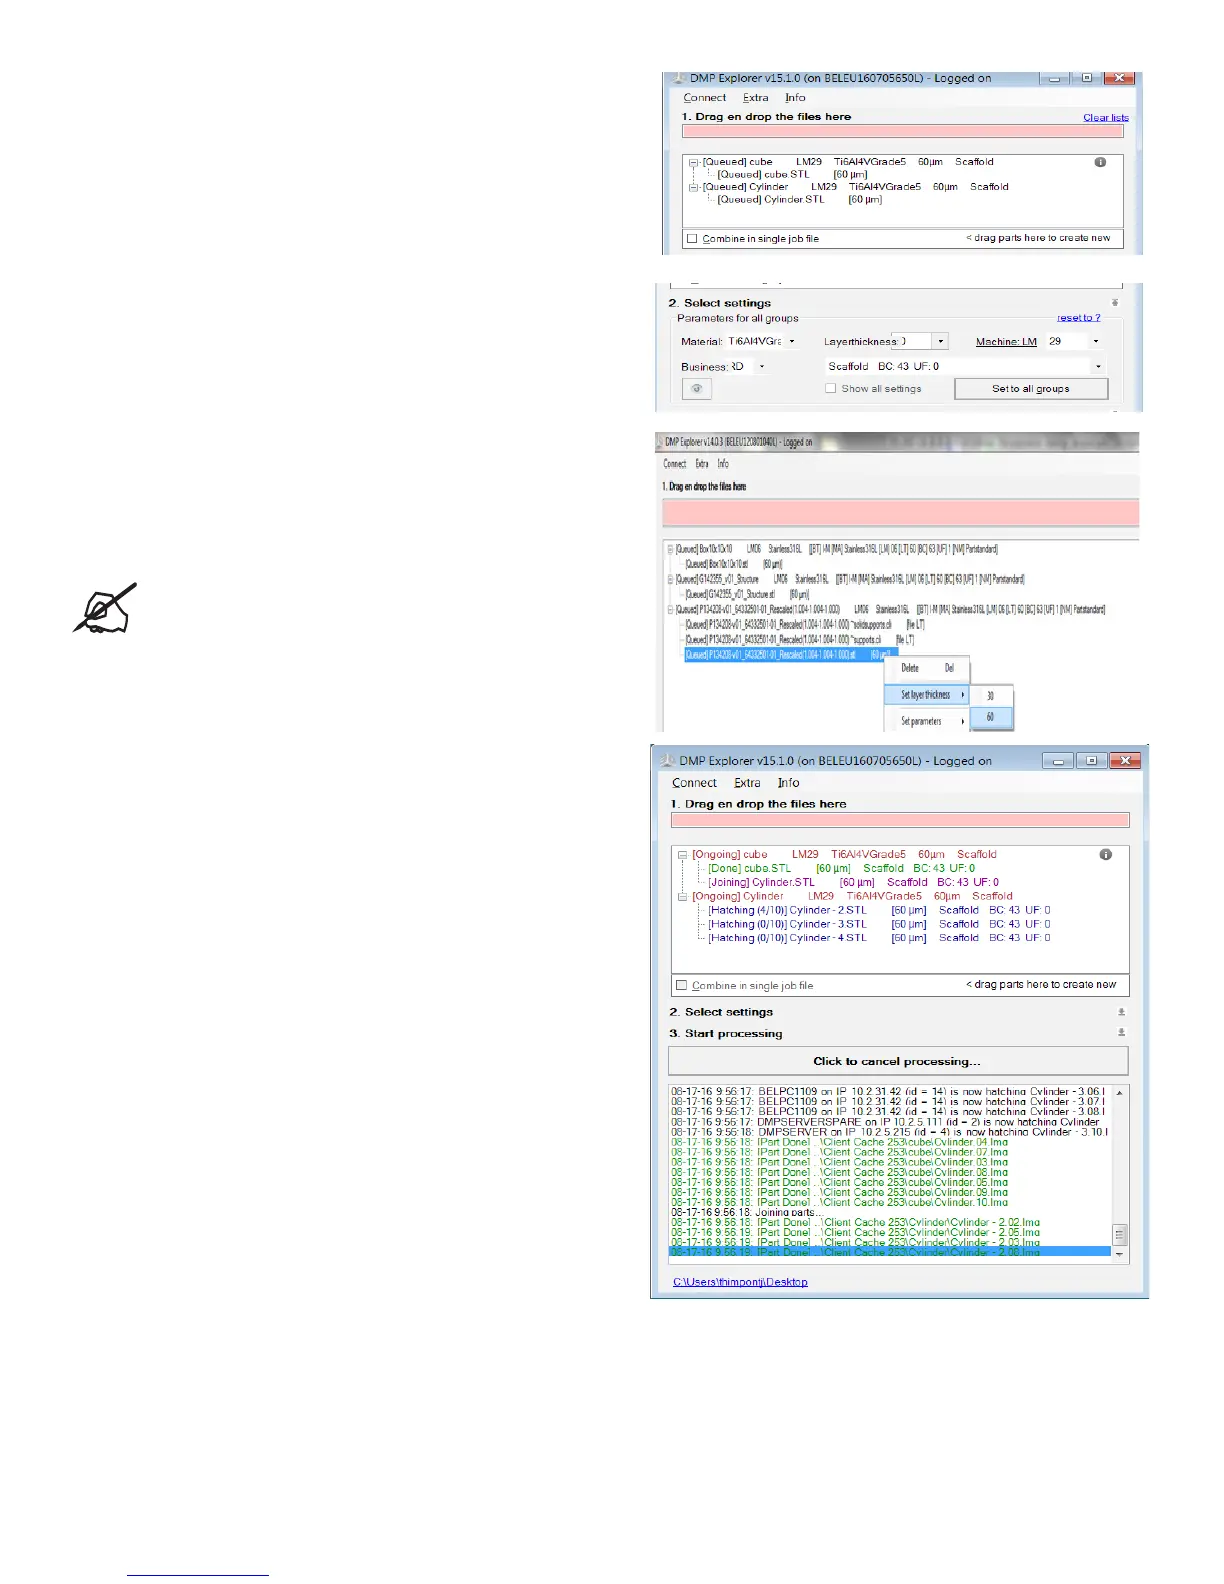
File processing is performed in 3 steps
1. Input le
Drag and drop .stl and .cli les in the red eld. Files will be grouped
and non-process
able les will be ltered out automatically. Groups can still be
changed by dragging les and renamed by double clicking and
writing the new name. Parts or groups can be removed again by
selecting the line and pressing the delete key.
2. Select settings
The settings for all the groups can be changed in this section.
First ll in all the applicable elds and then press “Set to all
groups” to change the settings for all groups.
Layer parameters and layer thickness of each part individually
can be changed by right clicking the line in the input le eld and
selecting “Set parameters” or “Set layer thickness” accordingly.
NOTE: Be carefull when changing parameters for
each part individually as all proles (even if they are
not possible) will be shown. In the general parameter
selection only the possible proles will be shown.
3. Start processing
When the start button is pressed the processing starts. The
progression will be visible in the input le eld.’
The eld below the start button will show the conversion log,
errors that come up while processing will also be shown here.
When nished the output will be placed on the location of the
original .stl le. You can also nd a link to this location on the
bottom left corner of the screen.