Chapter 7 - Optional Equipment Installation
102 Adept Cobra s600/s800 Robot User’s Guide, Rev H
2. Use a 4 mm Allen wrench to install three supplied M5 x 10 screws to secure the
plate. Tighten the screws to a torque of 4.5 N•m (40 in-lb). Repeat the process for
the second plate. Note that the plates can be installed in a number of different
positions, depending on how much you need to limit the range of Joint 2.
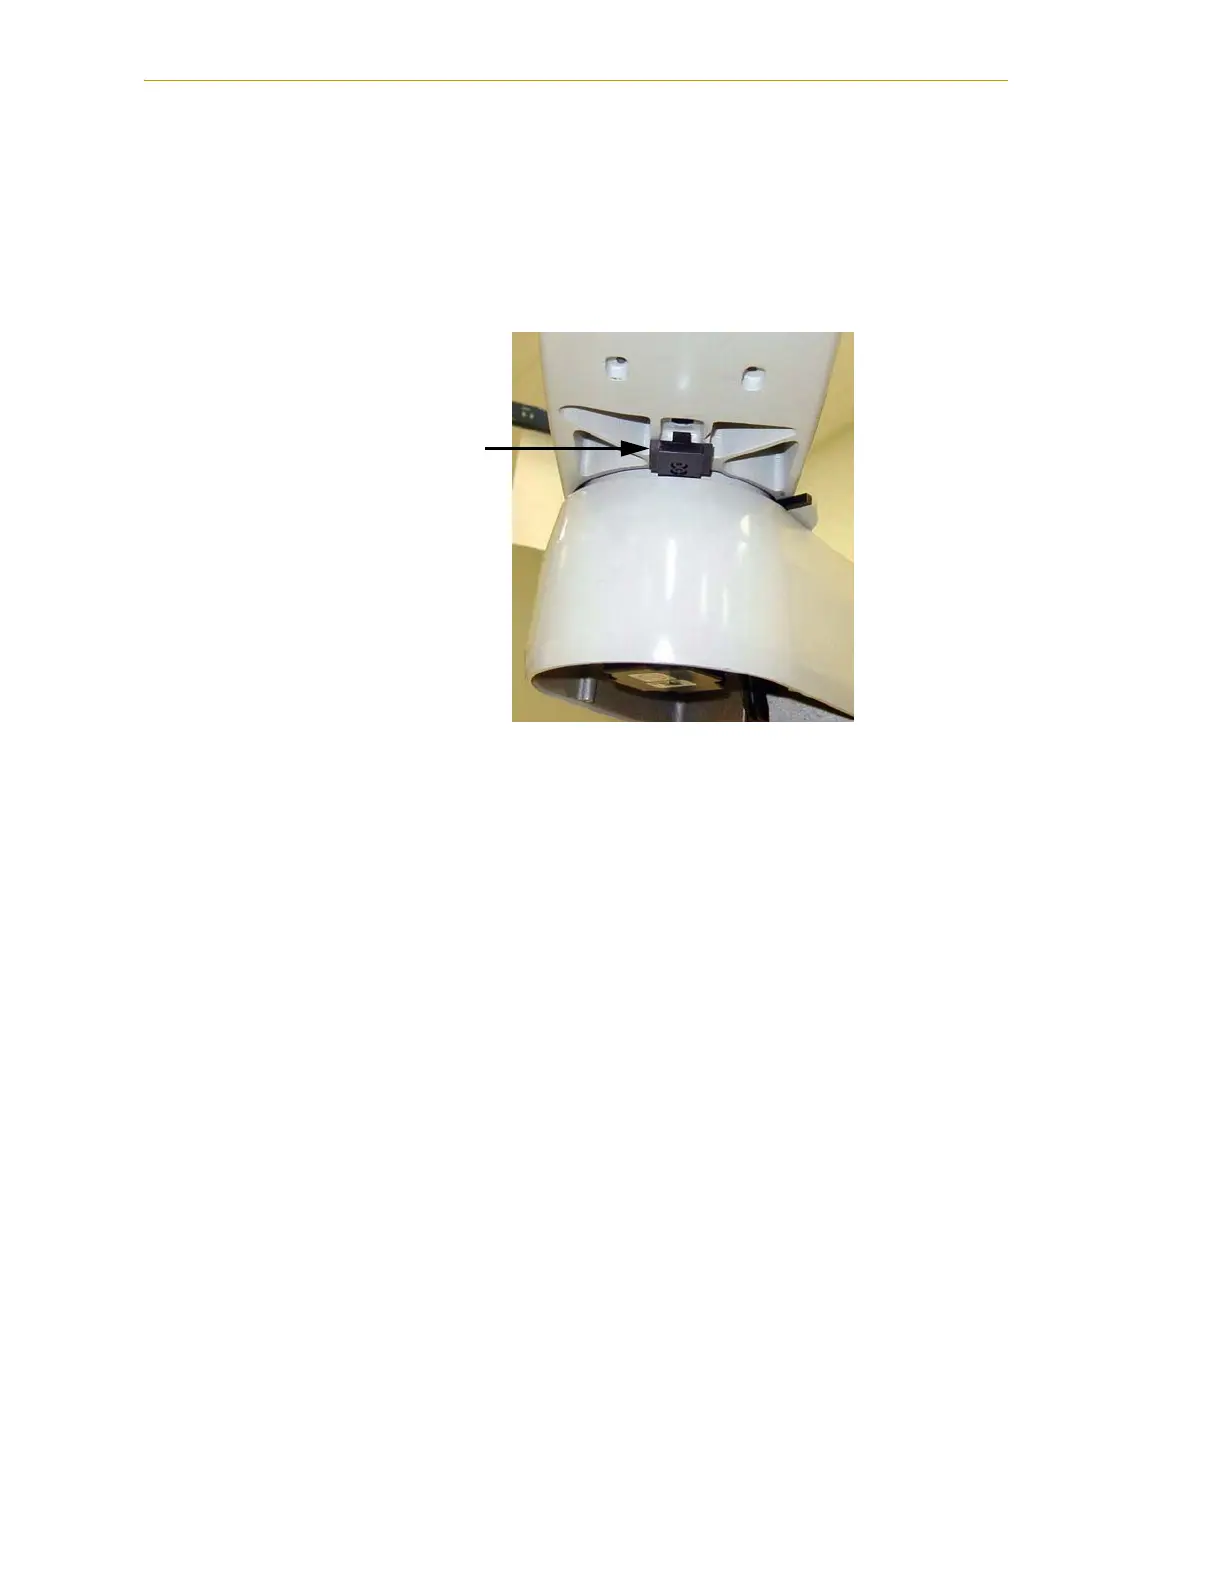
3. Slide the fixed hardstop device into the slot on the underside of the outer link. See
Figure 7-23 on page 102.
Figure 7-23. Fixed Hardstop Device for Joint 2
4. Use a 3 mm Allen wrench to install two supplied M4 x 10 screws to secure the
hardstop device. Tighten the screws to a torque of 2.5 N•m (22 in-lb).
Modifying Joint Limit Softstop Locations for Joint 2
After installing the adjustable hardstops, you must modify the softstop locations using the
SPEC program.
1. Load and run the SPEC.V2 program. The main screen appears as shown in Figure
7-15 on page 98.
2. Select option 4 => Edit robot specifications.
3. In the next menu, select option 3 => Edit joint motion specs. See Figure 7-16 on
page 98.
4. In the next menu, select option 1 => Change joint number, and enter 2. Verify this
at the top of the screen as shown in Figure 7-24.
Joint 2 Fixed Hardstop
Device installed on
underside of Outer Link.
 Loading...