50
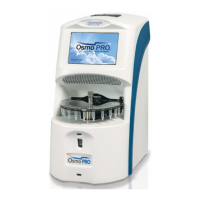
The OsmoPRO
®
Micro-Osmometer Service Manual
Sample Probe & Cooling Assembly Engagement
• Select the Engage tab and press START.
• Place an empty sample tube into the turntable in position eleven.
• The sample probe & cooling assembly partially engages. Place the sample tube Height
Positioning Fixture (P/N 112170FX) between the underside of the stripper bracket and the top
surface of the sample tube.
NOTE: THE ‘U’ CUTOUT IN THE FIXTURE SPANS THE BODY OF THE SAMPLE
PROBE.
• Make certain BLOCK MTR is selected.
• Raise the cooling assembly using the UP arrow until the sample tube height positioning
fixture is sandwiched between the underside of the stripper bracket and top surface of the
sample tube. DO NOT select LEARN at this time.
NOTE: THE FIXTURE SHOULD BE ABLE TO BE REMOVED WITH A MINIMAL
AMOUNT OF FORCE.
• Press MOTOR SELECT to change from BLOCK MTR to SAMPLE MTR.
• Remove the sample tube height positioning fixture, and, carefully, lower the sample probe until
there is a minimal amount of interference between the sample tube and the sample probe. This
can be determined by trying to lift the sample tube out of the cooling assembly using the sample
tube height positioning fixture, or its equivalent. If the sample tube can be lifted, there is no
interference, and the sample probe must be lowered. If the sample tube cannot be lifted, there is
an interference between the sample tube and the sample probe.
NOTE: IT IS VERY IMPORTANT TO KEEP THE INTERFERENCE BETWEEN THE SAM-
PLE PROBE AND THE SAMPLE TUBE TO A MINIMUM. EXCESSIVE INTERFERENCE
DAMAGES MECHANICAL COMPONENTS.
• Press LEARN. The sample probe & cooling assembly disengages, and the turntable rotates.
• Verify the engagement is correct by pressing ENGAGE and DISENGAGE. Carefully, observe
as the sample probe & cooling assembly engage, and make certain the sample tube’s height
position is correct using the sample tube height positioning fixture, if necessary. Also, verify
the sample tube is properly clamped. If adjustments need to be made, use the displayed icons to
adjust and then press LEARN.
• Press EXIT after obtaining the proper engagement position.
 Loading...
