www.advancedco.com
59
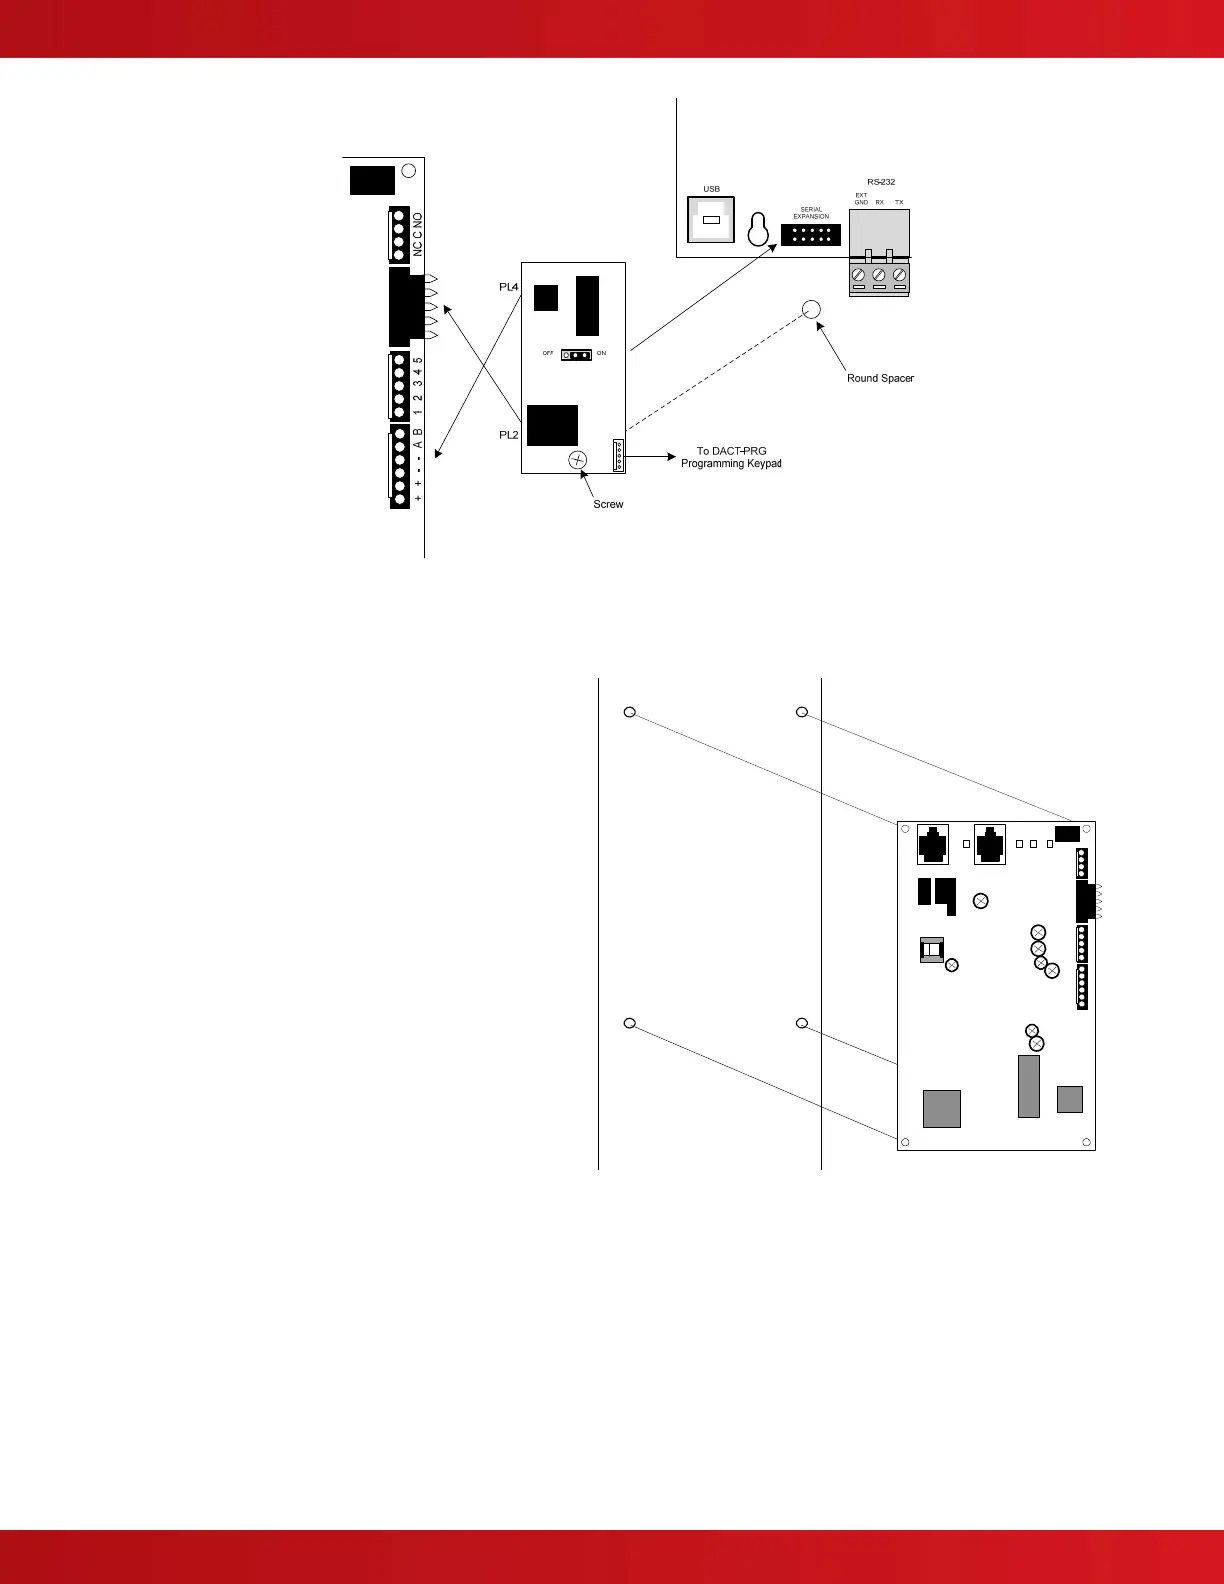
Plug the AX-SEB, Serial Expansion Board, into the
expansion socket and install/tighten the supplied
screw to the round spacer (see figure 32).
Plug the 6 pin ribbon cable coming from the AX-
SEB (PL4) into the RS-232/power input connection
on the D9068P. Plug the 5 pin ribbon cable coming
from the AX-SEB (PL2) into the DACT-PRG keypad
input connection on the D9068P, this connection
allows the DACT-PRG to be connected to the AX-
SEB board for D9068P programming (see figure 32)
The D9068P is mounted on the left sidewall of the
enclosure back box. On the upper left sidewall of
the back box are three (3) PC board push snap-on
standoffs [p] and one (1) screw standoff. Push the
D9068P onto the three (3) push snap-on standoffs
[p]. Utilizing the provided screw, secure the D9068P
to the screw standoff [s] (see figure 33).
Figure 32 - AX-SEB to D9068P Wiring
LINE 1
HEARTBEAT
LINE 2
SYS TROUBLE
+ + - - A B 1 2 3 4 5 NC C NO
D9068P
p
p
s
p
Figure 33 - D9068P Mounting