4-14
Printing, Plotting, and Saving Measurement Results
Defining a Plot Function
Selecting Pen Numbers and Colors
• Press and select the plot element where you want to change the pen number. For example,
press and then modify the pen number. The pen number selects the color if you are
plotting to an HPGL/2 compatible color printer.
Press after each modification.
NOTE The following color assignments are valid for HPGL/2 compatible color printers only. When
using word processor or graphics presentation programs, different colors may be assigned to
the pen numbers.
NOTE You can set all the pen numbers to black for a plot in black and white.
You must define the pen numbers separately for each measurement channel (channel 1/3
and channel 2/4).
Selecting Line Types
• Press and select each plot element line type that you want to modify.
— Select to modify the line type for the data trace. Then enter the new line type
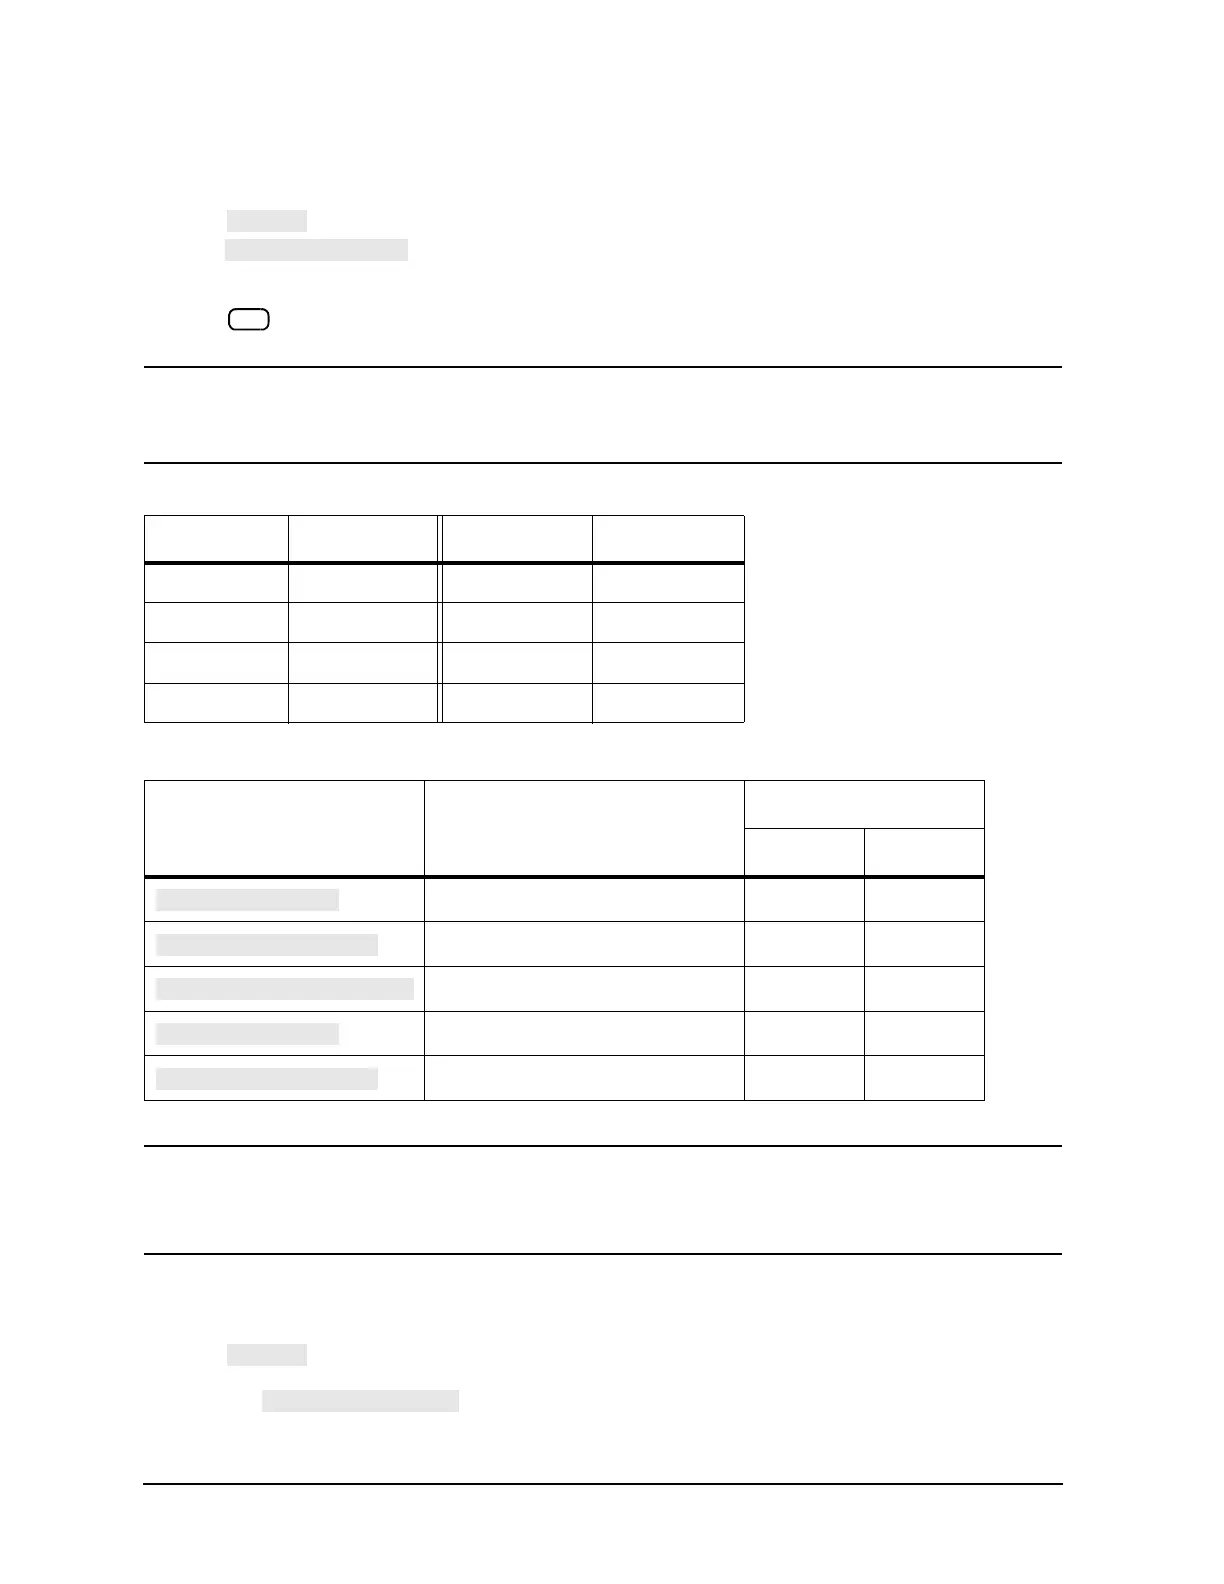
Tab le 4-2 Default Pen Numbers and Corresponding Colors
Pen Number Color Pen Number Color
0 white 4 yellow
1 cyan 5 green
2 magenta 6 red
3 blue 7 black
Tab le 4-3 Default Pen Numbers for Plot Elements
Corresponding Key Plot Element Pen Numbers
Channel 1 Channel 2
Measurement Data Trace 2 3
Displayed Memory Trace 5 6
Graticule and Reference Line 1 1
Displayed Text 7 7
Displayed Markers and Values 7 7

 Loading...


