Figures
10
Figure 50: Bracket Holes ....................................................................................................................................................112
Figure 51: RKMT-J14 Bracket Holes ..................................................................................................................................113
Figure 52: Switch Orientations with the Front Panel Facing the Front of the Equipment Rack ..........................................113
Figure 53: Switch Orientations with the Rear Panel Facing the Front of the Equipment Rack...........................................114
Figure 54: Attaching the Handles to the RKMT-J14 Brackets ............................................................................................115
Figure 55: Attaching the RKMT-J14 Brackets to the Switch ...............................................................................................115
Figure 56: Installing the Switch in an Equipment Rack.......................................................................................................116
Figure 57: Installing the RKMT-J15 Bracket in the Equipment Rack ..................................................................................118
Figure 58: Loosening the Two Thumbscrews on the Front of the RKMT-J15 Bracket .......................................................118
Figure 59: Sliding Out the Bracket of the RKMT-J15..........................................................................................................119
Figure 60: Removing the Plastic Feet from the Bottom Panel of the Switch ......................................................................119
Figure 61: Placing the x530L-10GHXm Switch in the RKMT-J15 Bracket .........................................................................120
Figure 62: Securing the x530L-10GHXm Switch to the RKMT-J15 Bracket.......................................................................120
Figure 63: Sliding in the Bracket.........................................................................................................................................121
Figure 64: Tightening the Two Thumbscrews on the RKMT-J15 bracket...........................................................................121
Figure 65: Bracket Holes on the Switch..............................................................................................................................123
Figure 66: Switch Orientations in an Equipment Rack........................................................................................................124
Figure 67: Example of Attaching the Brackets to the Switch ..............................................................................................125
Figure 68: Installing the Switch in an Equipment Rack.......................................................................................................126
Figure 69: Positioning the x530L-28GTX or x530L-52GTX Switch on the Wall..................................................................128
Figure 70: Positioning the x530L-10GHXm, x530L-18GHXm, x530L-28GPX or x530L-52GPX Switch on the Wall..........129
Figure 71: Switch on the Wall with a Plywood Base ...........................................................................................................133
Figure 72: Installing the Plywood Base to the Wall.............................................................................................................134
Figure 73: Installing Two Brackets on the x530L-28GTX or x530L-52GTX Switch ............................................................136
Figure 74: Installing Four Brackets on the x530L-10GHXm, x530L-18GHXm, x530L-28GPX and x530L-52GPX
Switches .......................................................................................................................
....................................137
Figure 75: Securing the x530L-28GTX or x530L-52GTX Switch to the Plywood Base ......................................................138
Figure 76: Securing the x530L-10GHXm, x530L-18GHXm, x530L-28GPX or x530L-52GPX Switch to the
Plywood Base ...................................................................................................................................................139
Figure 77: Marking the Locations of the Bracket Holes on a Concrete Wall.......................................................................141
Figure 78: Installing the Switch on a Concrete Wall ...........................................................................................................142
Figure 79: Installing the Retaining Clip ...............................................................................................................................145
Figure 80: Plugging in the AC Power Cord to the Switch ...................................................................................................147
Figure 81: Lowering the Power Cord Retaining Clip...........................................................................................................147
Figure 82: Plugging in the AC Power Cord to an AC Source..............................................................................................148
Figure 83: Management Cable Included with Switch..........................................................................................................152
Figure 84: VT-Kit3 Management Cable ..............................................................................................................................152
Figure 85: Management Workstation, VT-Kit3 Management Cable, and Switch................................................................153
Figure 86: Connecting the Management Cable to the Console Port ..................................................................................153
Figure 87: Switch Initialization Messages...........................................................................................................................160
Figure 88: Switch Initialization Messages (Continued) .......................................................................................................161
Figure 89: Switch Initialization Messages (Continued) .......................................................................................................162
Figure 90: Powering Off the Switch ....................................................................................................................................186
Figure 91: Installing an SFP Transceiver............................................................................................................................190
Figure 92: Positioning the SFP or SFP+ Handle in the Upright Position ............................................................................191
Figure 93: Connecting a Fiber Optic Cable to an SFP or SFP+ Transceiver .....................................................................191
Figure 94: Installing SP10TW Cables .................................................................................................................................193
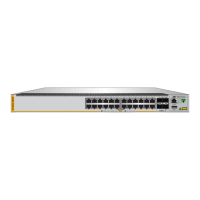
Figure 95: x530L-10GHXm.................................................................................................................................................200
Figure 96: x530L-18GHXm.................................................................................................................................................201
Figure 97: x530L-28GTX ....................................................................................................................................................201
Figure 98: x530L-28GPX ....................................................................................................................................................201
Figure 99: x530L-52GTX ....................................................................................................................................................202
Figure 100: x530L-52GPX ..................................................................................................................................................202
Figure 101: RJ-45 Socket Pin Layout (Front View).............................................................................................................208
 Loading...