EasyManua.ls Logo

Amada HFA-400 User Manual

Default Icon
174 pages
To Next Page IconTo Next Page
Page #1 background imageLoading...
Page #1 background image
HFA250/400T/TW US-
E01
-200409
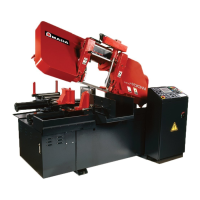
HORIZONTAL BANDSAW
HFA-250/250W/400/400W
(HFA-252T/252TW/407T/407TW)
OPERATOR'S MANUAL

Table of Contents

Questions and Answers:

Amada HFA-400 Specifications

General IconGeneral
BrandAmada
ModelHFA-400
CategorySaw
LanguageEnglish

Summary

Safety Rules & Cutting Precautions

Safety Rules

Important safety rules to prevent injuries and accidents during operation.

DANGER and WARNING plates

Explanation and placement of danger and warning plates on the machine.

Cutting Precautions

Guidelines for safe and efficient cutting, including saw blade selection.

Part I Description

Specifications

Technical specifications for the HFA-250/250W and HFA-400/400W machines.

Part II Installation

Supplying Electric Power

Guidance on safely connecting and supplying electric power to the machine.

Connecting Power Cable

Step-by-step instructions for connecting the power cable.

Checking Electrical Connections

Procedure to verify that all electrical connections have been made correctly.

Part III Controls

Control Panel

Detailed description of the control panel layout and its components.

Part IV Operation

Selecting Saw Blade

Guidance on choosing the correct saw blade for the material.

Installing Saw Blade

Procedure for installing a new saw blade onto the machine.

Loading and Positioning Work

Instructions for loading and properly positioning workpieces for cutting.

Positioning Work

Detailed steps for positioning the workpiece accurately for cuts.

Semiautomatic Positioning Function

Explanation of the function that automatically positions workpieces.

Semiautomatic Positioning

Step-by-step guide to performing semiautomatic workpiece positioning.

Stack Cutting

Instructions for stacking and cutting multiple workpieces simultaneously.

Handling Cutting Data

Procedures for entering, storing, checking, changing, and canceling cutting data.

Entering and Storing Cutting Data

How to input and save cutting parameters for automatic operation.

Head-End Positioning Function (Optional)

Details on the optional function for automatic workpiece head-end positioning.

Setting Cutoff Length

How to set the desired cutoff length using the head-end positioning function.

Head-End Positioning Operation

Step-by-step guide for performing the head-end positioning of workpieces.

Operation

General guidance on operating the machine.

Manual Operation

Detailed instructions for operating the machine in manual mode.

Starting Cutting

Procedure for initiating a cut in manual mode.

Automatic Operation

Instructions for executing cutting data sequentially in automatic mode.

Before Starting Automatic Operation

Essential checks before initiating automatic cutting sequences.

Stopping Automatic Operation After Detection of Excessive Runout

Machine stop procedure upon detecting excessive saw blade runout.

Interrupt Station Function

Functionality for inserting new cutting data during automatic operation.

Inserting Interrupt Station in Current Station

Procedure to insert new cutting data during an active cutting station.

Inserting Interrupt Station Between Stations to be Executed

Procedure to insert new cutting data between existing automatic operation stations.

Part V Troubleshooting

Operating Troubles

Common issues encountered during operation and their solutions.

Checkpoints for Improving Cutting Accuracy

Factors to check to enhance the precision of cutting operations.

Alarm Code List

List of alarm codes, their causes, and remedies.

Part VI Maintenance

Related product manuals