56 Rev. 2
Calibration
Capacitance-Based Level Calibration : Closed Dewar Calibration Procedure
communications option can be used to query the instrument for the
liquid level at regular time intervals during the calibration
procedure. If no remote monitoring or communication option is
installed, the level display must be manually plotted vs. time
during the procedure.
3. Refer to “Analog output signals” on page 32 to configure the
recorder output or current loop output.
4. Commence filling the dewar. While the sensor is cooling down,
there may be a slow drift in the displayed liquid level. However,
when the liquid actually touches the bottom of the sensor, contact
with the liquid surface may become apparent by virtue of more
random and frequent fluctuations in the displayed liquid level. The
liquid level trace will also start to show an increasing profile with
positive slope.
Once the indications of the contact between the sensor and liquid
become readily apparent, use the PERFORM MIN CAL procedure
below to reset the new minimum calibration point. This point is the
0% level of the sensor when the PERFORM MIN CAL procedure is
finished and saved becomes the 0% level.
Note
If the sensor is installed in the dewar with some small amount of
liquid already in contact with the sensor, then the final minimum
calibration point can be set before filling begins but after any
thermally induced fluctuations in the observed output have
diminished. However, note that the measured span of the liquid
level is reduced by the initial level of liquid in contact with the
sensor.
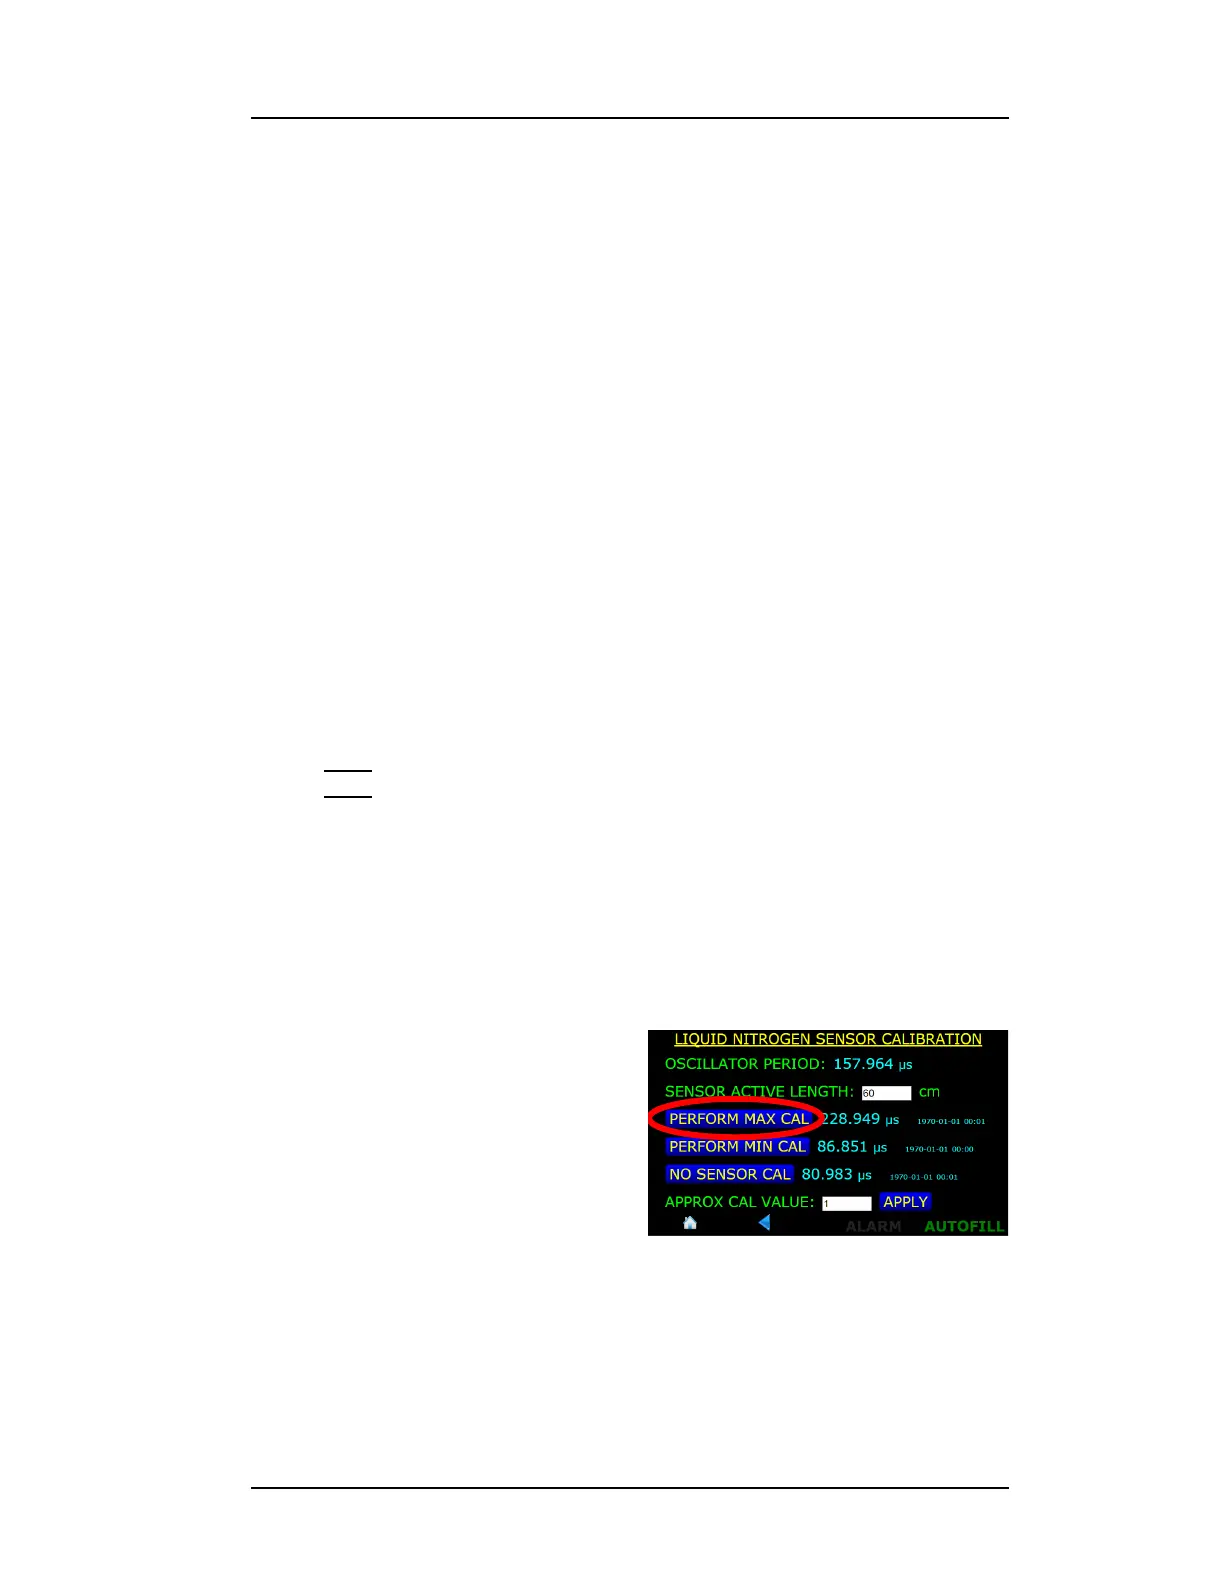
5. Perform the minimum level
calibration by invoking the
minimum calibration function
by pressing MENU >
SENSORS > CALIBRATE
NITROGEN > PERFORM MIN
CAL.
6. After several seconds of
displaying “CALIBRATING...”,
the instrument will complete
the calibration process. Press the SAVE button to save the new
calibration set point.
Figure 4-41. PERFORM MAX CAL.
Selection Button