4. Troubleshooting
Situation Solution
The activated lens file does not
correspond with the lens m ounted
on the projector.
Activate a lens file which does correspond w ith the mounted lens or mount an othe r lens
which corresponds with the lens file you want to activate.
Corrupt lens file. Delete the lens file and program correct lens type into comm unicator under
Advanced/lens parameters a nd recreate a new lens file. Tip: perform a “Lens Homing”
before creating a new lens file. Otherwise, if t he lens is removed the existing lens file
becomes useless. Setup all new lens files aw ay from the m aximu m limitation of the lens
zoom. It is poss ible that the lens file was originally created at the maximum or minimum
zoom capabilities of the lens zoom.
The final lens position lays very
close to the mechanical limits which
disable the motorized lens position.
Position the lens m anually, or reposition the projector so that the lens pos ition lies further
away from the mechanical limits, or try to use another lens which range is more s uitable.
Setup all new lens files away from the max imum limitation of the lens z oom. It is possible
that lens file was originally created at the ma ximum or minimum zoom capabilities of
the lens zoom. Program correct lens type into comm unicator un der Advanced/lens
parameters a nd recreate the lens files.
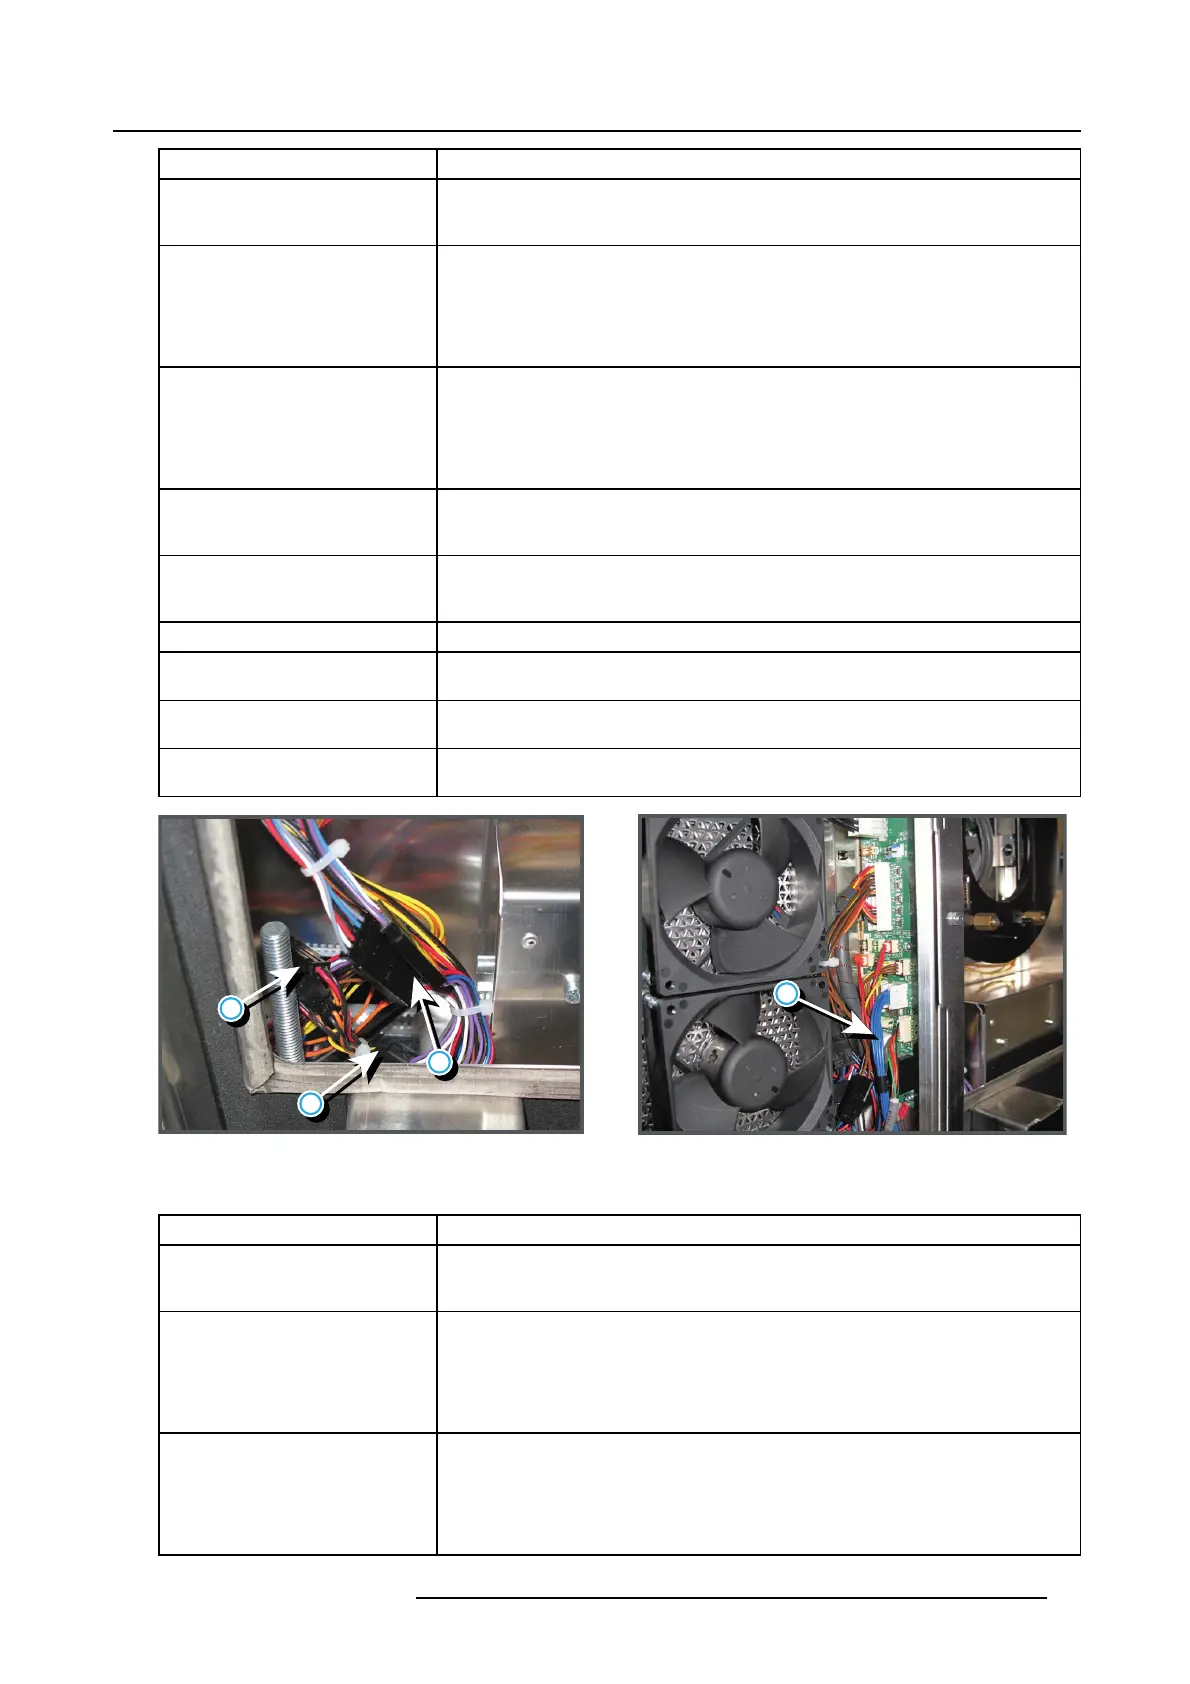
Disconnected wire units (reference
1 image 4-19) of the zoom motor of
the motorized lens.
Remove the front cover of the projector and c heck if all wire un its at t he left bottom of
the lens holder are connected.
Disconnected wire un it, of the lens
zoom/shift signals, from the Signal
Backplane.
Remove the front cover and front dust filter from the projector and check if t he wire unit
(reference 4 image 4- 19) is inse rted in the Signal Backplane (white plug behind blue
wires).
Malfunction Fan C ontrol bo ard. Replace the Fan Control board. See "Removing a board in the card cage", page 213.
Malfunction zoom motor o f the lens. Use the local keypad to zoom the image o n the screen. If unsuccessful, replac e the
motorized lens.
Malfunction Signal Backplane (bad
connection).
Replace the Signal Backplane. See "Replacement of th e s ignal back plane", page 231.
Malfunction SM PS board which
supplies p ower to the lens.
Replace the SMPS board. See "Replaceme nt of the Switched M ode Power Supply",
page 281.
1
4
2
3
Image 4-19
Lens connections
Code 5231: “lens focus position - requested target not reached” (Warning)
Situation Solution
The activated lens file does not
correspond with the lens m ounted
on the projector.
Activate a lens file which does correspond w ith the mounted lens or mount an othe r lens
which correspond with the lens file yo
u want to activate.
Corrupt lens file. Delete the lens file and program correct lens type into comm unicator under
Advanced/lens parameters a nd recreate a new lens file. Tip: perform a “Lens Homing”
before creating a new lens file. Oth
erwise, if the lens is rem oved the e xisting lens file
becomes useless. Setup all new lens files aw ay from the m aximu m limitation of the lens
zoom. It is poss ible that the lens file was originally created at the maximum or minimum
zoom capabilities of the lens zo
om.
The final lens position lays very
close to the mechanical limits which
disable the motorized lens position.
Position the lens manually, or re
position the projector so that the lens position lays further
away from the mechanical limits, or try to use another lens which range is more s uitable.
Setup all new lens files away from the max imum limitation of the lens z oom. It is possible
that lens file was originally c
reated at the ma ximum or minimum zoom capabilities of
the lens zoom. Program correct lens type into comm unicator un der Advanced/lens
parameters a nd recreate the lens files.
R5905043 DP2K-12C/11CX 19/02/2018 39
 Loading...


