Procedure
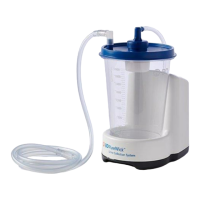
To prepare the waste container:
1. Verify that the flow cytometer is in standby mode.
Press the STANDBY button on the control panel if necessary.
2. Disconnect the orange waste tubing and the black alarm sensor line from the waste container.
Keep the lid on the waste container until you are ready to empty it.
3. Empty the waste container.
The waste container is heavy when full. When emptying it, use good body mechanics to prevent injury.
4. Add approximately 1L of bleach to the waste container and close it.
5. Reconnect the orange waste tubing and make sure it is not kinked.
6. Reconnect the black alarm sensor line.
Preparing the fluidics
Introduction
This topic describes how to prepare the fluidics system.
When to prime the fluidics
Sometimes, air bubbles and debris may become lodged in the flow cell. This is indicated by excessive noise in
the forward and side scatter parameters (FSC and SSC, respectively). In these cases, it is necessary to prime the
fluidics system. Priming introduces air to the flow cell. Following the procedures below minimize the need for
priming and make priming more effective when needed.
Procedure
Start up the fluidics:
1. Turn on the computer and instrument as described in Starting the cytometer and computer (page 24).
2. Install a tube with 3mL of 1.5% dilution of BD
®
Detergent Solution Concentrate on the SIP and put the
tube support arm underneath the tube.
Note: The BD
®
Detergent Solution Concentrate must be diluted before use. Mix one full 15mLbottle of
BD
®
Detergent Solution Concentrate into 985mL of DI water to make 1L total.
3. Press RUN and HIGH on the cytometer fluid control panel. Run for 10 minutes.
4. Remove the tube of detergent from the SIPand replace with a tube containing 3mL of DI water.
5. Again, press RUN and HIGH on the cytometer fluid control panel. Run for 10 minutes.
Determine whether or not the fluidics need to be debubbled by priming:
1. Open or create an experiment to view BD
®
CS&TBeads. For details, see Running a performance check (page
71) and Setting up a compensation experiment (page 74).
2. Press RUNand LOW on the cytometer fluid control panel.
Chapter 3 Cytometer setup 31