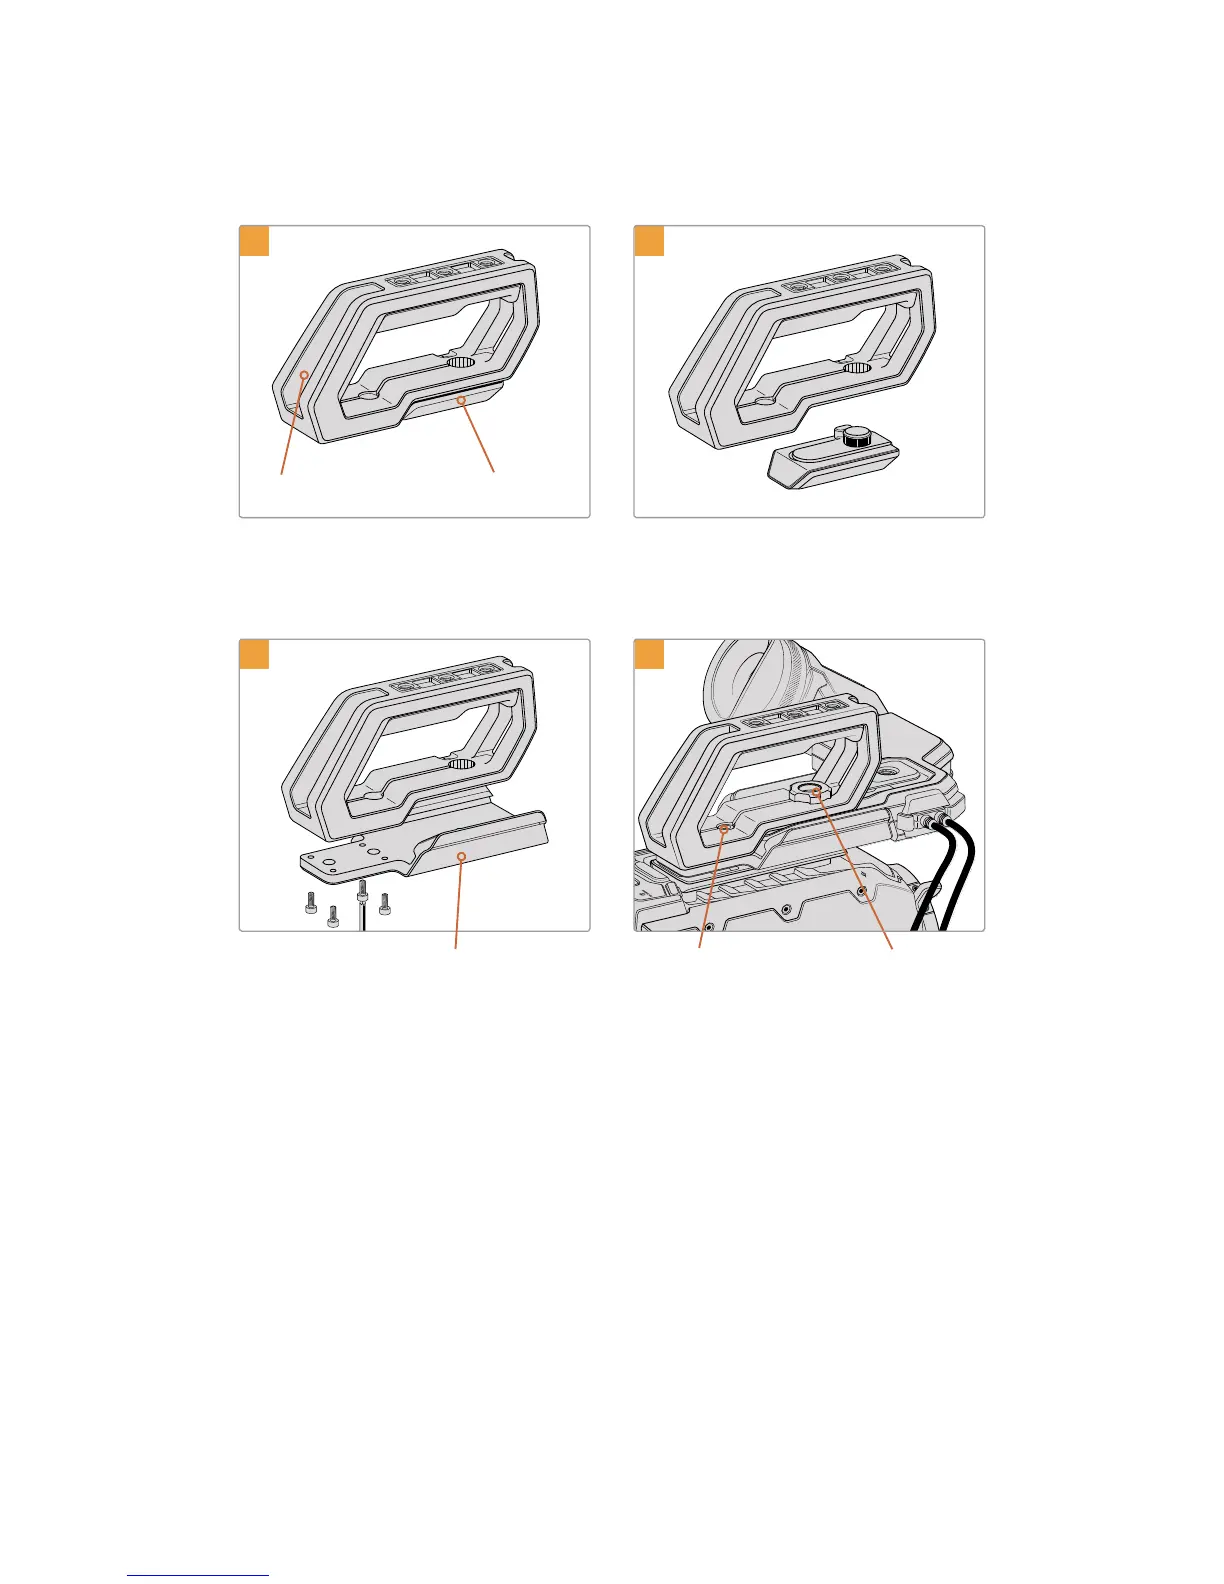
To attach the top handle with URSA Viewfinder
1
Top handle URSA Viewfinder cap
2
Place your URSA Mini on a flat, stable surface
soyou can access the top of your camera.
Remove the URSA Viewfinder cap from the
base of the handle by gently lifting its arm
away from the side of the handle and pulling
the cap from the hole.
3
URSA Viewfinder adapter plate
Thumbscrew for adjusting
the optional URSA
Viewfinder position
2 x 1/4” socket head
screws for mounting
handle to camera
4
Fasten the URSA Viewfinder adapter plate tothe
handle using the 4 x M3 screws with a2.5mm Hex
key driver.
Fasten the handle to any two of URSA Mini’s top
1/4” mounting points using the two supplied 1/4”
screws with a 3/16” Hex key driver. URSA Mini’s
rear two mounting points are recommended for
most situations, but you can choose any pair for
better weight balance when using large lenses.
Avoid over-tightening the screws as it may
damage the screw threads.
The hole inside the front of the handle is used
with the thumb screw when attaching and
adjusting the URSA viewfinder. For information on
how to attach the URSA Viewfinder to the top
handle, refer to the ‘Blackmagic URSA Viewfinder’
section in your URSA manual.
138URSA Mini Shoulder Mount Kit