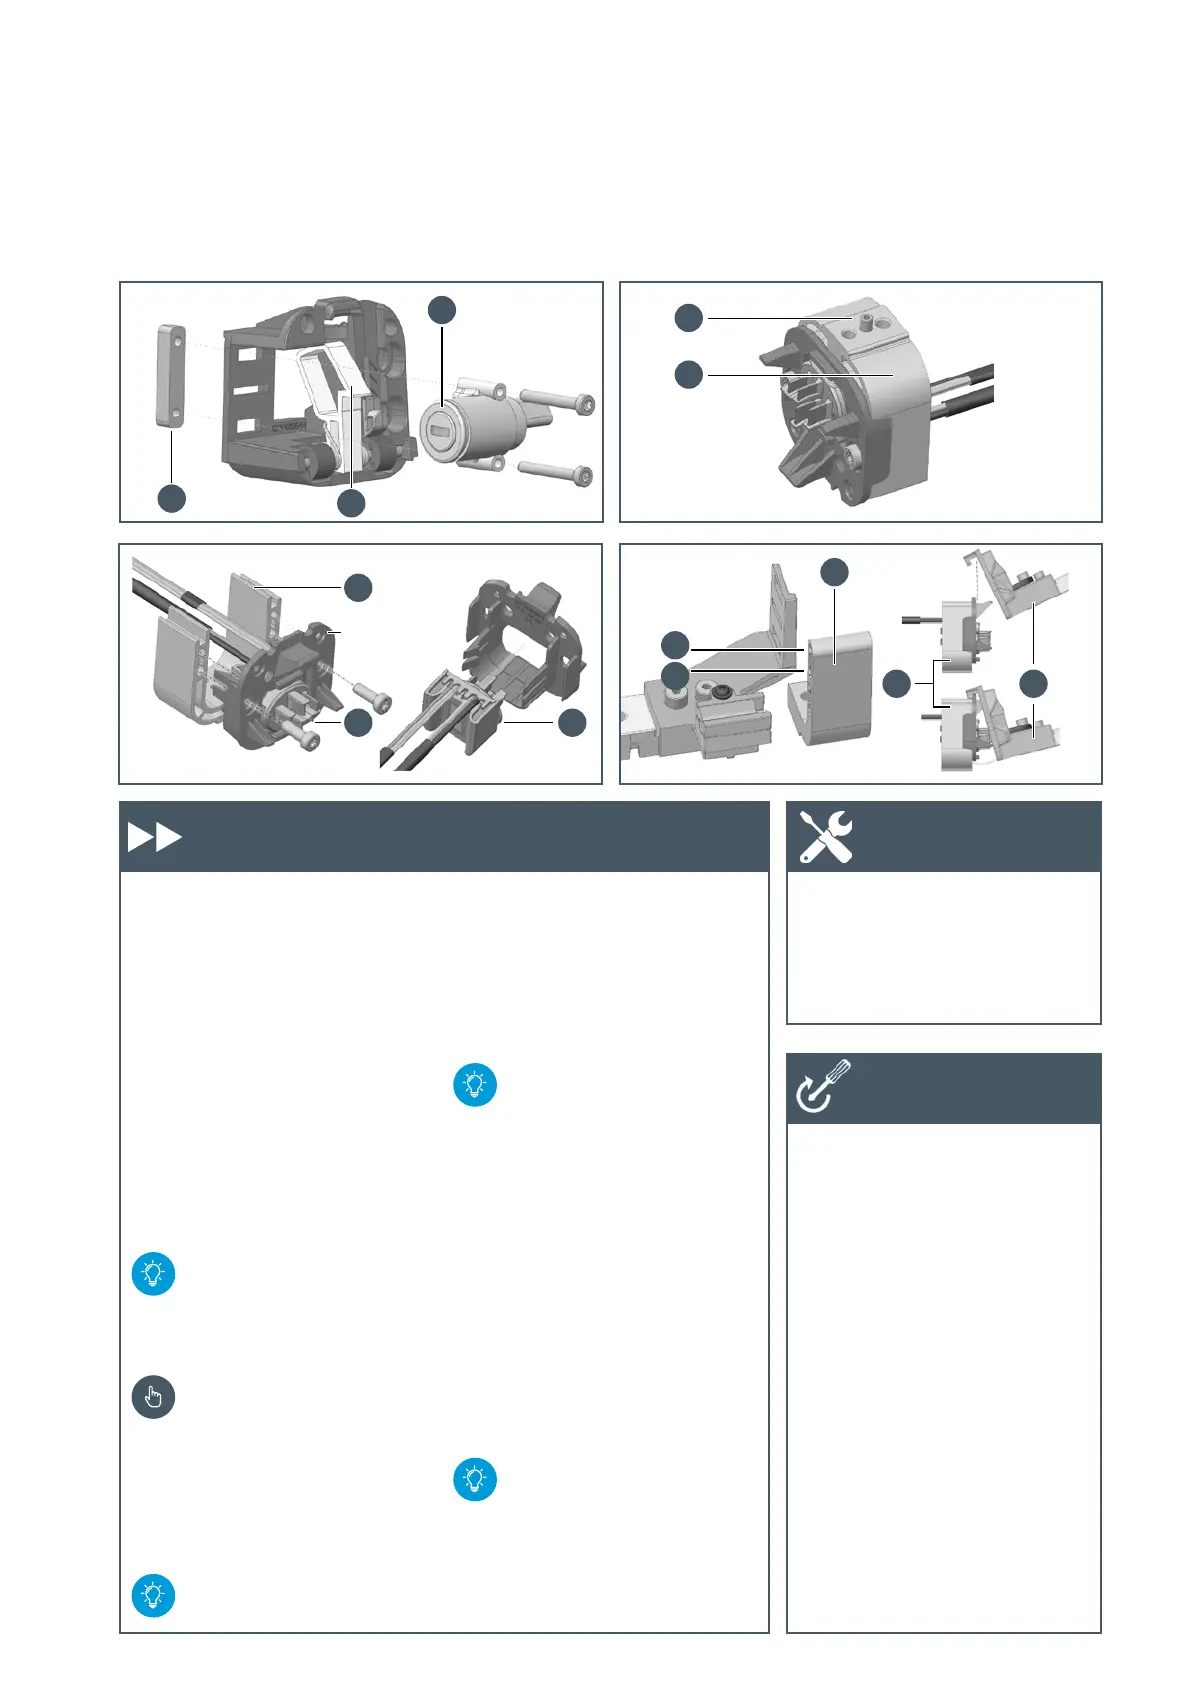
B
A
CC
D J
E
F
E
G
I
I
H
180
6.4 PowerTube
6.4 PowerTube
Preparing mount system for installation
Lock side:
1. Press the bar to backside of
mount plate (A), place lock (B)
against it and screw together
with two M4 x 27-
screws (T20).
Cable side:
2. Snap the PowerTube cable (C)
onto mount plate (D).
3. Use two M5 x 14
screws to lightly screw (T25)
the mount plate (D) to the
aluminum angle (E).
Vertical: use upper tapped
holes; Horizontal: use lower
tapped holes in aluminum
angle (E).
Pay attention and do not
damage the screw threads!
4. If needed, insert the threaded
pin (F) in the aluminum angle
(E) (size 2) to adjust the height.
Now tighten the screws
from
step 3 (T25).
Threaded pins: Vertical
M4 x 25, Horizontal M4 x 10
Attachment of mounting aid:
5. Lightly attach the L-angle (G) on
the lock side of the mounting
aid with the existing screw
(Allen key size 4).
Vertical: use upper tapped
holes (H); horizontal: use
lower tapped holes (I) in
L-angle (G).
6. Obliquely guide the mount
plate of the cable side (D) into
the mounting aid (J). Using a
tilted movement, allow the plug
to engage there.
7. If applicable, use two
M4 x 27 screws and the
threaded flange (I) to attach
the lock (B) to the mounting
aid.
Different mounting aids are
needed respectively for the
horizontal and vertical
variants.
X Torx wrench
T20/T25
X Allen key
size 2 / size 4
X Torque wrench
X M5 x 14 screws
(Torx T25): 4 Nm
X M4 x 27 screws
(Torx T20): 3 Nm
Work steps Tool
Tightening
torques










 To Next Page