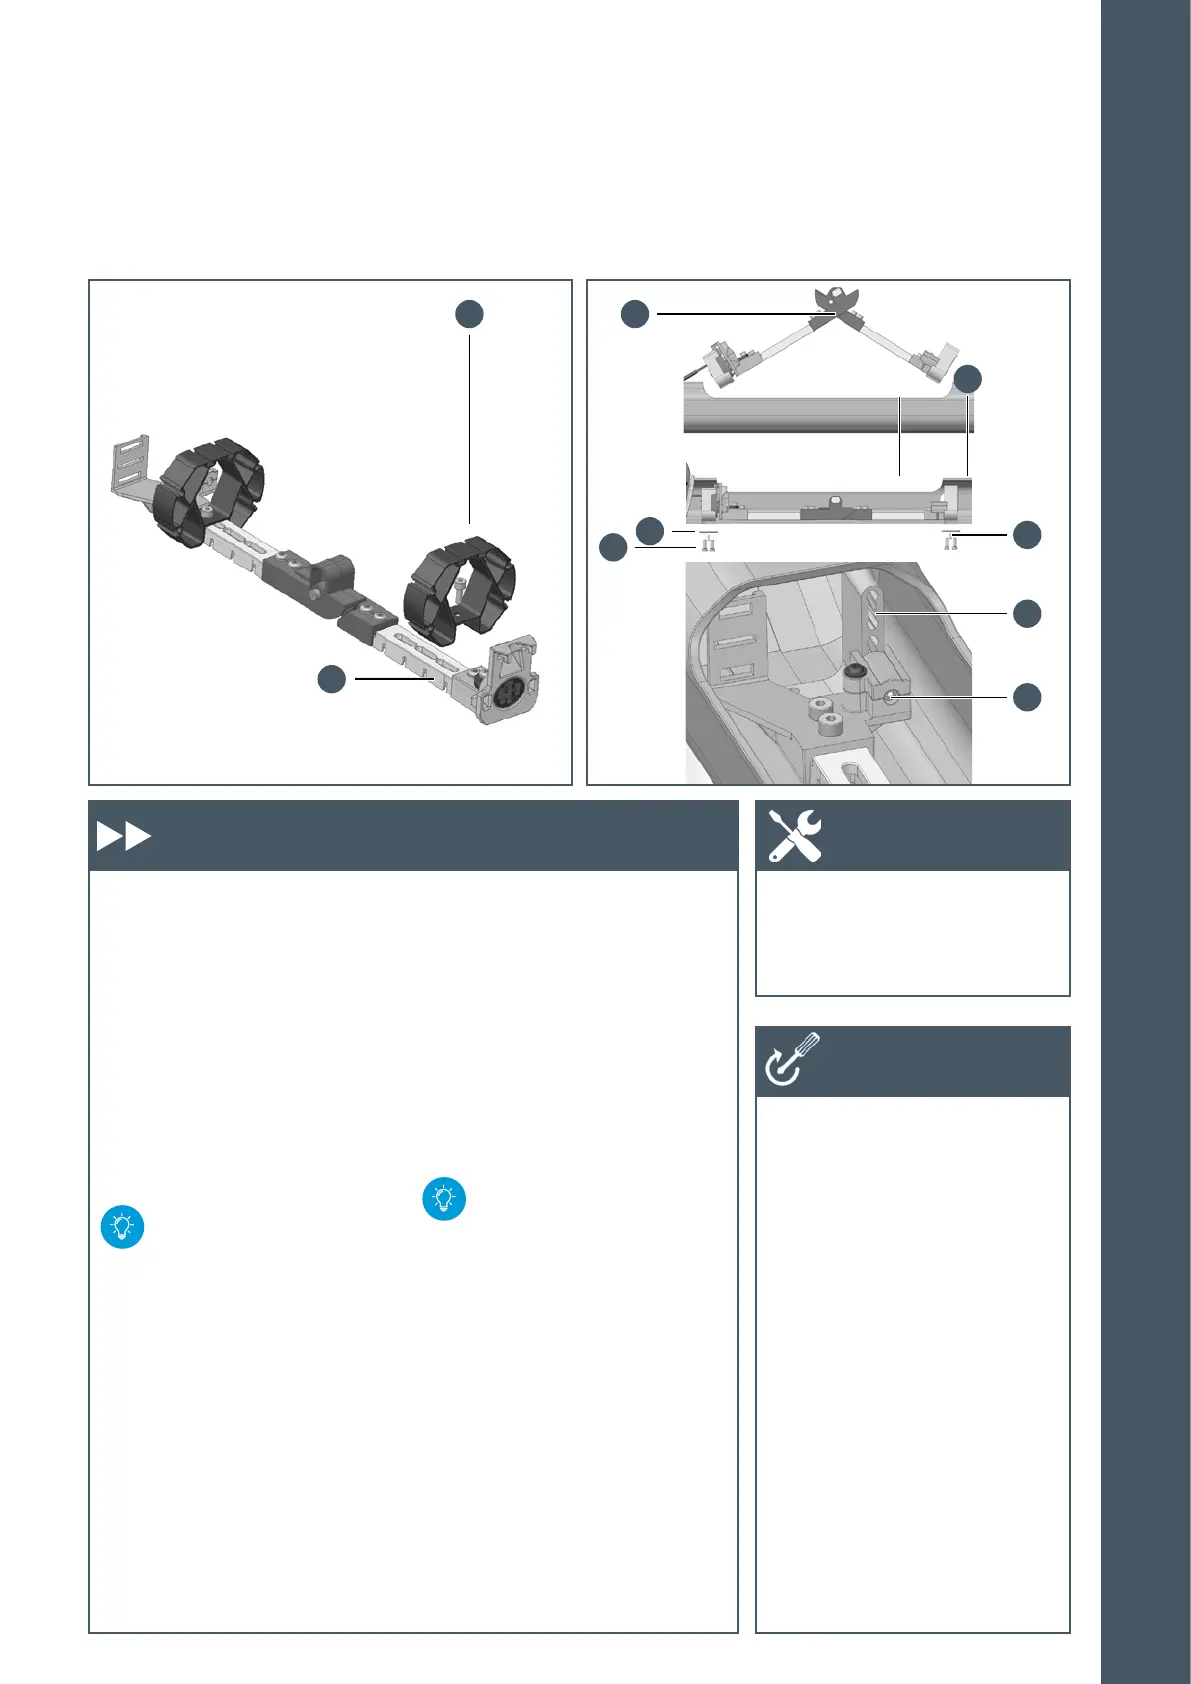
B
C
E
F
D
F
G
B
A
181
6.4 PowerTube 6.4 PowerTube
Attaching the battery hous-
ing sections to the mount-
ing aid
Battery housing sections can be
attached at various positions on
the mounting aid (e.g. oriented in
the direction of a design cover):
1. Use the M5 x 12 screws and M5
nuts to screw down the battery
housing section (A) to the
mounting aid (B).
With certain limitations, this
is also possible after inser-
tion of the mounting aid.
Insertion of the mounting
aid into the frame cut-out
1. Lay in the cables, tilt the
mounting aid (B) and guide into
the frame cut-out. Fold out the
mounting aid until it engages.
2. Orient the mount system, screw
down each mounting angle
using the two M5 x 14 screws
(C) and a shim (D).
If not already done, insert
the threaded pin (G) for
height adjustment. (Torx
T10) Threaded pins: Vertical
M4 x 25, Horizontal M4 x 10
Remove the mounting aid
from the frame cut-out
1. Unscrew screw (E) from mount-
ing angle (F); tilt the mounting
aid (B) and lift out of the frame
cut-out.
X Torx wrench T10
X Torx wrench T25
X Allen key size 2
X Torque wrench
X M5 x 14 screws
(Torx T25): 4 Nm
Work steps Tool
Tightening
torques
6
INSTALLATION/
REMOVAL









 To Next Page