Spare parts for PowerTube available from Bosch
(see spare parts list), for example:
– Cables, various lengths
– Charging Socket Kit
– Threaded Flange Kit
– Lock-side/cable-side assembly kit
J
H
I
FG
A
B
C
D
E
182
6.4 PowerTube
6.4 PowerTube
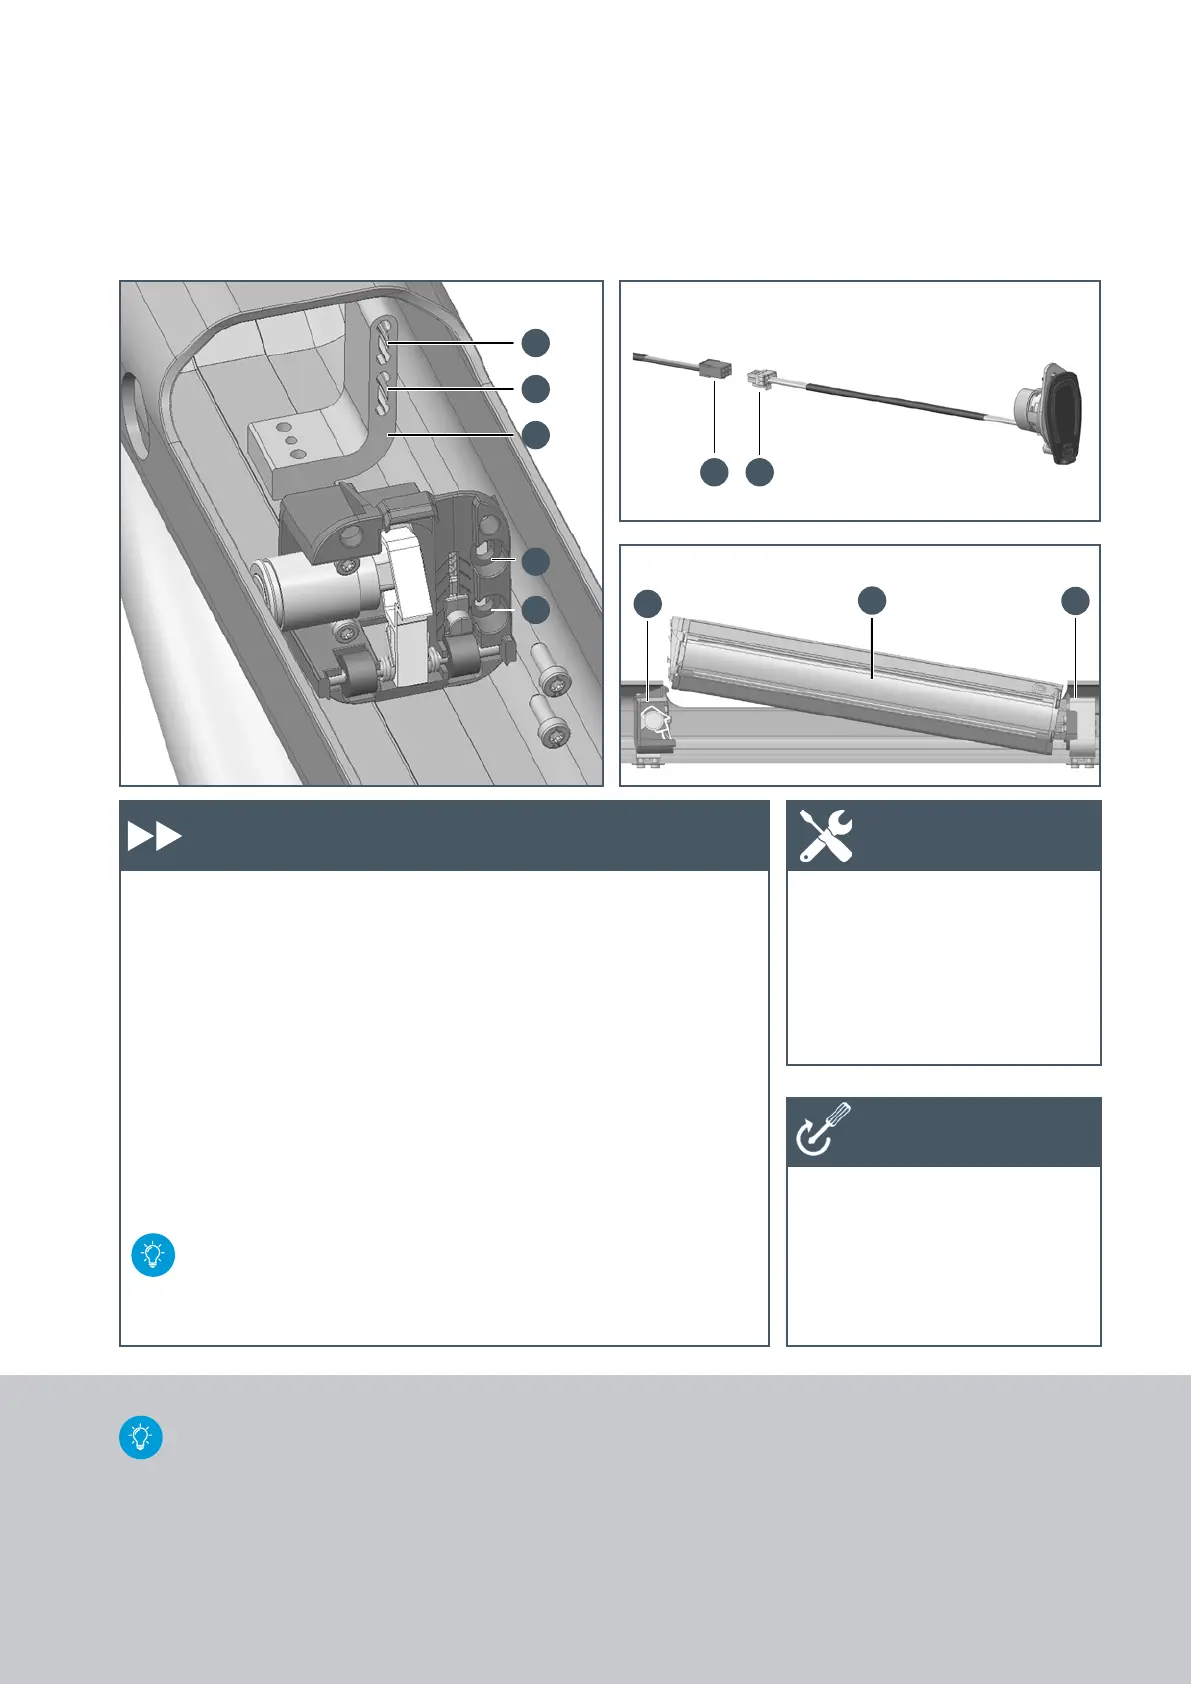
Assembling the lock side of
mount system to the alumi-
num angle
1. Use two M5 x 14 screws to
screw down the pre-assembled
lock side of the mount system
(see page 180) to the aluminum
angle (A) attached in the frame.
If needed, adjust the height by
means of the previously
inserted threaded pin
(Torx T10).
Vertical: use upper tapped
holes (D); horizontal: use
lower tapped holes (E) in
the aluminum angle (A).
2. Tighten the M5 x 14 screws.
3. Align the lock with the frame
cut-out.
Installing the PowerTube
1. Plug together the plug of the
charging socket (F) and the
PowerTube cable (G).
2. First, insert the PowerTube (H)
in the mount system of the
cable side (I) and then use a
circular movement to engage it
in the lock side (J).
3. Check the mount system and, if
necessary, make adjustments.
X Torx wrench T10
X Torx wrench T25
X Torque wrench
X M5x14 screws
(Torx T25): 4 Nm
Work steps Tool
Tightening
torques










 To Next Page