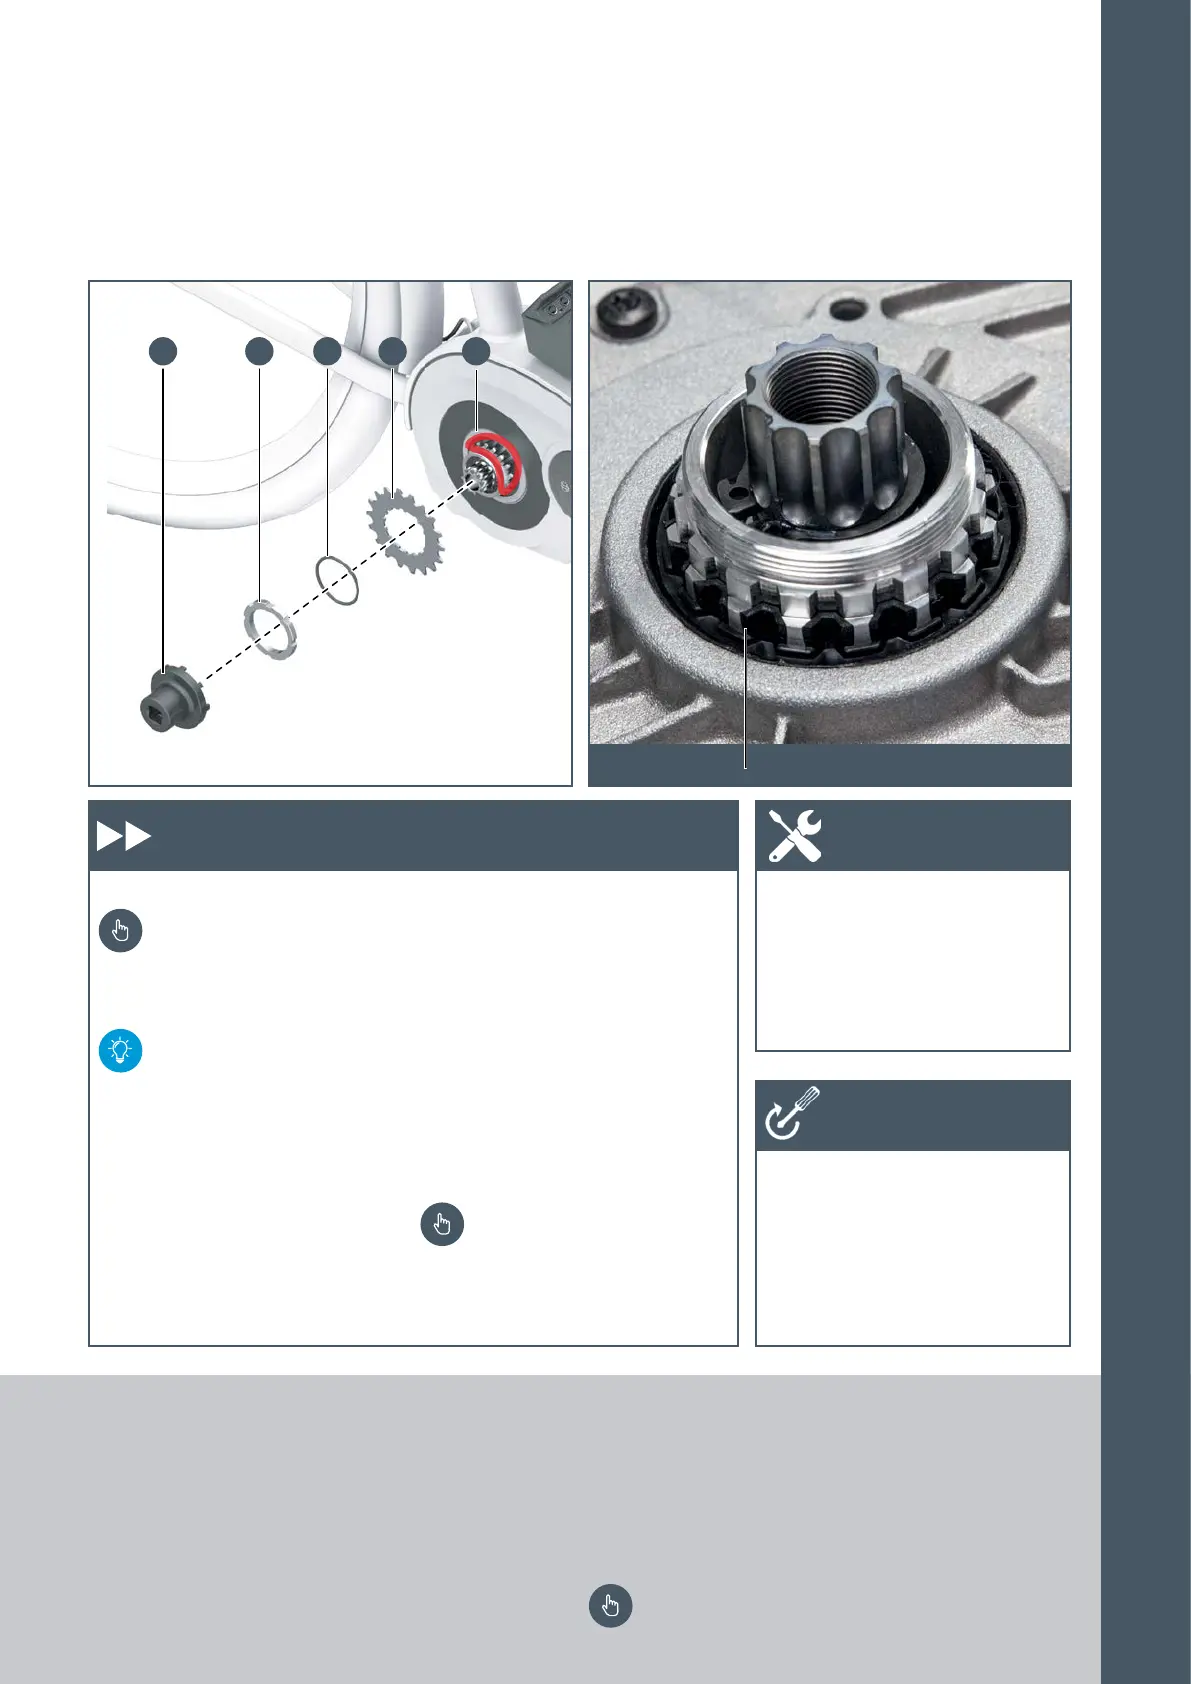
E D C B A
205
6.10 Installing Drive Unit (BDU250C/255C) 6.10 Installing Drive Unit (BDU250C/255C)
Installing the chainring and crankshaft
The chainring spider may only
be loosened and tightened
by
a trained specialist using the
original Bosch Lock Ring Tool.
To increase the robustness of
the drive unit, as
of model year 2017 a bearing
protection ring is inserted
behind the chainring at the
factory. Spare part Order
number: 1.270.016.104
1. Lightly grease and insert the
bearing protection ring (unless
already installed).
2. Lightly grease the gear profile
and fine threads on the motor
shaft.
3. Put the chainring (B) onto the
gear profile of the motor shaft
(during replacement, it is essential
to use a chainring with the same
cog count as the original part).
4. Push on the O-ring (C).
5. Tighten the lock ring (D) with the
lock ring tool (E).
Left-hand thread!
6. Grease the bottom bracket shaft.
7. Mount the crank arms.
X Bearing grease
X Torque wrench
X Original Bosch Lock Ring Tool
(Order number:
0.275.009.003)
X Allen key size 8
X Lock ring (aluminium, greased):
20-25 Nm
X Crank arms on the bottom
bracket shaft (Allen key size 8,
M15 x 1): according to manufac-
turer's specifications, typically
45–55 Nm
Work steps Tool
Tightening
torques
Useful spare parts
X Set of 5 bearing protection rings and bearing
grease, Order number: 1.270.020.133
X Bearing grease, Order number: 1.270.014.053
Drive belt drive
The use of drive belts is generally possible. Drive belts,
crown gears, lock rings and spacers are available from
the manufacturers of each of the belt drive systems.
The function and durability of these systems are the
responsibility of the respective manufacturers.
Be sure to observe proper alignment and tension
in order to prevent damage to the drive!
Bearing protection ring
6
INSTALLATION/
REMOVAL




 To Next Page