37
3.4.6 Testing the Material Flow
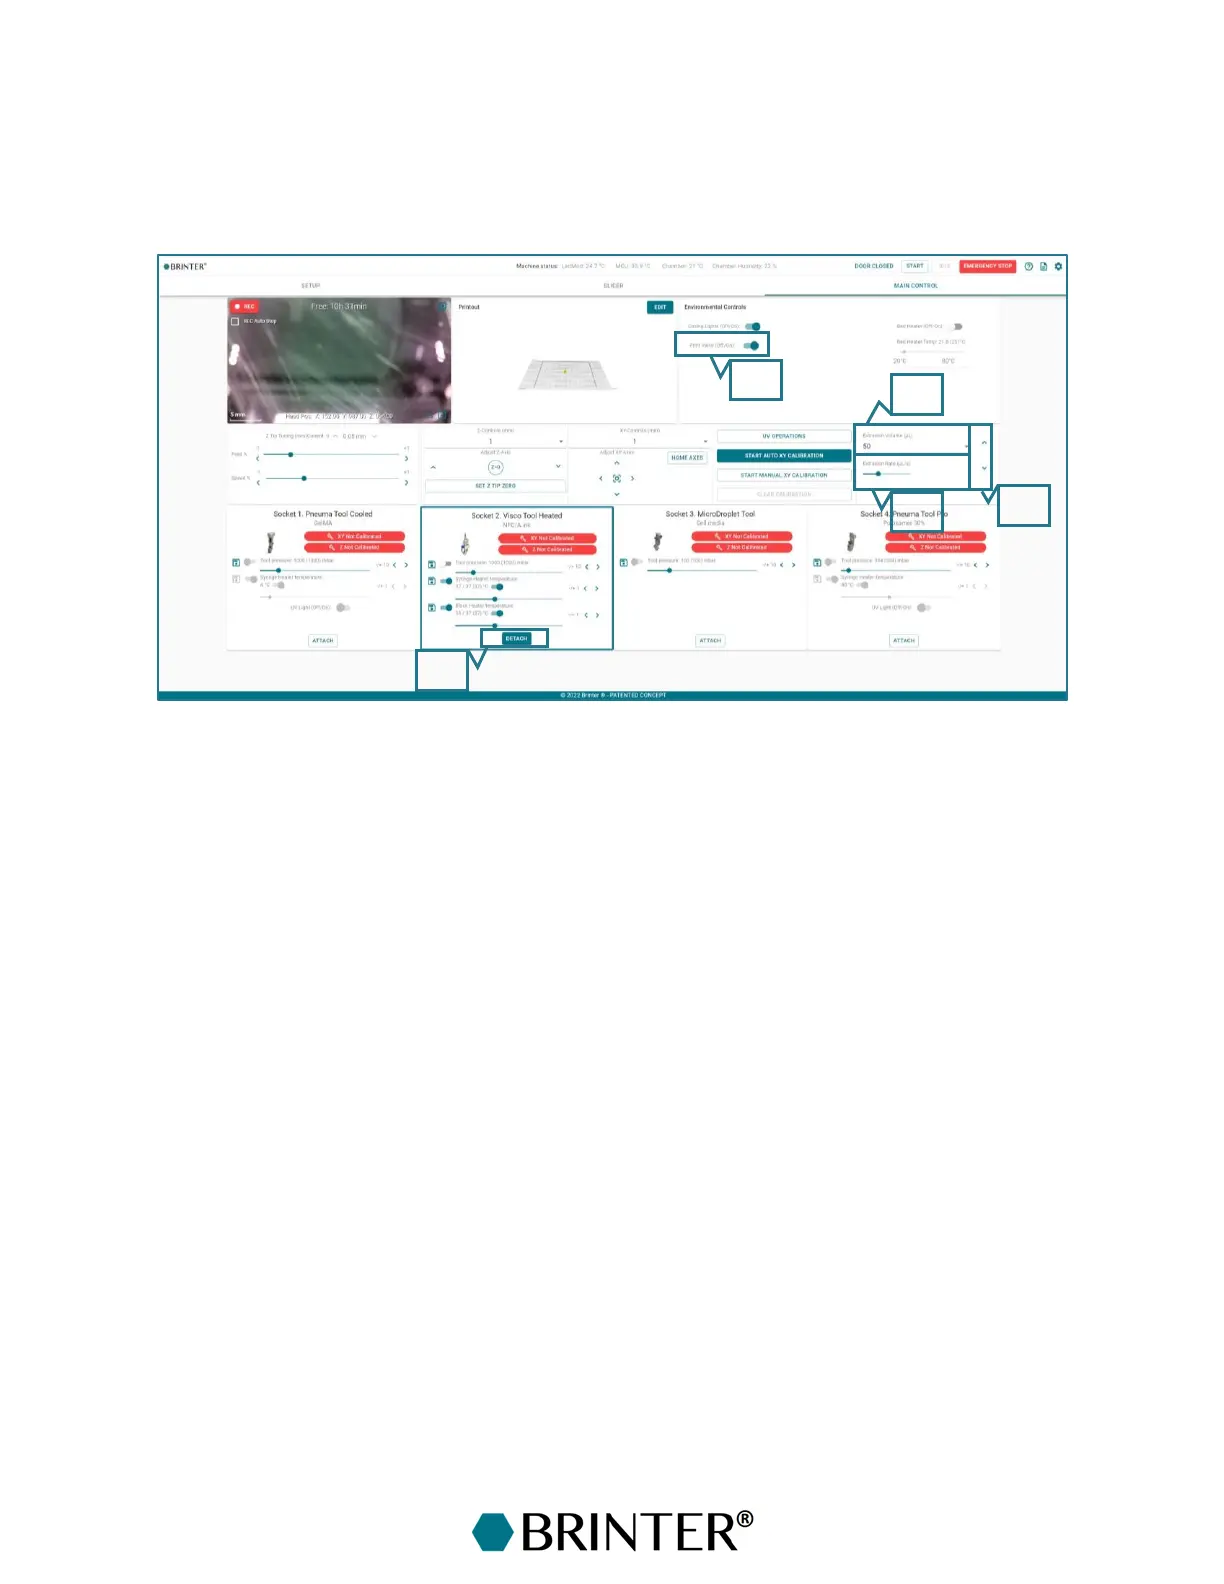
First, mount the chosen print head with the needle in its place into the tool changer adapter. Attach
the print head by pressing the Attach button. When the print head is attached, test that the material
flows continuously from the needle with the set printing parameters.
1. Attach/Detach – Click to mount the print head in question into the tool changer adapter.
When the print head is successfully attached, the button turns green and reads “DETACH”.
2. Print valve for pressure-controlled print heads – Test the material flow with the set pressure
value by switching the Print Valve to the ON position. Adjust the pressure until the material
extrudes as a continuous filament. Switch back to the OFF position to stop the material flow.
Switch the pressure on also for the Visco Tools as it enables the material to flow easily from
the syringe barrel into the print head.
3. Extrusion volume – Set the volume for the extrusion test (µL). Available only for Visco Tools.
4. Extrusion rate – Set the extrusion rate for the extrusion test (µL/s). Available only for Visco
Tools.
5. Extrude – Click the downwards arrow to start the extrusion. The upwards arrow is for
retracting. Available only for Visco Tools.