75
10 Appendix 5. Pneuma Tool Cooled Manual
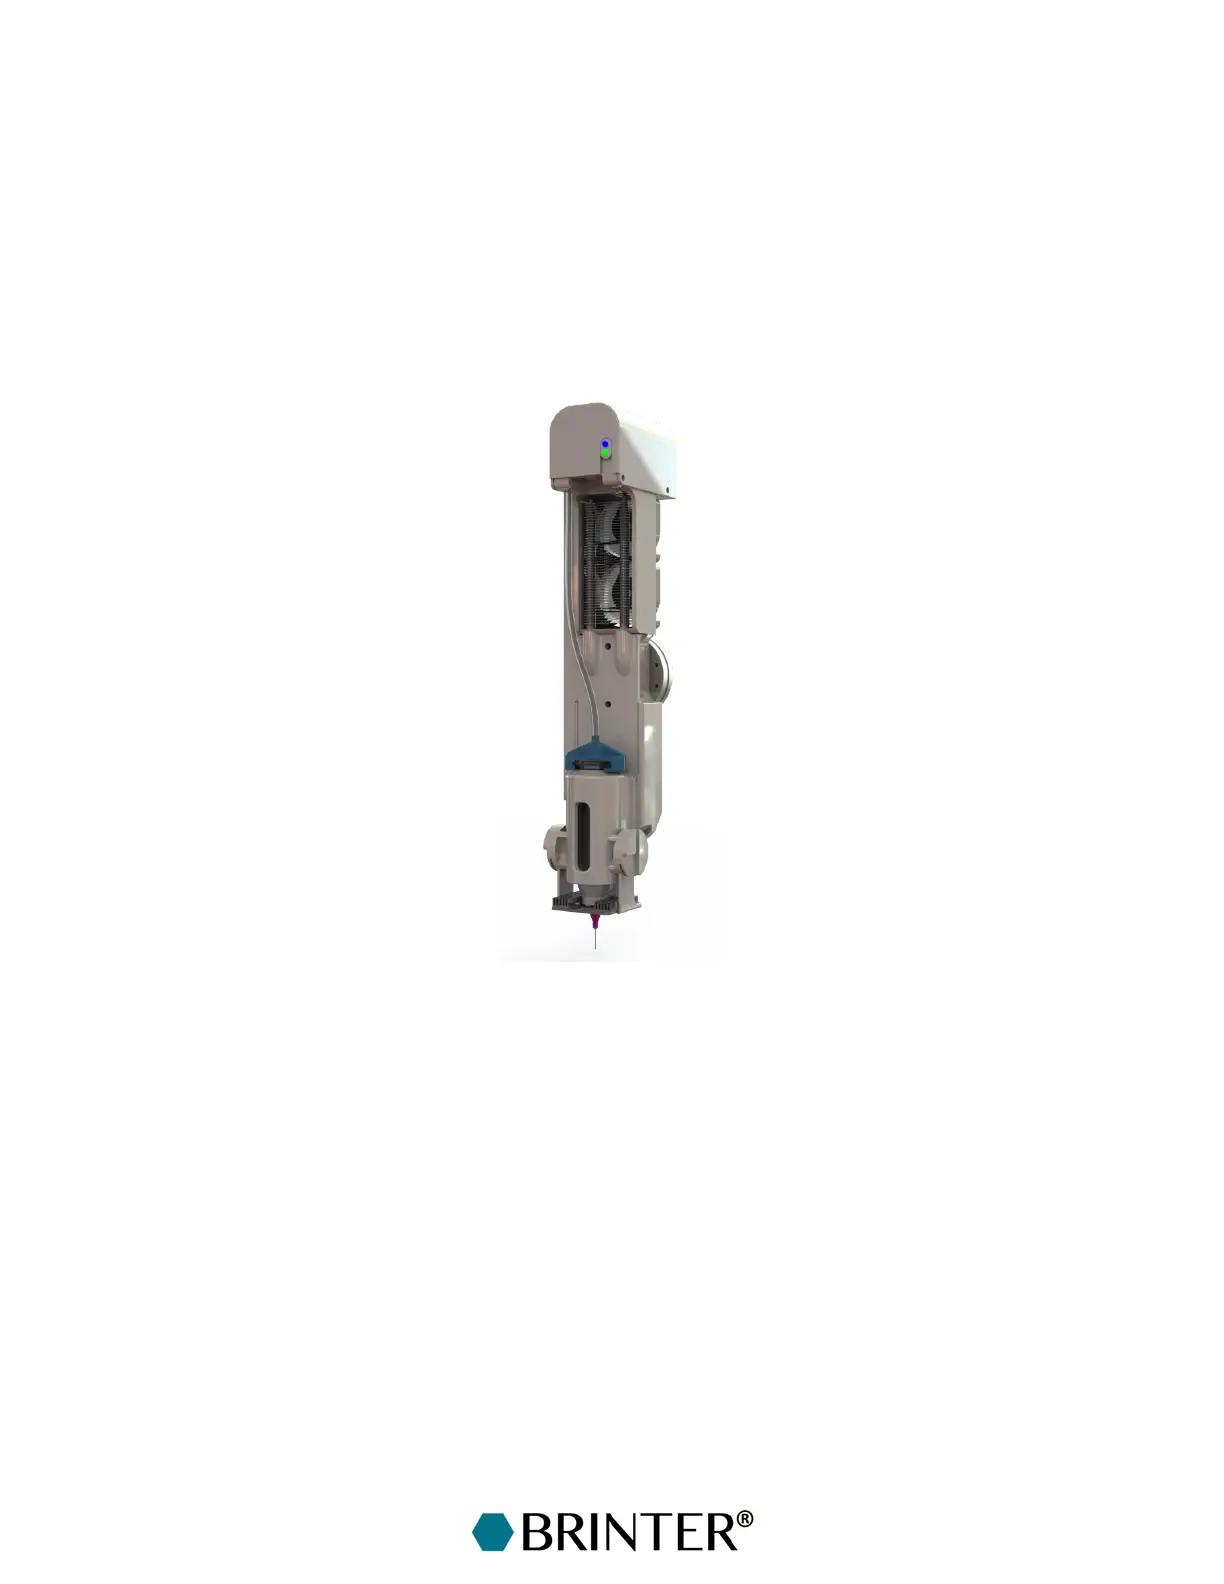
10.1 Print Head Overview
The dispensing with Pneuma Tool Cooled print head (Figure 9) is based on the pneumatic extrusion.
The cooling function enables a constant temperature from +4 °C to RT throughout the print head
syringe barrel. In addition, the print head is equipped with an integrated UV/Vis LED module emitting
at a wavelength of 365 nm, 405 nm or 450 nm. It allows in situ photocrosslinking of the
photosensitive non-viscous bioinks during the deposition process. Pneuma Tool Cooled is compatible
with various commercial and noncommercial low-to-medium viscosity hydrogel bioinks and pastes;
however, if the printed material breaks the tool, it is not covered by the warranty.
10.2 Getting the Print Head Ready for Printing
Fill the syringe barrel [1] with the printable material and insert a piston to assure an even distribution
of the air pressure. In order to start the printing process more quickly, it is recommended that the
bioink should be cooled on ice or in a fridge to the desired temperature before inserting it into the
print head.
Also, if working with a photosensitive bioink, keep the bioink protected from light by using orange
UV-protected syringe barrels to avoid premature crosslinking. Turn off the Brinter
®
casing lights to
work in a dark mode.
Cap the syringe barrel with a Luer-Lock needle [2] and insert the barrel in the print head by pushing
it down until it locks.
Attach the pressure hose by twisting the pressure connector [3] to the syringe barrel. Make sure that
the pressure hose is tightly attached to the pressure connector on the print head.