56
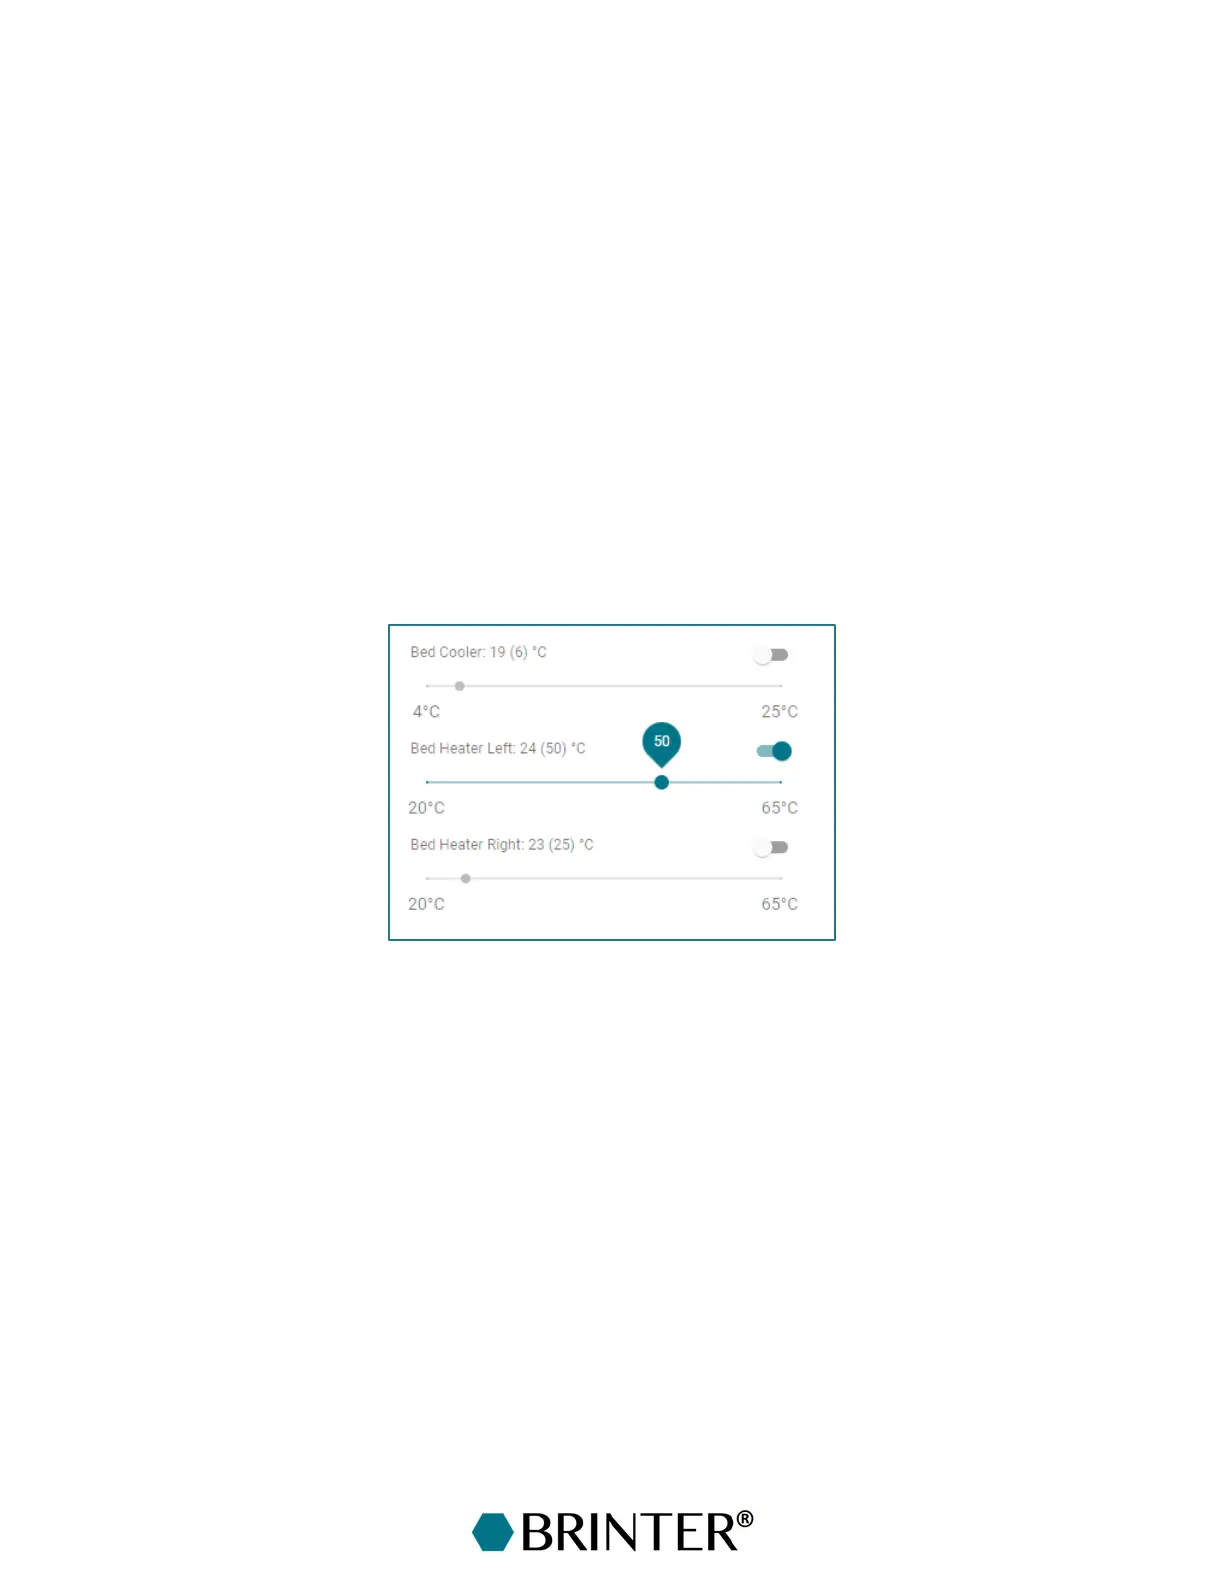
6.6 Using the Temperature-Controlled Print Bed
The temperature of the two heated areas on both sides of the bed can be adjusted from RT up to
+65 °C from the Main control tab in the Brinter
®
software. The maximum temperature can be
reached at the surface of the aluminium bed in ~10 minutes. The cooled area is located in the middle
with a temperature range from RT down to +4 °C (or ~18 °C below the chamber temperature). The
minimum temperature can be reached at the surface of the bed in ~30 minutes.
NB: The user is advised to measure the actual temperature from the surface of the print dish (e.g.,
well plate or Petri dish) to verify that the target temperature is also reached on the dish surface
before starting the print job. The area around the temperature sensor will reach the set temperature
sooner than the actual printing surface
To use the cooling of the print bed, turn on the cooling function from the “Bed Cooler (Off/On)” switch.
Next, set the target temperature with the slider underneath. The set temperature will be shown in
the brackets, and the current bed temperature is shown before the brackets. To use the heated areas,
turn on the left and/or right heaters from the Bed Heater (Off/On) switches. Set the target
temperatures with the sliders and wait for the print bed to reach the target temperature before
starting the print job.