22
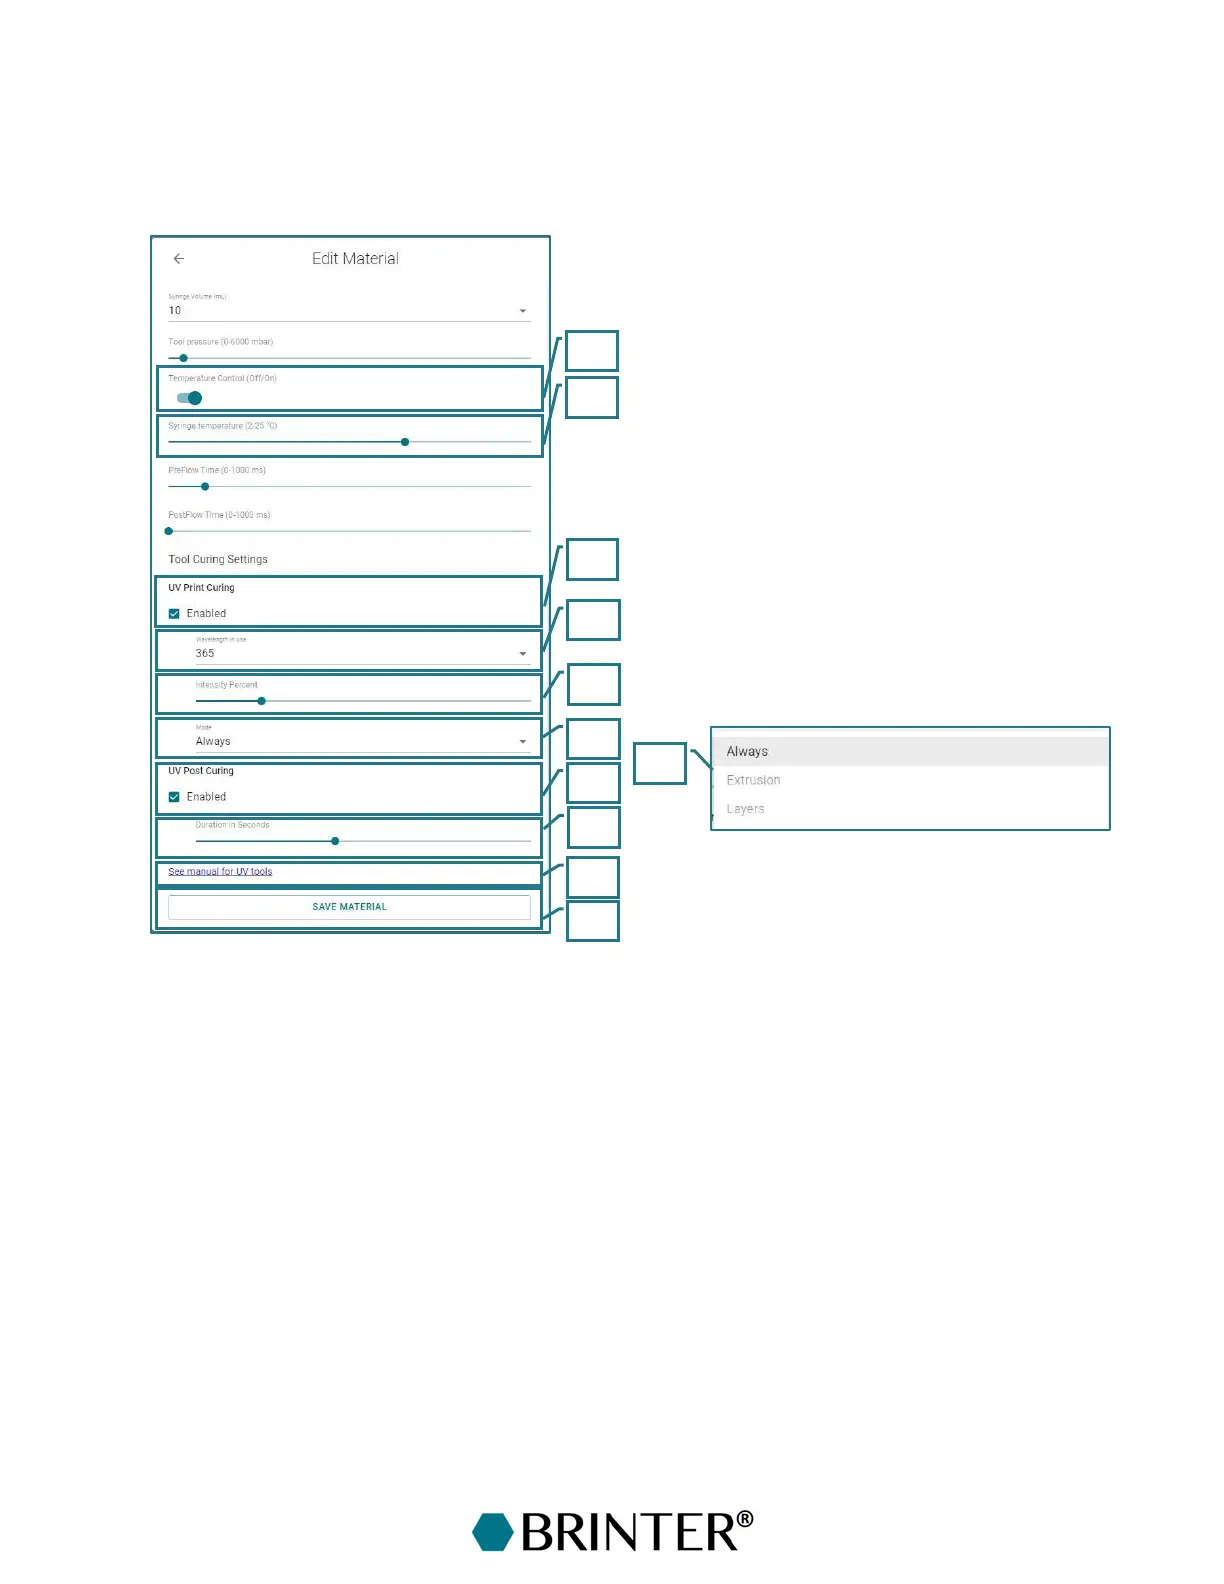
3.4.3.3 Configuring the Pneuma Tool Pro, Pneuma Tool Cooled and Pneuma Triaxial
The configuration of the print heads with an integrated LED module (Pneuma Tool Pro, Pneuma Tool
Cooled and Pneuma Triaxial Pro print heads) differs slightly from the basic Pneuma Tool; however,
the needle, syringe, and pressure settings are similar to Pneuma Tool:
32. Temperature Control – Off/On toggle switch for using the heating/cooling of the print head.
(Available only for the print heads with heating/cooling option.)
33. Syringe temperature – Set the target temperature for the syringe barrel (from +2 to +25 °C
for Pneuma Tool Cooled and from +20 to +66 °C for Pneuma Tool Pro and Pneuma Triaxial
Pro Tool).
34. Tool curing settings – Tick the box to enable photocuring during the printing process with the
tool-integrated LED module.
35. Wavelength in use – Select the photocuring wavelength for curing during and after printing
with the tool-integrated LED module.
36. Intensity percent – Adjust the intensity of the light for curing during and after printing (0–
100%).
37. Mode – Select the mode for the curing (Only mode “Always” on is in use in Brinter
®
versions
without the hardware upgrade kit enabling the Duet-TCB connection. Brinter
®
platforms with
the upgrade kit enable curing with the tool-integrated LEDs in a layer-by-layer mode, as well.)