33
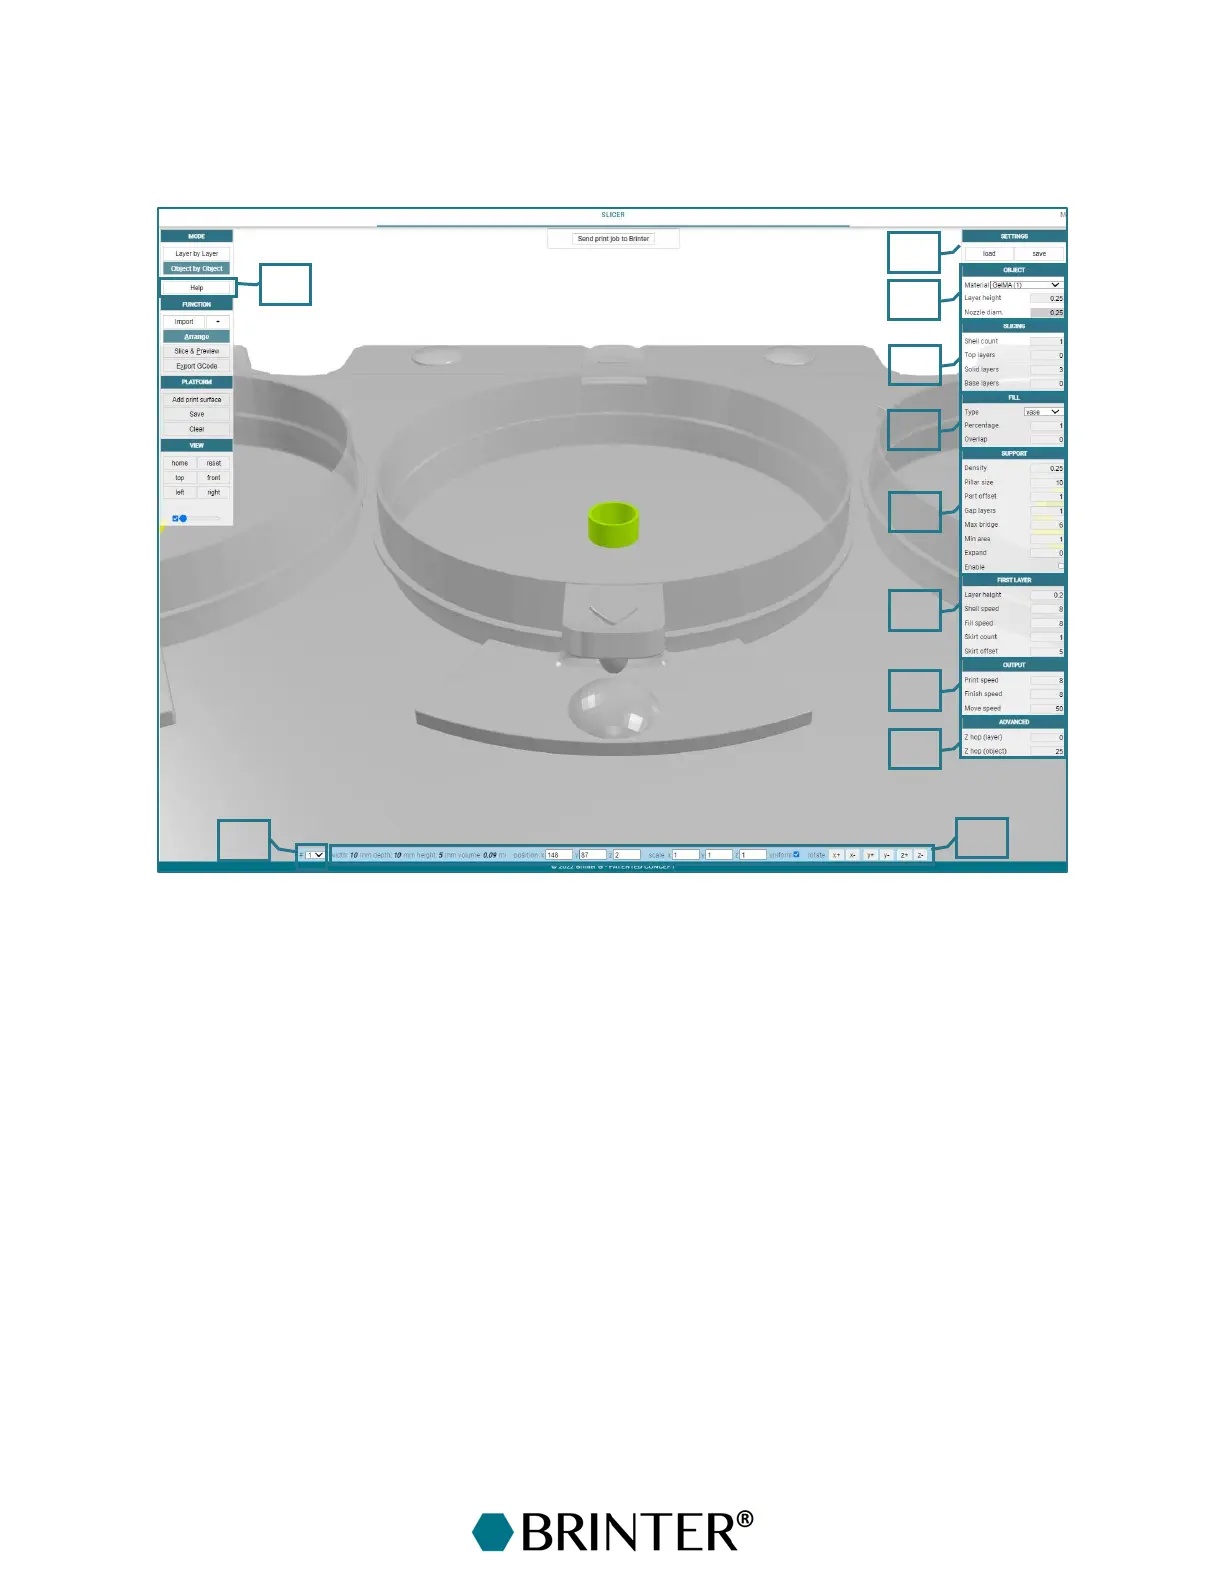
3.4.4.3 Setting the Slicing Parameters for Objects
Next, set the object-specific slicing parameters for each of the imported objects by clicking one by
one for each object active. Set the slicing parameters, and designate material for each object.
10. # – Change the printing order for multiple objects from the drop-down menu. First, make the
object active by clicking it with a mouse (its colour turns from yellow to green).
11. Scale or rotate – When the object is active, a menu appears, allowing the object to be
positioned into certain coordinates, scaled or rotated. The left mouse button rotates the
object. The right mouse button moves the object. Scroll to scale.
12. Settings – Load or save the given slicing settings.
13. Object – Assign the selected object to a particular print head/material. Set the layer height
in millimeters. The nozzle diameter is shown in millimeters as the value given in the Material
window at the Setup tab.
14. Slicing – Set the parameters for the layers, i.e., the number of perimeter walls (shell count)
to be generated, the number of solid top layers to enforce at the top of the print, and the
number of solid base layers to implement at the bottom of the print.
15. Fill – Set the parameters for filling the object, i.e., the infill pattern type, percentage (0.0–
1.0), and overlap with the shell and other fill as % of nozzle width (0.0–1.0).
16. Support – Set the parameters for the support structures, i.e. the density (0.0-1.0,
recommended 0.15, 0 to disable), pillar size (width in millimeters), part offset in millimeters,