59
7.2 Getting the Print Head Ready for Printing
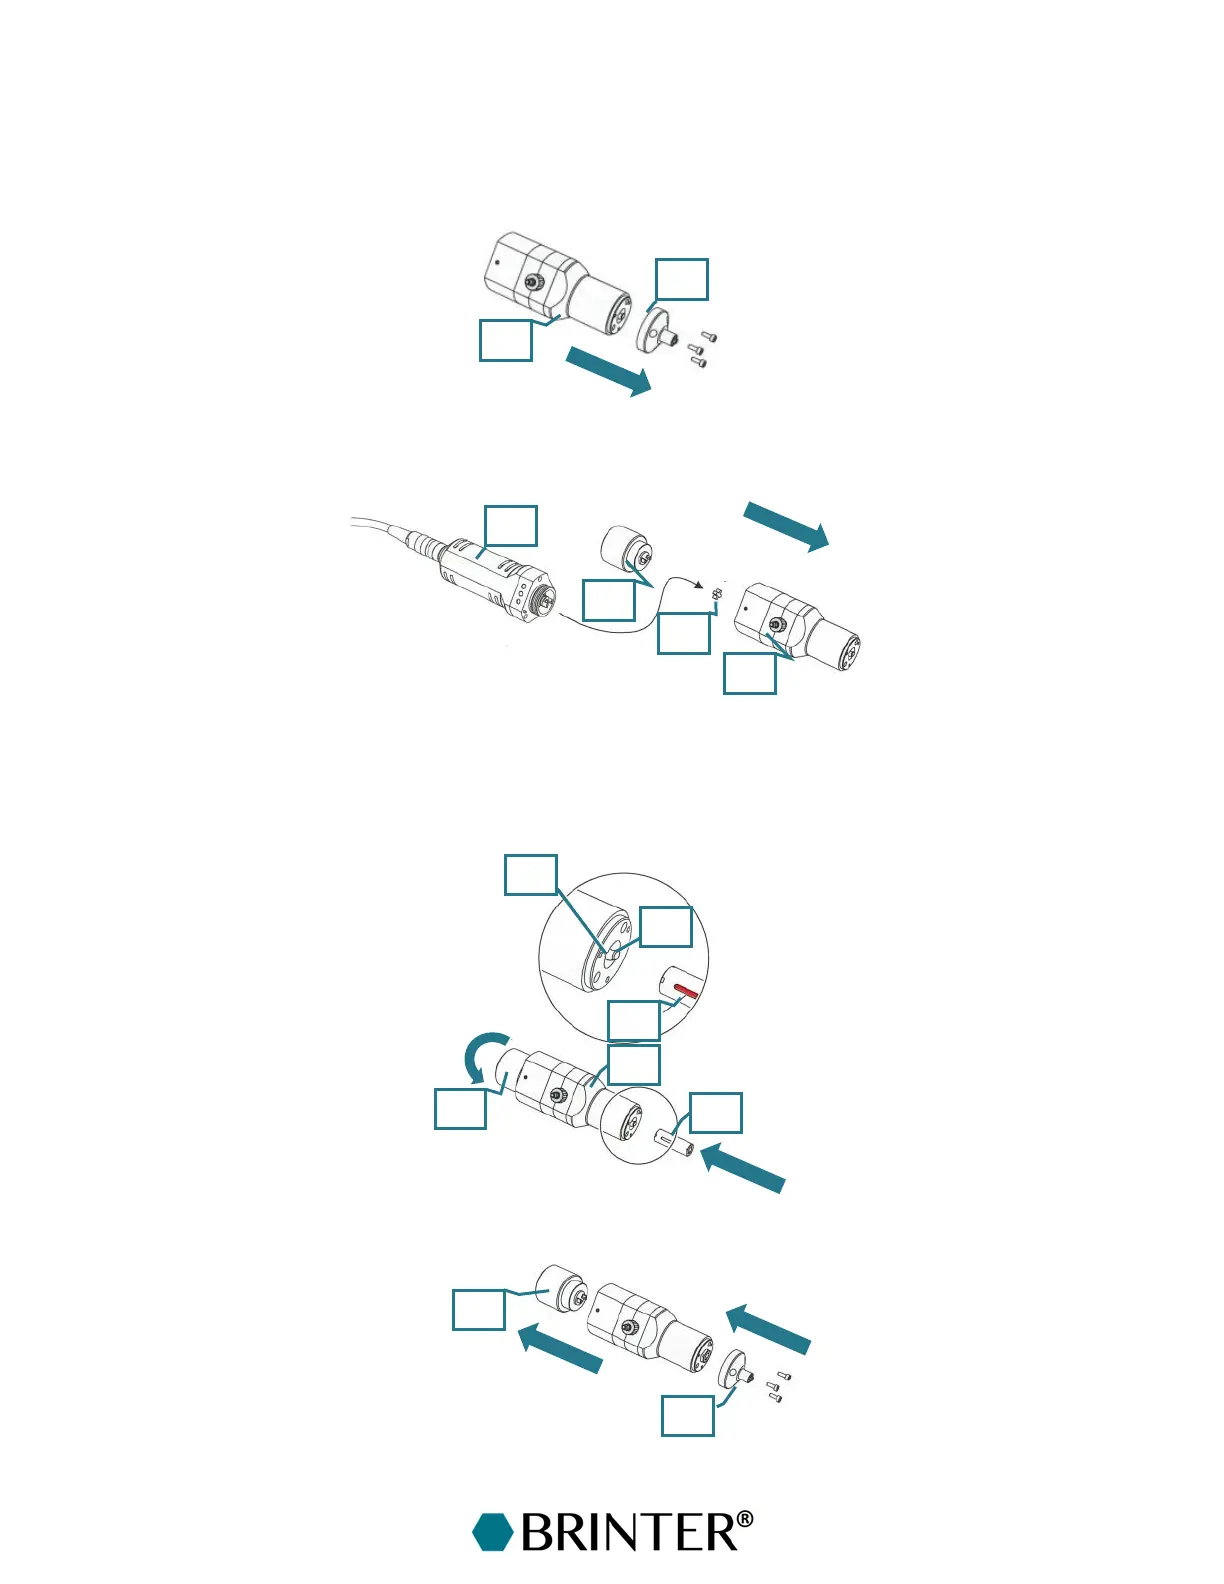
7.2.1 Inserting the Stator
Detach the end piece [2] from the dosing unit [1].
Unplug the star-shaped coupling [3] from the drive unit [4]. Plug the star-shaped coupling [3] into the
dosing unit [1]. Attach the assembly aid [5] to the dosing unit [1].
Wet the rotor [6] with the material or a suitable lubricant. Screw the stator [7] onto the rotor [6] with
the correct orientation until the dowel pin [8] begins to dip into the groove [9].
Lightly press the stator towards the dosing unit [1] and turn the assembly aid [5] in the direction of
the arrow until the stator has been guided into the dosing unit [1].
Uncouple the assembly aid [5] and fit the end piece [2].