68
8.2 Getting the Print Head Ready for Printing
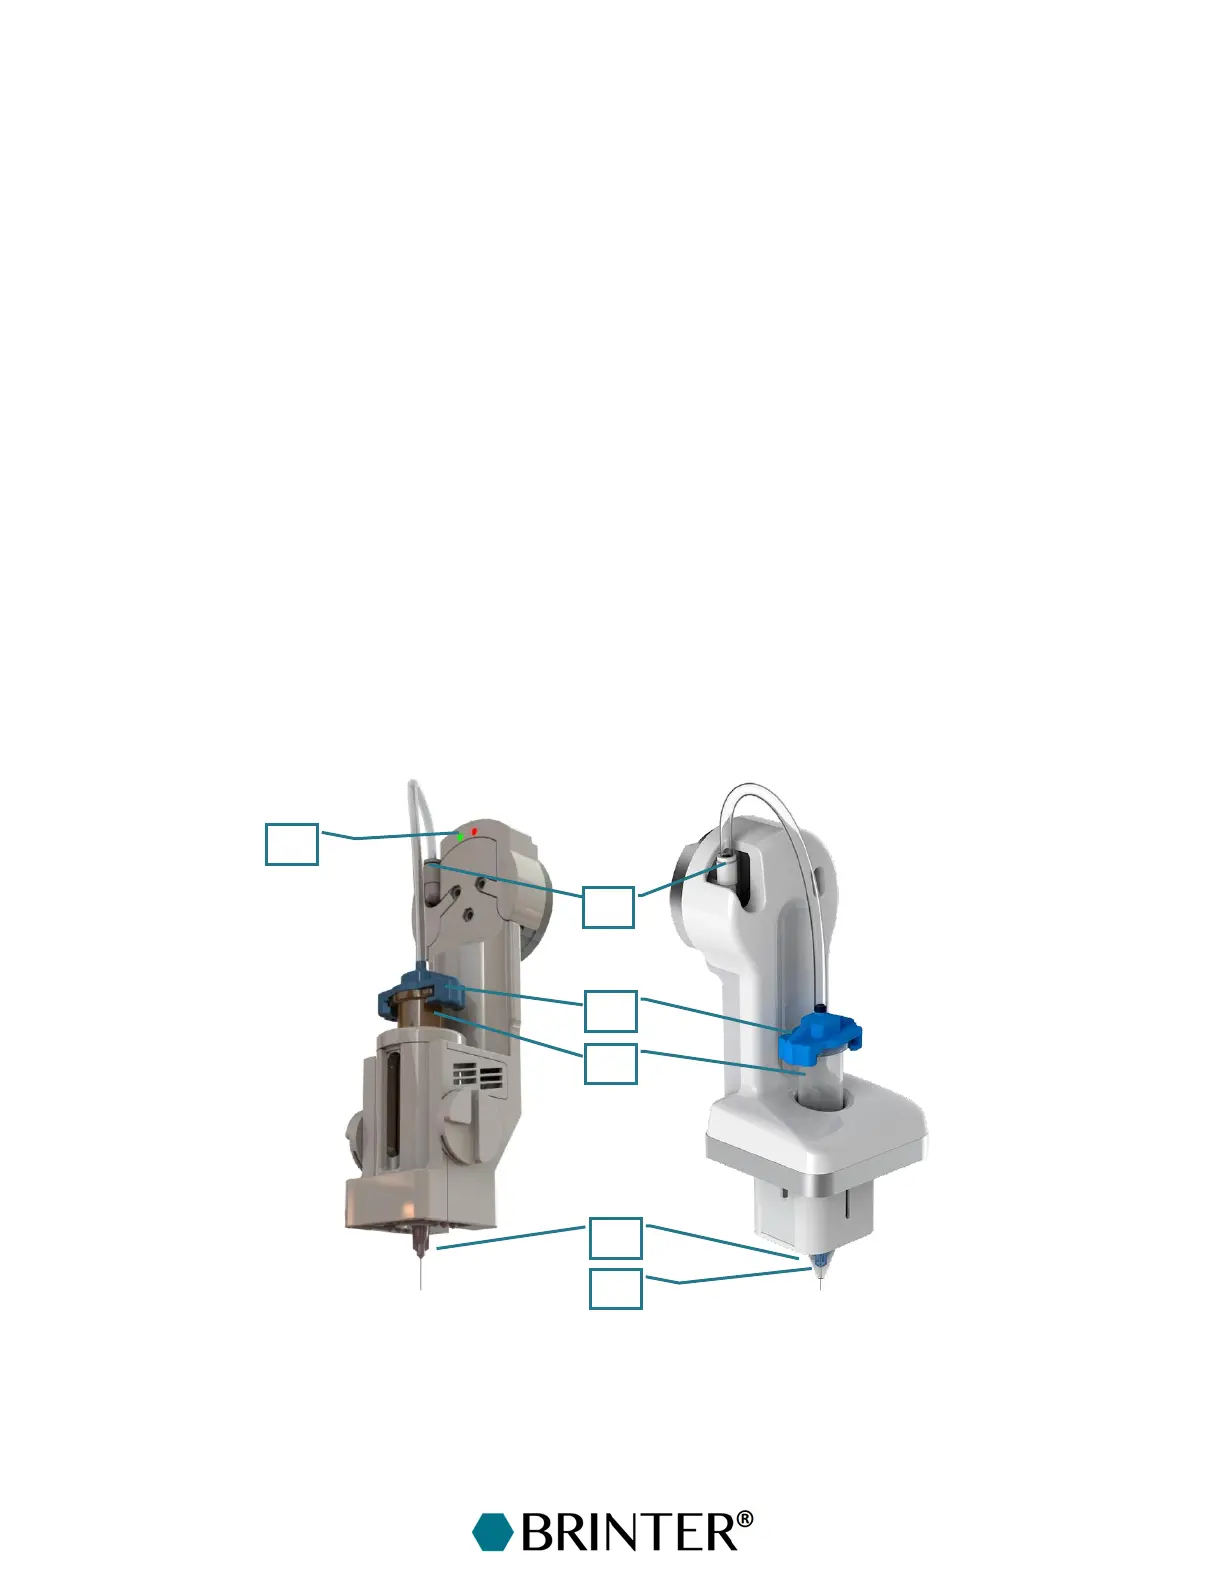
Fill the syringe barrel [1] with the printable material and insert a piston to assure an even distribution
of the air pressure.
Cap the syringe barrel with a Luer-Lock needle [2] and insert the syringe barrel (10 mL) in the print
head by pushing it down until it locks. In the new type of Pneuma Tools for Brinter
®
One, version 2.0,
3 mL syringe barrels can be used instead of 10 mL syringe barrels if a separate aluminium adapter
is first inserted into the print head.
Attach the pressure hose by twisting the pressure connector [3] to the syringe barrel. Make sure that
the pressure hose is tightly attached to the pressure connector on the print head [4].
The Pneuma Tool is now ready for printing.
The left green LED lights for a moment to indicate that the temperature setting has been received.
The right red LED is always on when the heater is heating [5].
The new type of Pneuma Tool (for Brinter
®
One, version 2.0) can be equipped with a separate
aluminium needle insulator [6] to ensure better heat distribution in the needle as well. It is attached
around the needle with magnets.
If heating of the material is needed, wait for the print head and material to reach the target
temperature before starting the print job. If 10 mL of gel material is at RT in the beginning, it will
take 10–15 mins to reach the target temperature of 66 °C.
After printing, the Pneuma Tool can be cleaned easily by disposing of the syringe barrel and the
needle and rinsing the pressure connector.