63
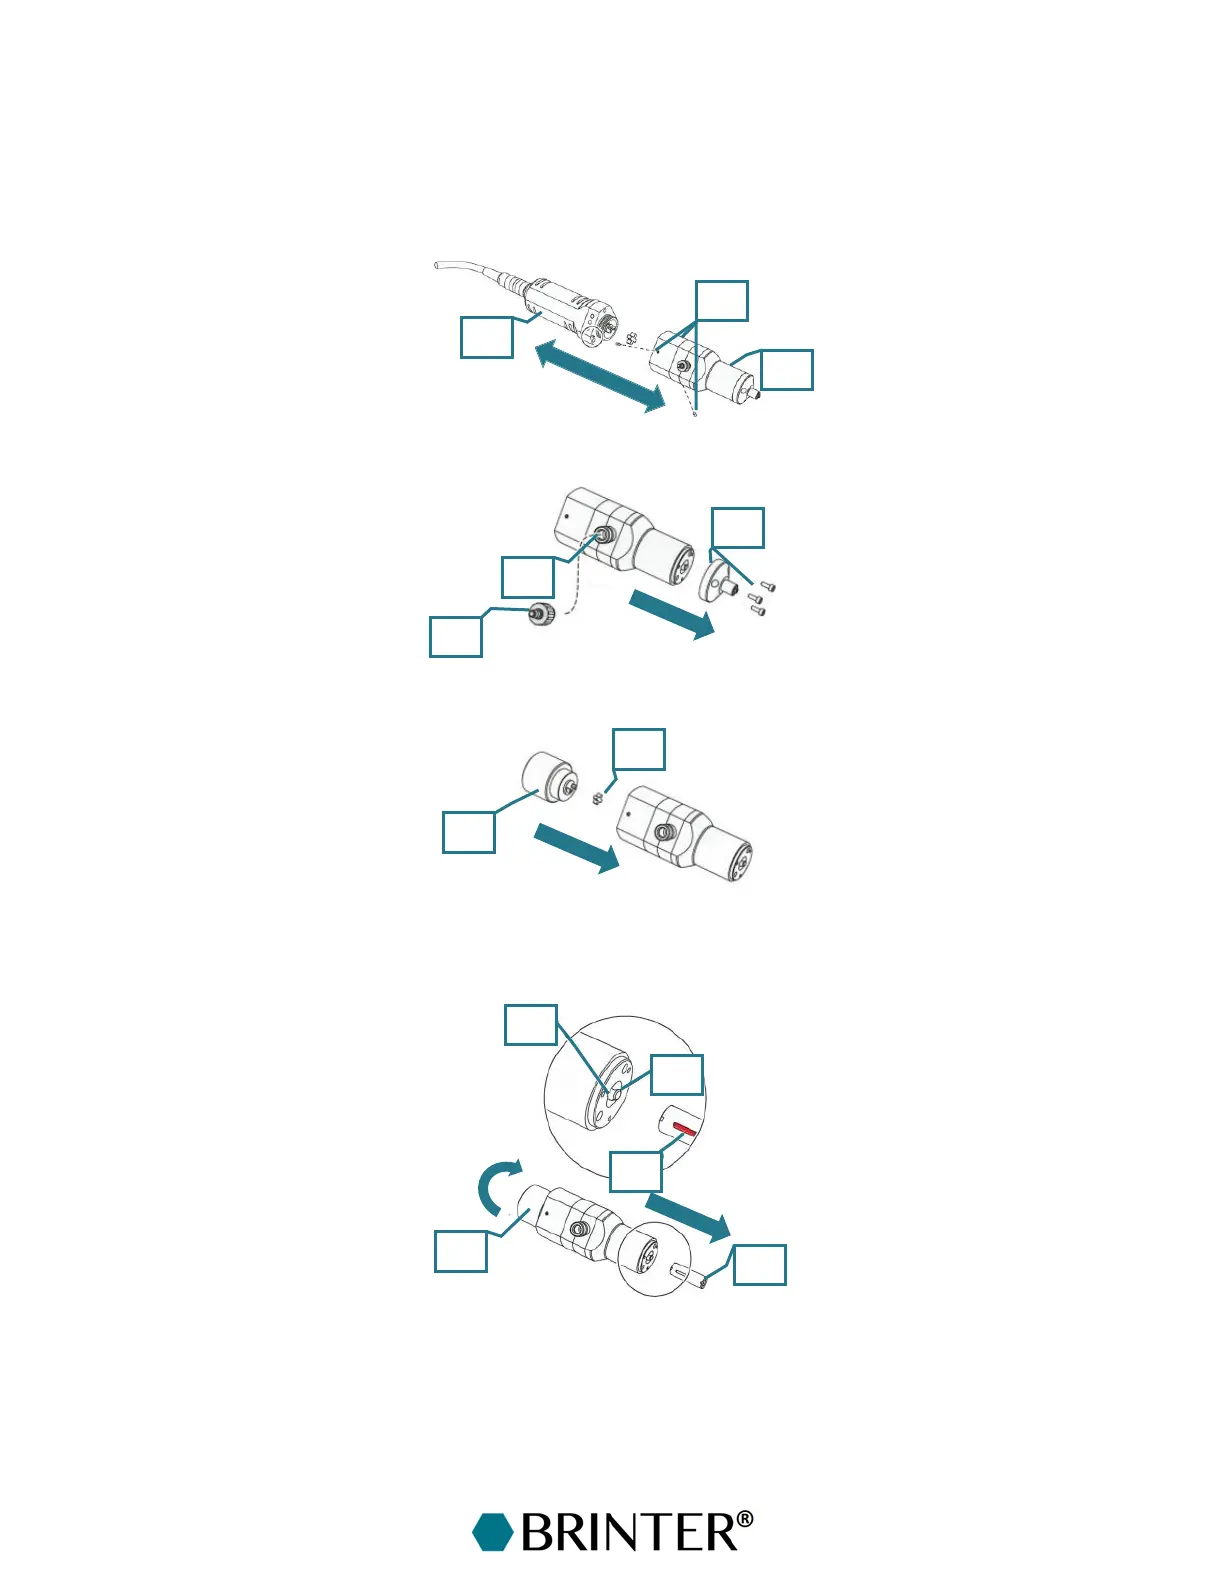
7.3.2 Disassembly of the Print Head
To clean the Visco Tool print head after printing, disconnect the print head from the Brinter
®
and
detach the material supply, i.e., the syringe barrel, from the print head.
Detach the dosing unit [1] from the drive unit [4] by unscrewing the set of threaded pins [10] from
the threads. Uncouple the dosing unit and drive unit by pulling them apart.
Detach the end piece [2]. Unscrew the valve attachment [19] from the bleed valve [17].
Dock the assembly aid [5] with the star-shaped coupling [3] on the dosing unit.
Turn the assembly aid [5] in the direction of the arrow.
The rotor assembly [6] then pushes the stator [7] out of the dosing unit until the dowel pin [8] is no
longer in the groove [9].
Detach the stator [7] from the rotor assembly [6] entirely by turning and pulling it. Uncouple the
assembly aid [5] from the dosing unit.