4- 23
Replacing the Printhead
TOP
Chapter 3
Printing by Objective
Chapter 4
Maintenance
Chapter 5
Using the Printer
in a Network
Environment
Chapter 6
Troubleshooting
Chapter 7
Operating the
Function Menu
Index
Contents
Chapter 2
Using Various Media
Chapter 1
Basic Use
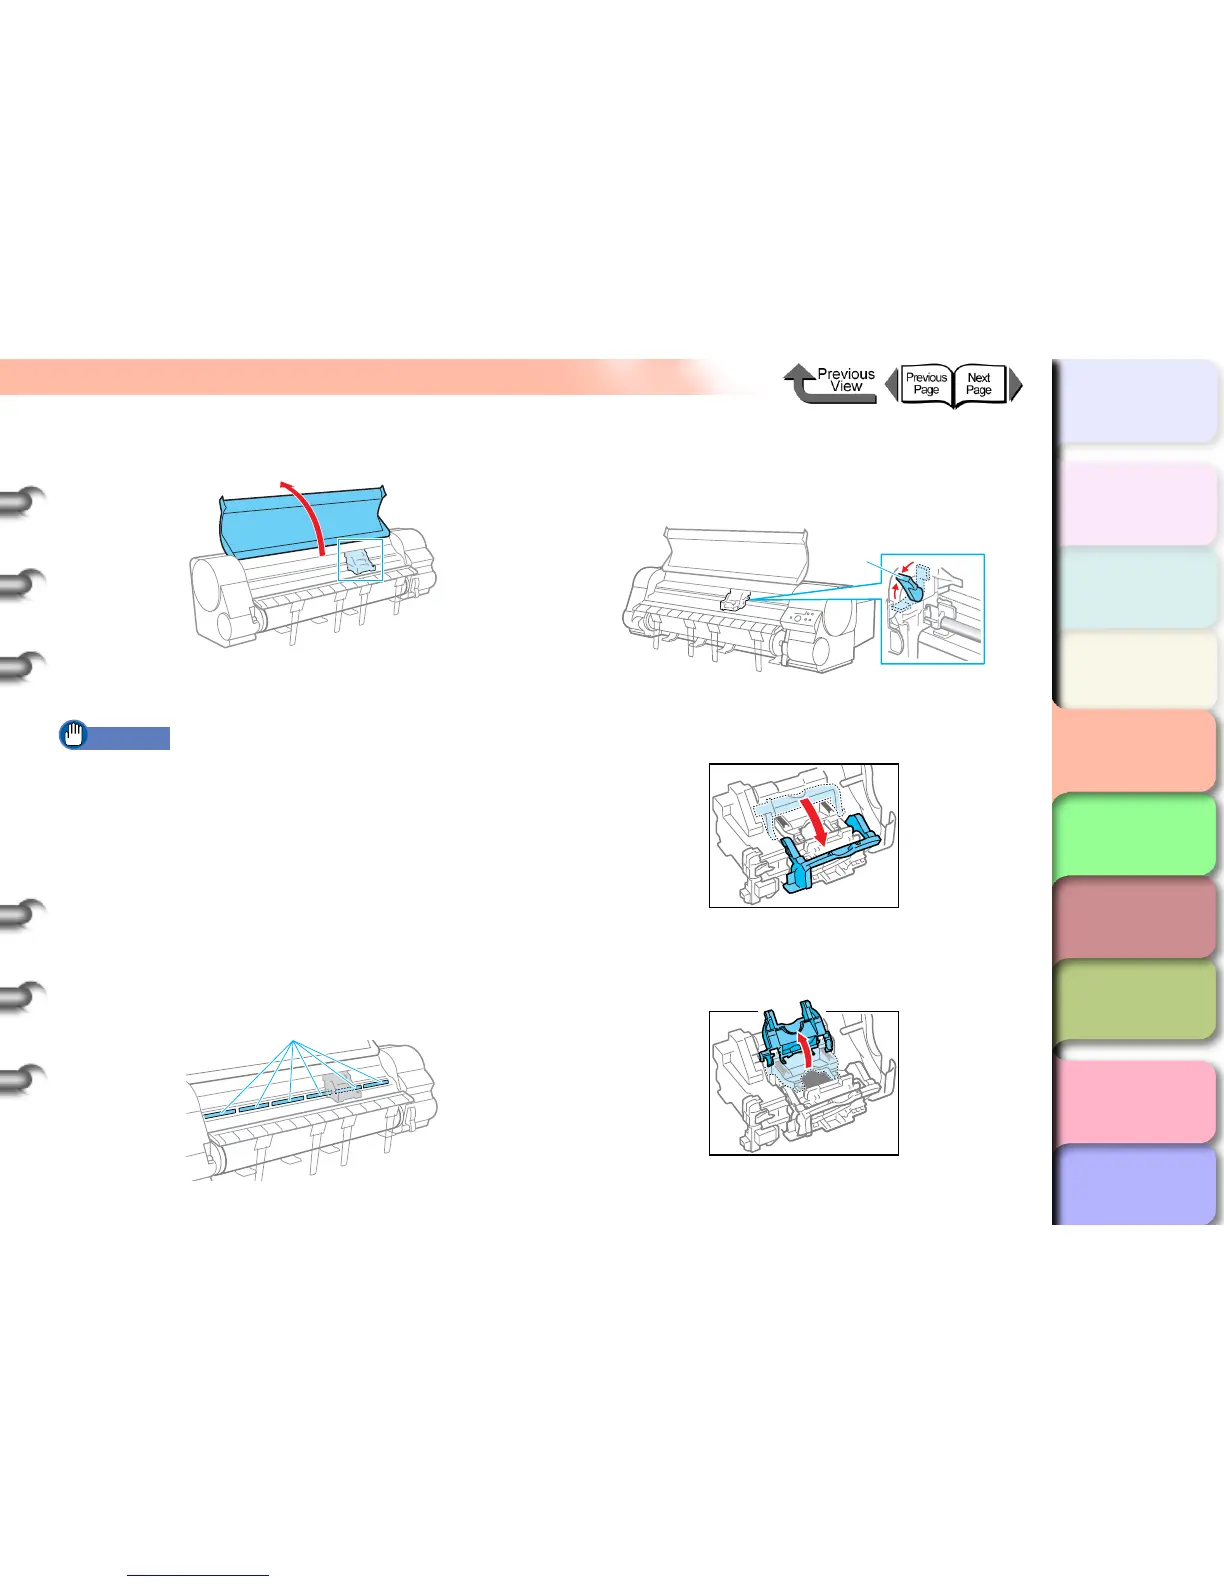
6 Open the top cover.
Rep. P.head OK is displayed on the printer
operation panel.
Important
z Do not touch any areas other than as directed. Doing
so may stain your hands or cause the printer to
malfunction.
z Before you start the procedure, wring out a damp cloth
and clean the carriage cover, printhead fixer cover,
and printhead fixer lever if they are dirty.
7 Wet and wring out a cloth, and then use the
cloth to wipe dirt from the intake ducts (c).
Clean the areas that are obscured by the intake duct
carriage by moving the carriage by hand.
8 If the printhead adjustment lever (d) is in the
high or low position, return it to the middle
(standard) position.
9 Pull the printhead fixer lever completely
forward to open it.
10Raise the printhead fixer cover completely to
open it.
c
d
 Loading...