Replace the GPU board
NOTE
When servicing components of the PRISMAsync always wear a grounded strap around your
wrist, to avoid electrostatic discharge that will harm your equipment.
NOTE
It might be possible that you have to re-install the software of the PRISMAsync after exchanging
the GPU.
Step Action
1
Remove side cover and middle bracket.
•
Follow the instructions as described in
Access internal components
on page 67
2
Unplug the power connector of the board.
3
Remove the screw of the metal PCI bracket.
•
Use a small Philips screwdriver to remove the screw used to mount the bracket to
the backside of the PRISMAsync.
4
Firmly press the PCI-E lock-mechanism to unlock the board.
•
The lock-mechanism is located at the bottom right side of the PCI-E connector on
the motherboard. Pressing it down will lift the board out of the connector.
5
Remove the board from the PRISMAsync.
6
Install the new board in the PCI-E connector.
• Firmly press the board in the PCI-E 1 connector (the upper). Check that the lock
mechanism is closed.
7
Fasten the graphic board.
•
Fix the board with a single screw on the PCI bracket side with a Philips screwdriver.
8
Connect the power connector to the board.
9
Re-install middle bracket and the side cover.
•
Make sure the fixing on the middle bracket is in position. It should fit exactly on the
GPU-board.
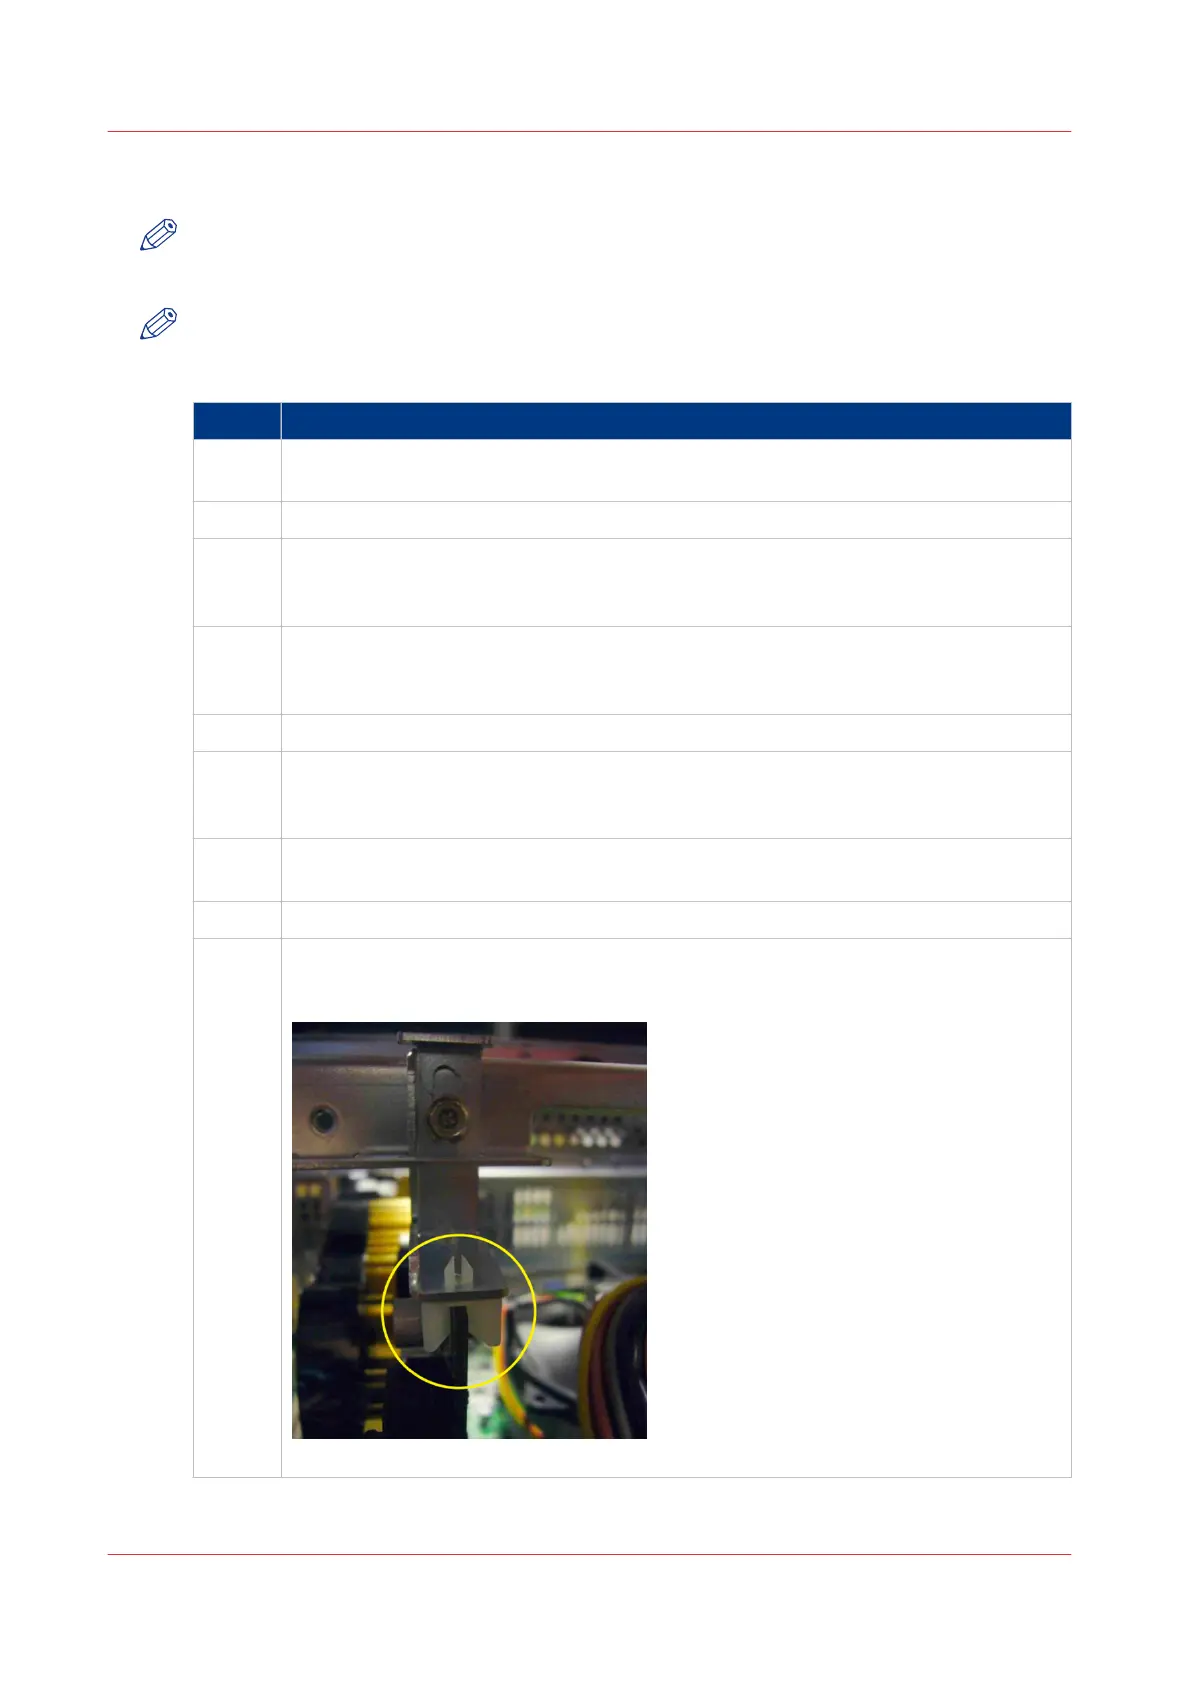
[18] Fixing of the PCI board
4
Replace the GPU board
68 Chapter 7 - Service procedures
PRISMAsync V3.2