Replace the DDI board
The DDI board handles the interfacing between the copier and the
PRISMAsync.
Only replace the board if you have checked the cables connected to the board.
NOTE
When servicing components of the
PRISMAsync always wear a grounded strap around your
wrist, to avoid electrostatic discharge that will harm your equipment.
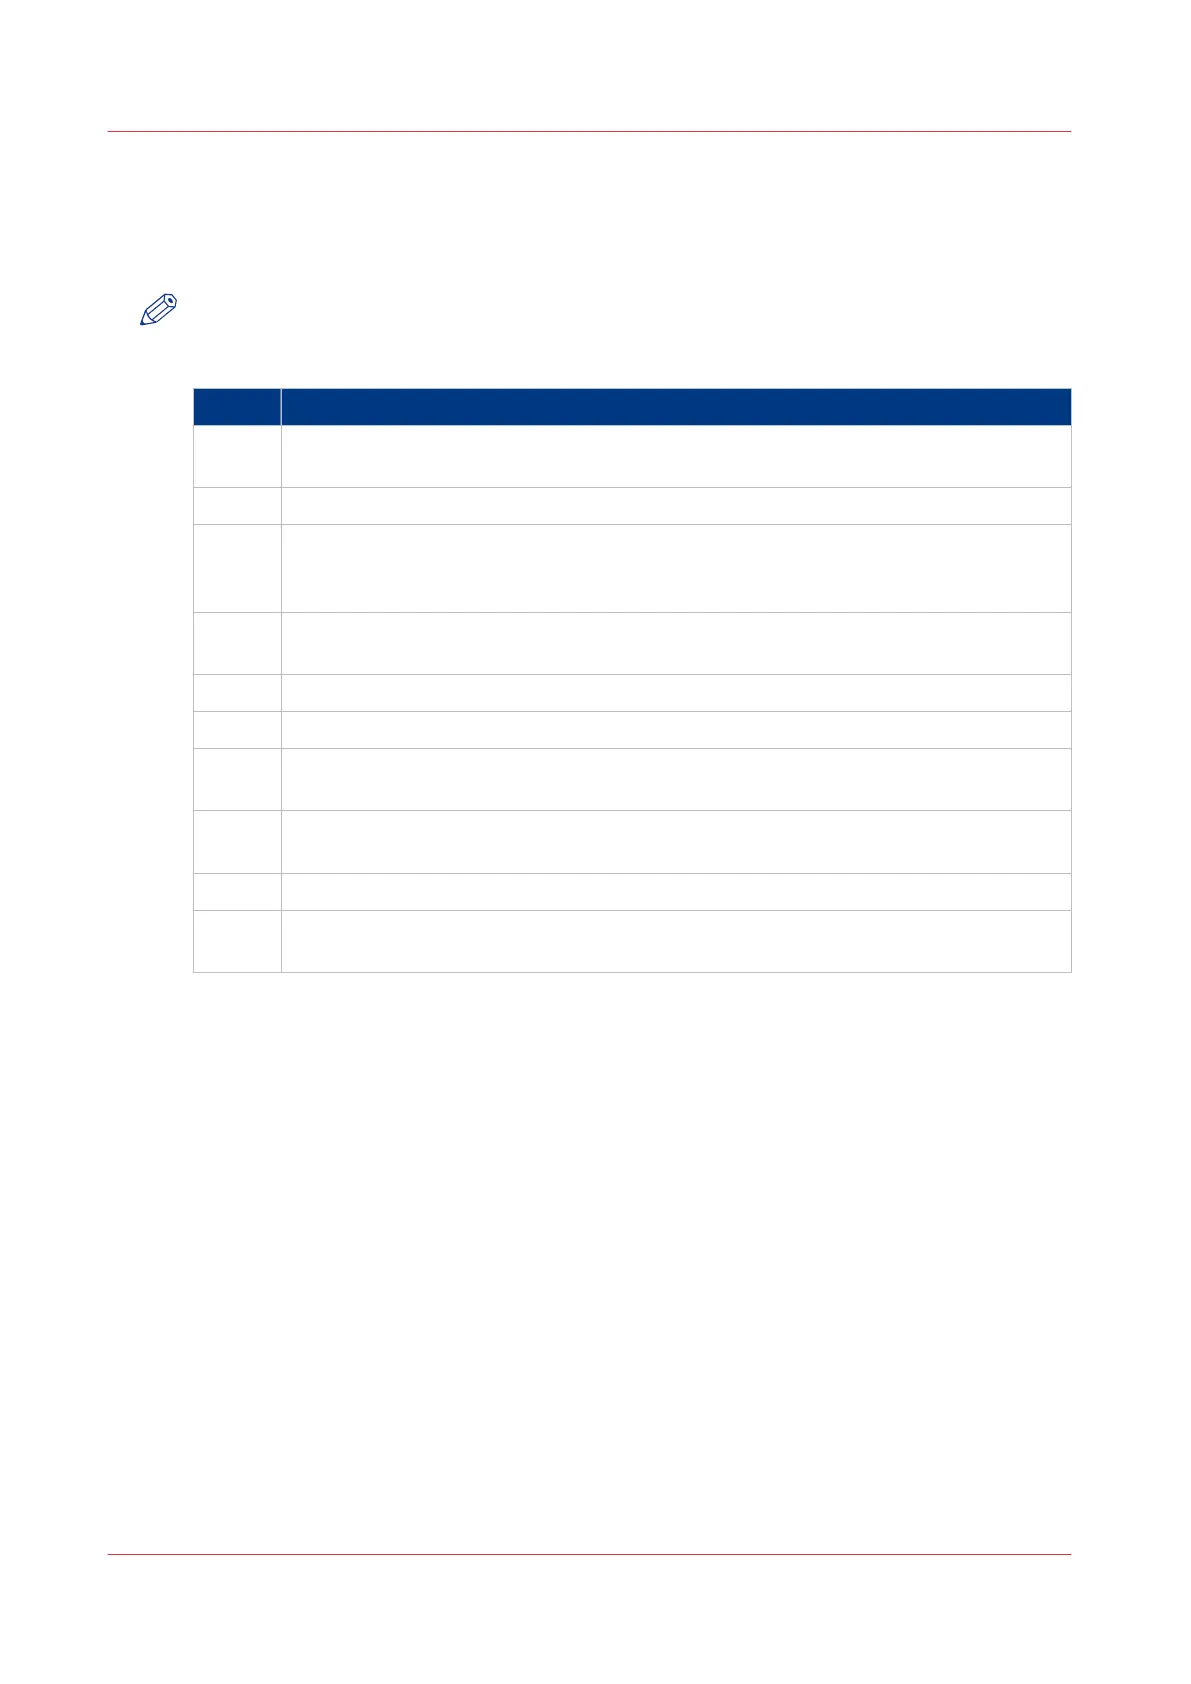
Step Action
1
Remove side cover and middle bracket.
Follow the instructions as described in
Access internal components
on page 67.
2
Unplug the power connector and internal connectors of the board.
3
Remove the screw of the metal PCI bracket.
Use a small Philips screwdriver to remove the screw used to mount the bracket to the
backside of the
PRISMAsync.
4
Remove the PCI card from it’s slot Hold the PCI card by the two top corners. Pull it
straight out of the socket.
5
Take the board out of the PRISMAsync.
6
Unpack the new board.
7
Place the board in the PCI-E connector.
Firmly press the board in the PCI-E connector. Use the PCI-E 3 port.
8
Fix the DDI board.
Fix the board with a single screw on the PCI bracket side with a Philips screwdriver.
9
Plug the internal connectors to the board.
10
Re-install middle bracket and side cover. Take care that the fixing on the middle
bracket is in position. It should fit exactly on the DDI-board.
Replace the DDI board
70 Chapter 7 - Service procedures
PRISMAsync V3.2