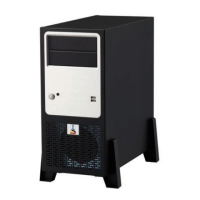
Replace the Base controller
If it is clear that an error can only be solved by replacing the motherboard a new base controller
can be ordered as a service part. This controller has all the hardware in it without the extra
boards that are added to make it a PRISMAsync controller (DDI board, AUX Control Board,
Ethernet Board, 22W1 Harness).
NOTE
When servicing components of the
PRISMAsync always wear a grounded strap around your
wrist, to avoid electrostatic discharge that will harm your equipment.
Perform the following actions to exchange the controller:
Step Action
1
Remove side cover and middle bracket.
•
Follow the instructions as described in
Access internal components
on page 67.
2
Remove extra boards
•
Remove the following boards:
• DDI board (See:
Replace the DDI board
on page 70 )
• AUX Control board (See:
Replace the AUX control board
on page 71 )
Check if you need a newer version of the AUX control board. (See conditions
above) If so, you do not have to remove the board.
• Additional Ethernet board (IPDS) (See:
Install/Replace the Ethernet board
on
page 75)
• (Optional) HDDs. (See:
Replace the Hard Disk Drives
on page 74 )
If HDDs are still working you can exchange the hard disks. In this case all set-
tings and jobs will be saved and no new system software installation is nee-
ded.
3
Remove harness 22W01
4
Remove the connections at the backside of the PRISMAsync
5
Unpack the base controller
6
Remove side cover and middle bracket.
•
Follow the instructions as described in
Access internal components
on page 67 .
7
Insert previously removed boards
•
Insert the following boards:
• DDI board (See:
Replace the DDI board
on page 70 )
• AUX Control board (See:
Replace the AUX control board
on page 71 )
Re-use the old board if possible, otherwise insert the new board. Be aware
that you have to connect the 22W01 harness too.
• Additional Ethernet board (IPDS) (See:
Install/Replace the Ethernet board
on
page 75 )
• (Optional) HDDs.
(See:
Replace the Hard Disk Drives
on page 74 ) See conditions above if it is
possible to re-use the HDDs.
8
Connect Harness 22W01
•
See
Connect Harness 22W01
on page 78
9
Re-install middle bracket and side cover.
•
Take care that the fixing on the middle bracket is in position. It should fit exactly on
the boards.
4
Replace the Base controller
76 Chapter 7 - Service procedures
PRISMAsync V3.2