Connect the PRISMAsync
You are now ready to make the following connections:
•
Operator console
• Copier interface connections
• Operator Attention Light
• Network cable connection
• Power cable connection
NOTE
Please follow standard Electro Static Discharge (ESD) precautions when handling electronic
components.
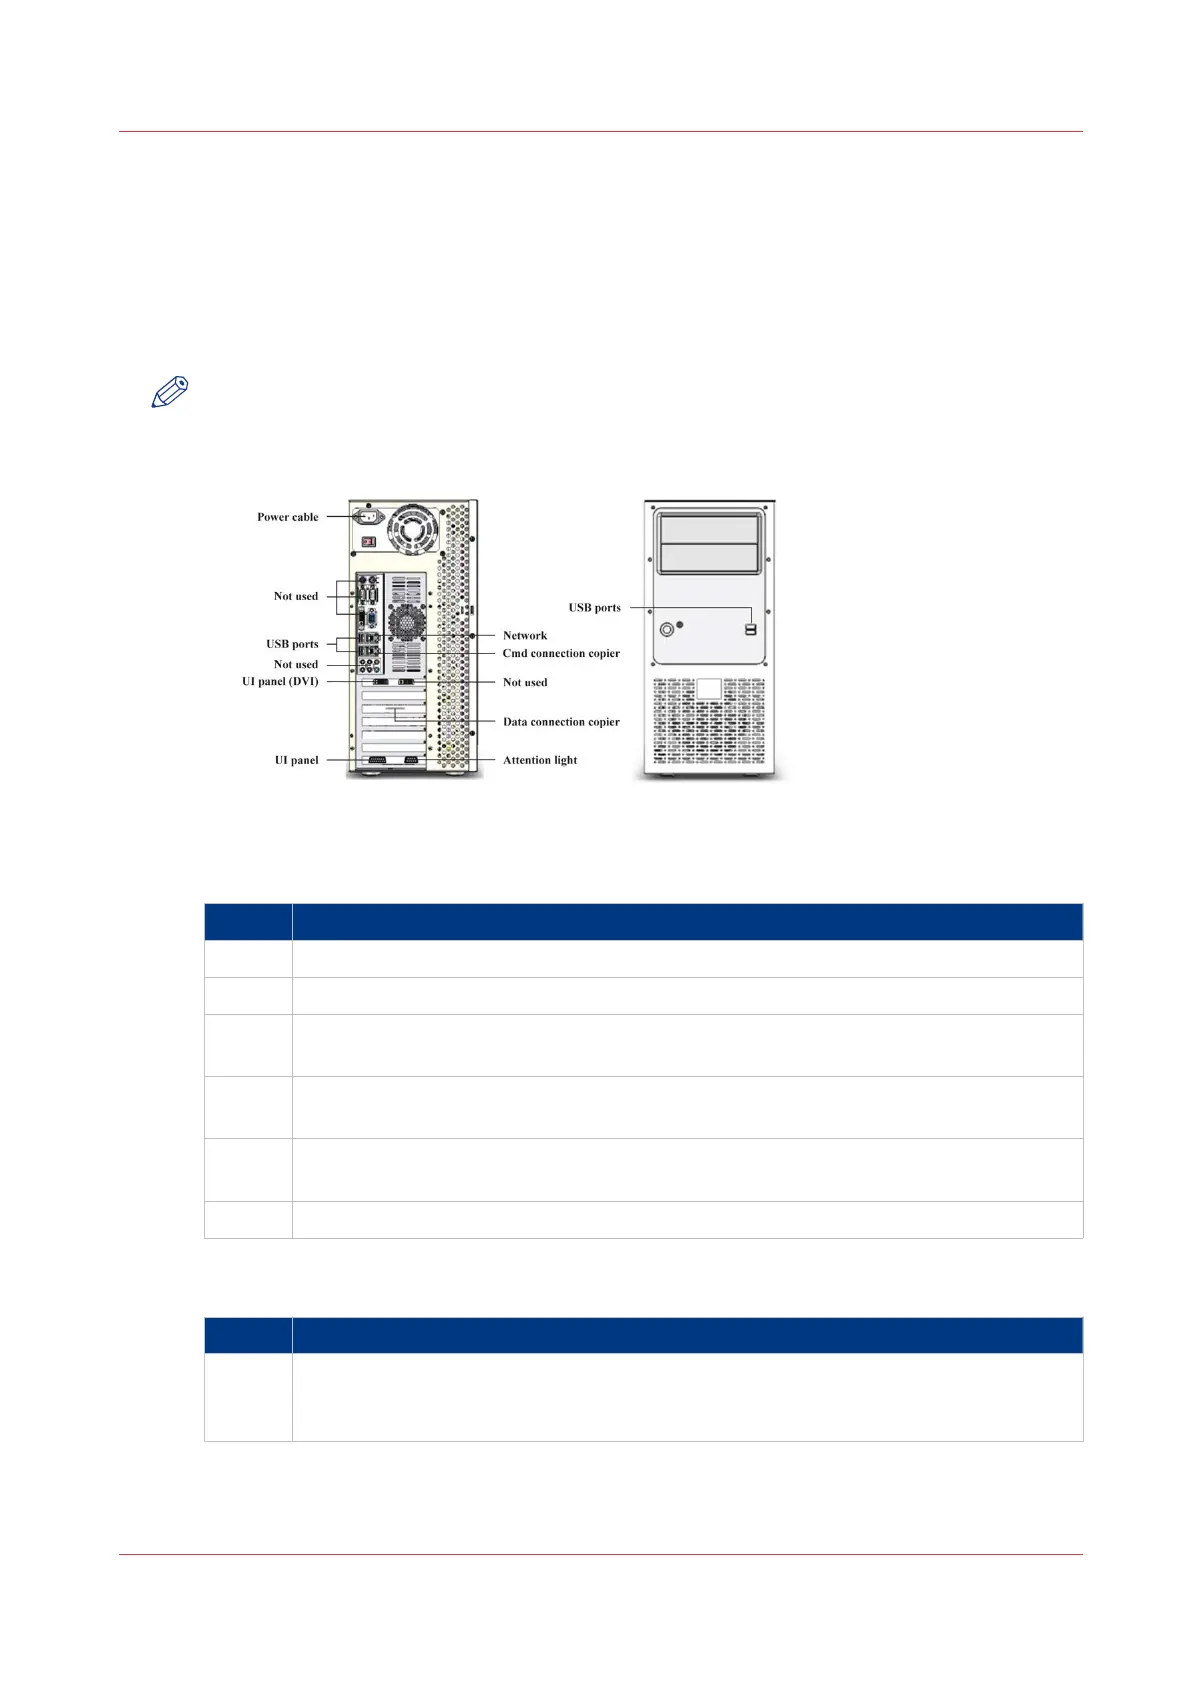
Connect the operator panel
Step Action
1 The cables needed for the connections are part of the operator attachment kit
2 Open the backside of the monitor.
3 Connect the DVI cable to the backside of the Operator panel. Connect the other side to
the left DVI port on the backside of the
PRISMAsync.
4 Connect the 15-pins D-sub connector to the connector on the backside of the PRISMA-
sync. Connect the other side to the backside of the operator panel.
5 Connect a USB cable to the backside of the operator panel. Connect the other side to
the backside of the
PRISMAsync
6 Close the backside of the operator panel.
Connect to the copier
Step Action
1
Connect one side of the Ethernet crossover-cable to the lower RJ45 connector on the
backside of the
PRISMAsync (Command/Status). Connect the other side to the RJ45
connector on the backside of the copier.
4
Connect the PRISMAsync
Chapter 3 - Installation 19
PRISMAsync V3.2