Replace the AUX control board
The AUX control board supplies power to the operator panel and controls the Operator Attention
Light.
NOTE
When servicing components of the
PRISMAsync always wear a grounded strap around your
wrist, to avoid electrostatic discharge that will harm your equipment.
Step Action
1
Remove side cover and middle bracket.
•
Follow the instructions as described in
Access internal components
on page 67.
2
Disconnect the power connector and internal connectors of the board.
3
Remove the screw of the metal PCI bracket.
•
Use a small Philips screwdriver to remove the screw used to mount the bracket to
the backside of the PRISMAsync
4
Remove the PCI card from it’s slot
•
Hold the PCI card by the two top corners. Pull it straight out of the socket.
5
Remove the board from the PRISMAsync.
6
Unpack the new board.
7
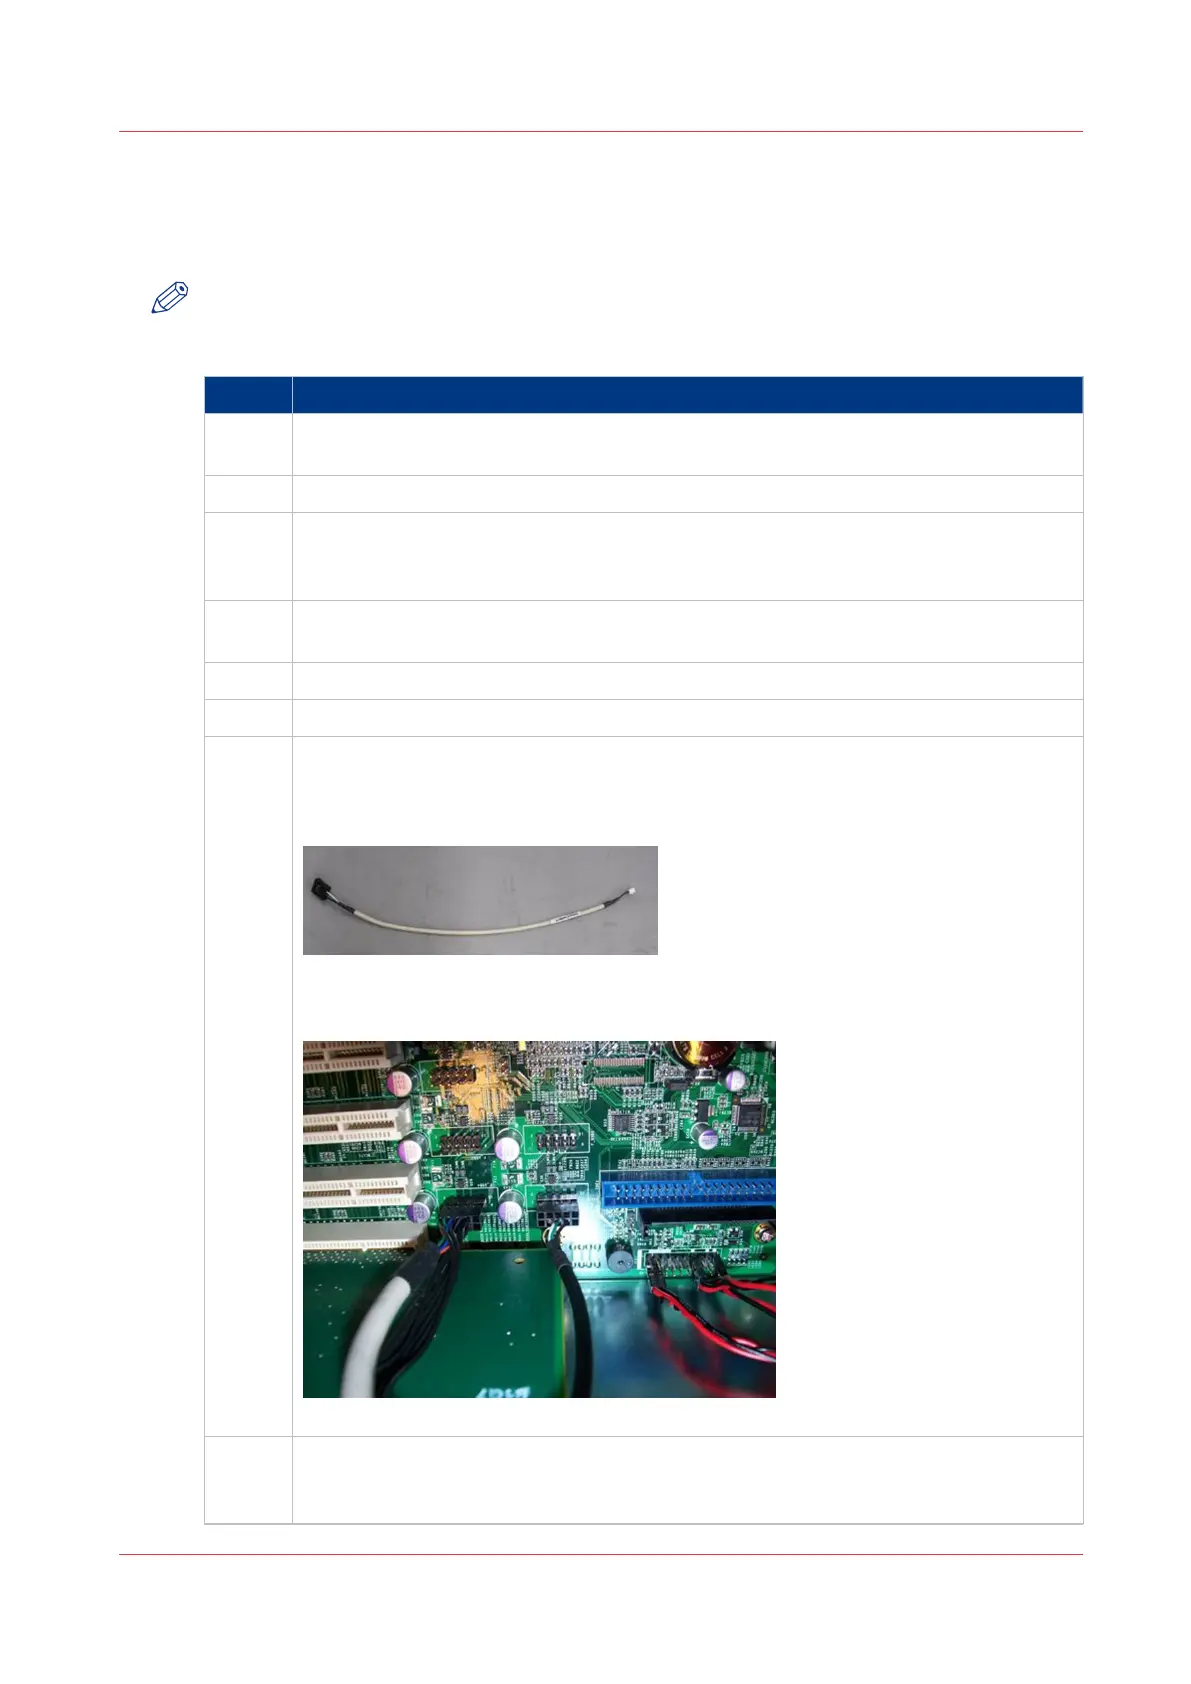
Connect the USB-wire connector
•
The USB wire connector (white side) must be connected to the Auxiliary Board. Be-
cause of the space between Board and controller box, it’s advised to do this before
inserting the board into the PCI connector.
[19] AUX board USB connector
•
Connect the other side of the connector to the nearest available USB pin header of
the motherboard.
[20] AUX to Motherboard USB connector
8
Install the board into the PCI slot.
•
Firmly press the board in the PCI connector. Use the PCI 4 port. It is the lowest PCI
connector on the Motherboard.
4
Replace the AUX control board
Chapter 7 - Service procedures 71
PRISMAsync V3.2