62-11785 8–14
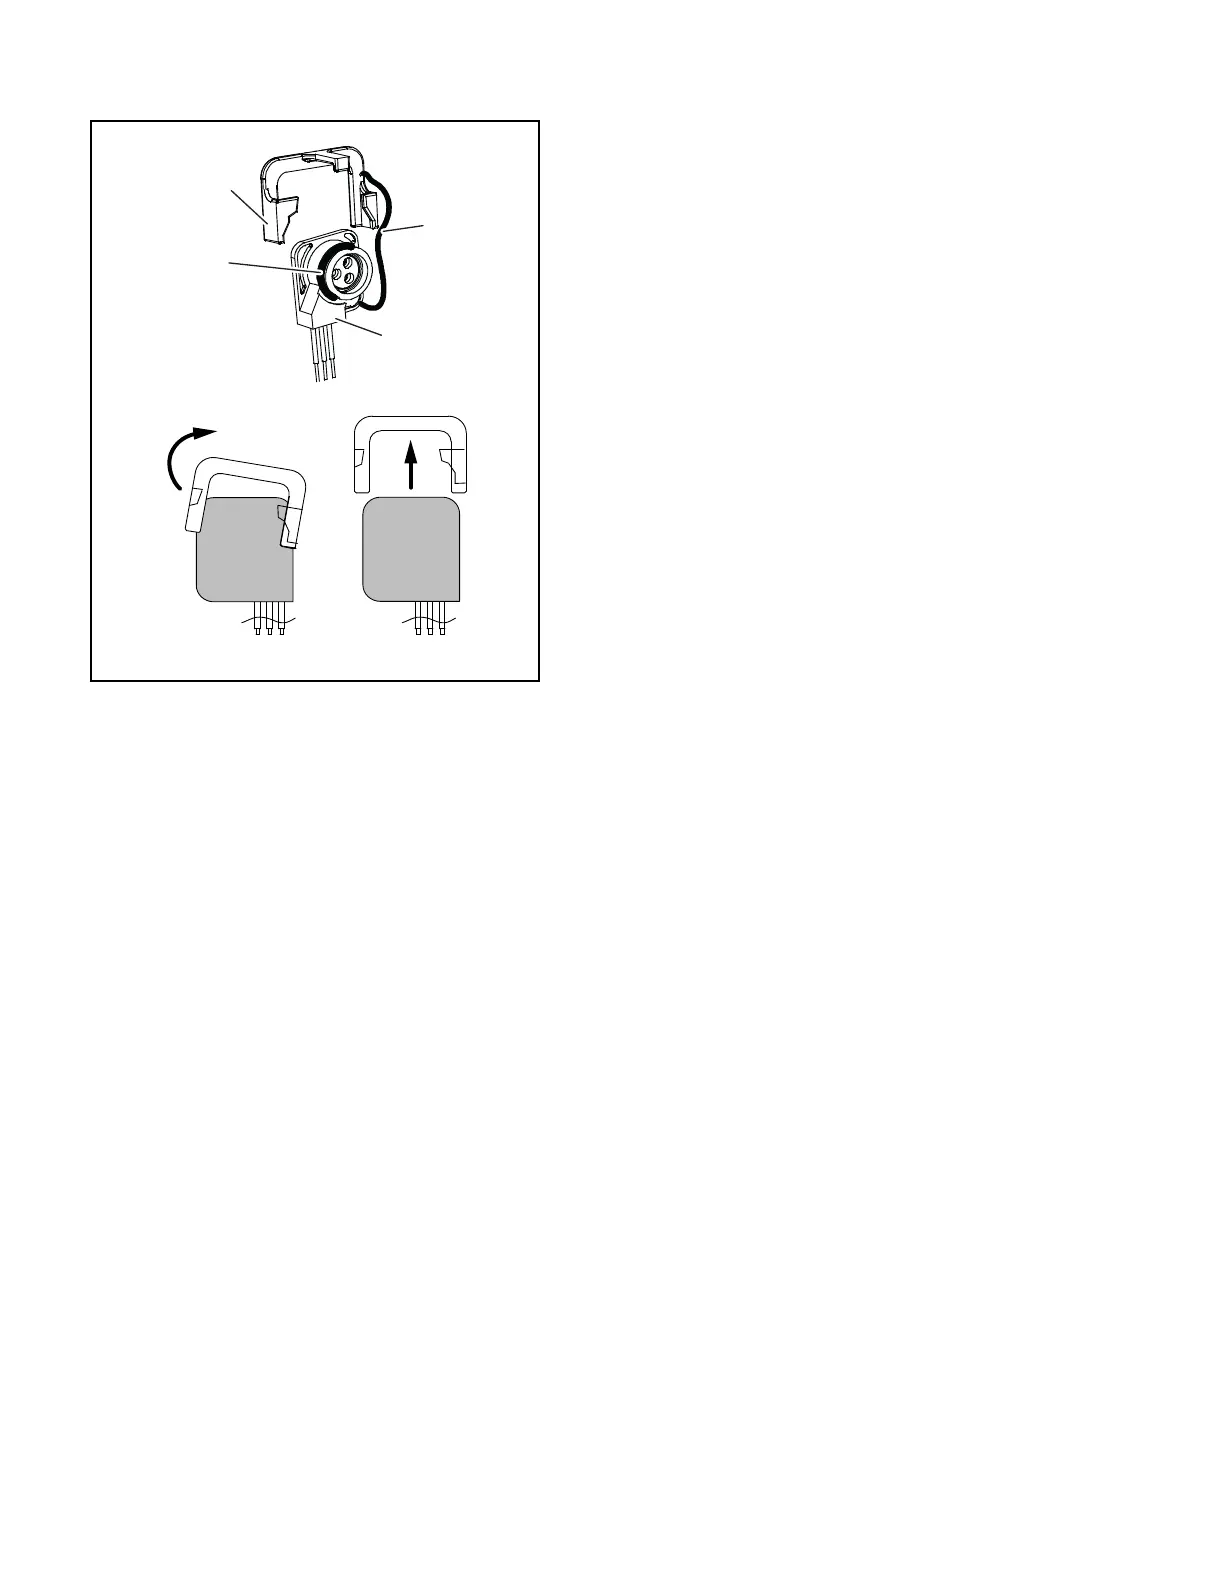
Figure 8.6 Compressor Plug Retaining Clip
8. Rotate the compressor to gain access to the
power plug. Remove the power plug retaining clip
(see
Figure 8.6
) by pulling out gently on the left
side (to clear the shorter left locking tab and rotate
the right locking tab) and then slide up and off the
plug. Pull the plug out and away from the
compressor to remove. Disconnect the ground
lead/ terminal from the compressor circle fence.
Inspect the power plug terminals to ensure
they are not deformed or have any signs of
heat or arcing. If any damage is noted,
replace the power cable.
9. Remove (slide out) the old compressor from the
unit and slide the new compressor into the unit.
Refer to
Figure 8.5
.
DO NOT add any oil to the replacement
compressor. Replacement compressor is
shipped with full oil charge of 60 oz.
10. Install the “D” ring into the square groove of the
power plug.
11. Inject a small amount of lubricant (shipped with the compressor) into each of the pin connections in the power
plug. For ease of installation and to prevent the “D” ring from rolling, use a small amount of the lubricant to
lubricate the outside radius of the “D” ring.
12. Align the power plug with the cutout in the terminal fence. Insert the power plug at a slight angle allowing the “D”
ring to start at the lower portion of the terminal fence. Apply even pressure on the back of the power plug until the
flat surface of the plug seats against the outer face of the terminal fence. Insertion force of the power plug to the
compressor socket may be difficult, use of a blunt hard object to pound compressor plug into the compressor
socket is not recommended. Compressor pin damage may occur if plugs are hammered into place. Use light
tapping from the palm of hand to aid in seating the plug. If the plug is tight fitting, remove plug and inspect the o-
ring for proper seating in groove, add more lubricant & retry.
13. Reinstall the plug retaining bracket or molded plug retainer as required. Inspect that molded plug retainer is fully
engaged in the circle fence, if not engaged correctly, insert the compressor plug deeper into socket and verify the
compressor plug is inserted squarely to the socket.
14. Attach the compressor grounding terminal to the compressor circle fence using new ground screw provided.
Grounding screw is a thread cutting type screw.
Due to thread cutting nature of the ground screw, higher initial torque is required to “cut” threads into
the base metal. This high initial torque can mislead one to believe the screw is tight. Visually verify that
screw is actually providing a clamping pressure to the grounding terminal and ring terminal is tight.
15. Install the four base-mounting bolts loosely.
16. Place new Teflon seals at the compressor suction and discharge ports. Apply a slight amount of mineral oil
(alkylated benzine oil CTD P/N 07-00274) to the economizer port O-ring, back side of sleeves, and coupling nut
and put in place at the economizer line connection port. Hand tighten all three connections.
17. Torque mounting bolts to 89 ft-lbs (66 Nm).
Retainer
Tether
Cable
“D” Ring
(Seal)
 Loading...