CTM Parts List 93
Cat. No. 01029401
Appendix A Hi-Flo 3/3e to CTM Conversion
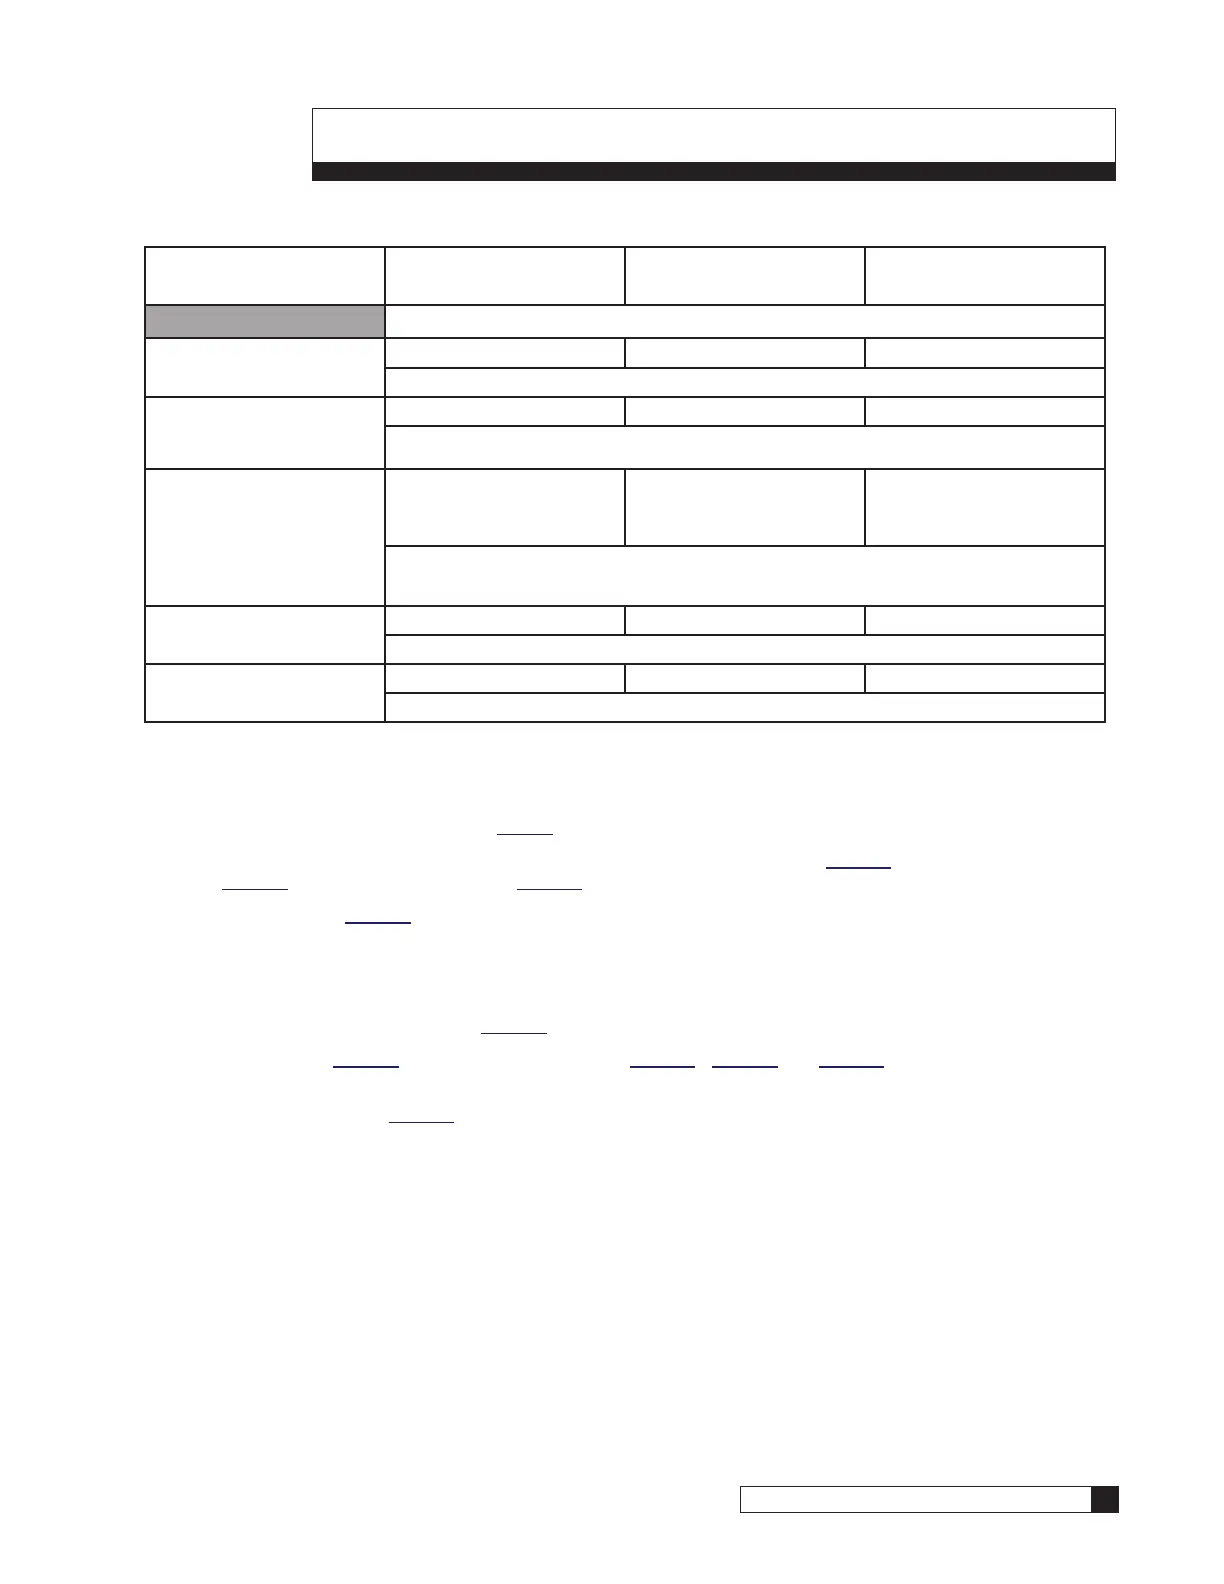
1. Order the approprate retrofit kit and plumbing adapter, see table:
Original
Hi-Flo 3/3e Model
Single Timeclock Single Meter HWB
Downflow
Multi-Tank
Meter Downflow
Retrofit Kits*/Plumbing Adapters
HC-60-1.5T
01029536 Kit 01029521 Kit 01029517 Kit
01029500 (without ports) or 01029502 (with ports)
HC-90-1.5T
HC-120-1.5T
HC-150-1.5T
01029537 Kit 01029522 Kit 01029518 Kit
01029500 (without ports) or 01029502 (with ports)
HC-120-2T
HCE-120-2
HC-150-2T
HCE-150-2
HC-210-2T
HCE-210-2
01029537 Kit 01029522 Kit 01029518 Kit
01029501 (without ports) or 01029503 (with ports)
HC-300-2T, HCE-300-2
01029538 Kit 01029523 Kit 01029519 Kit
01029501 (without ports) or 01029503 (with ports)
HC-450-2T, HCE-450-2
01029539 Kit 01029524 Kit 01029520 Kit
01029501 (without ports) or 01029503 (with ports)
*Retrofit Kits include the CTM control valve, GBE controller and sizing kit.
2. When you remove the Hi-Flo 3/3e control valve, it is critical to keep the manifold from coming up with the con-
trol valve.
3. Mount the CTM control valve (See page 8).
4. Make sure, that the control valve has the correct eductor throat and nozzle (page 17), brine refill control insert
(page 18) and drain line flow control (page 94). Replace parts using the sizing kits, if necessary.
5. Insert the PRV (page 16) and vacuum breaker for metered control valves or plugs for timeclock control valve.
6. If possible, move the tank so that either the inlet or outlet pipe is lined up with the control valve. This can
decrease the amount of plumbing needed in making the conversion. Reconnect the plumbing, drain line and
brine line. Connect the PRV to a suitable floor drain independent of the drain line for emergency relief.
7. Install accessories, if applicable (page 27)
8. Attach tubing (page 20) and electrical connections (page 94 - page 25 and page 27 (for multi-tank
systems)).
9. Initiate Final Startup (page 43)

 Loading...


