Web Operations 167
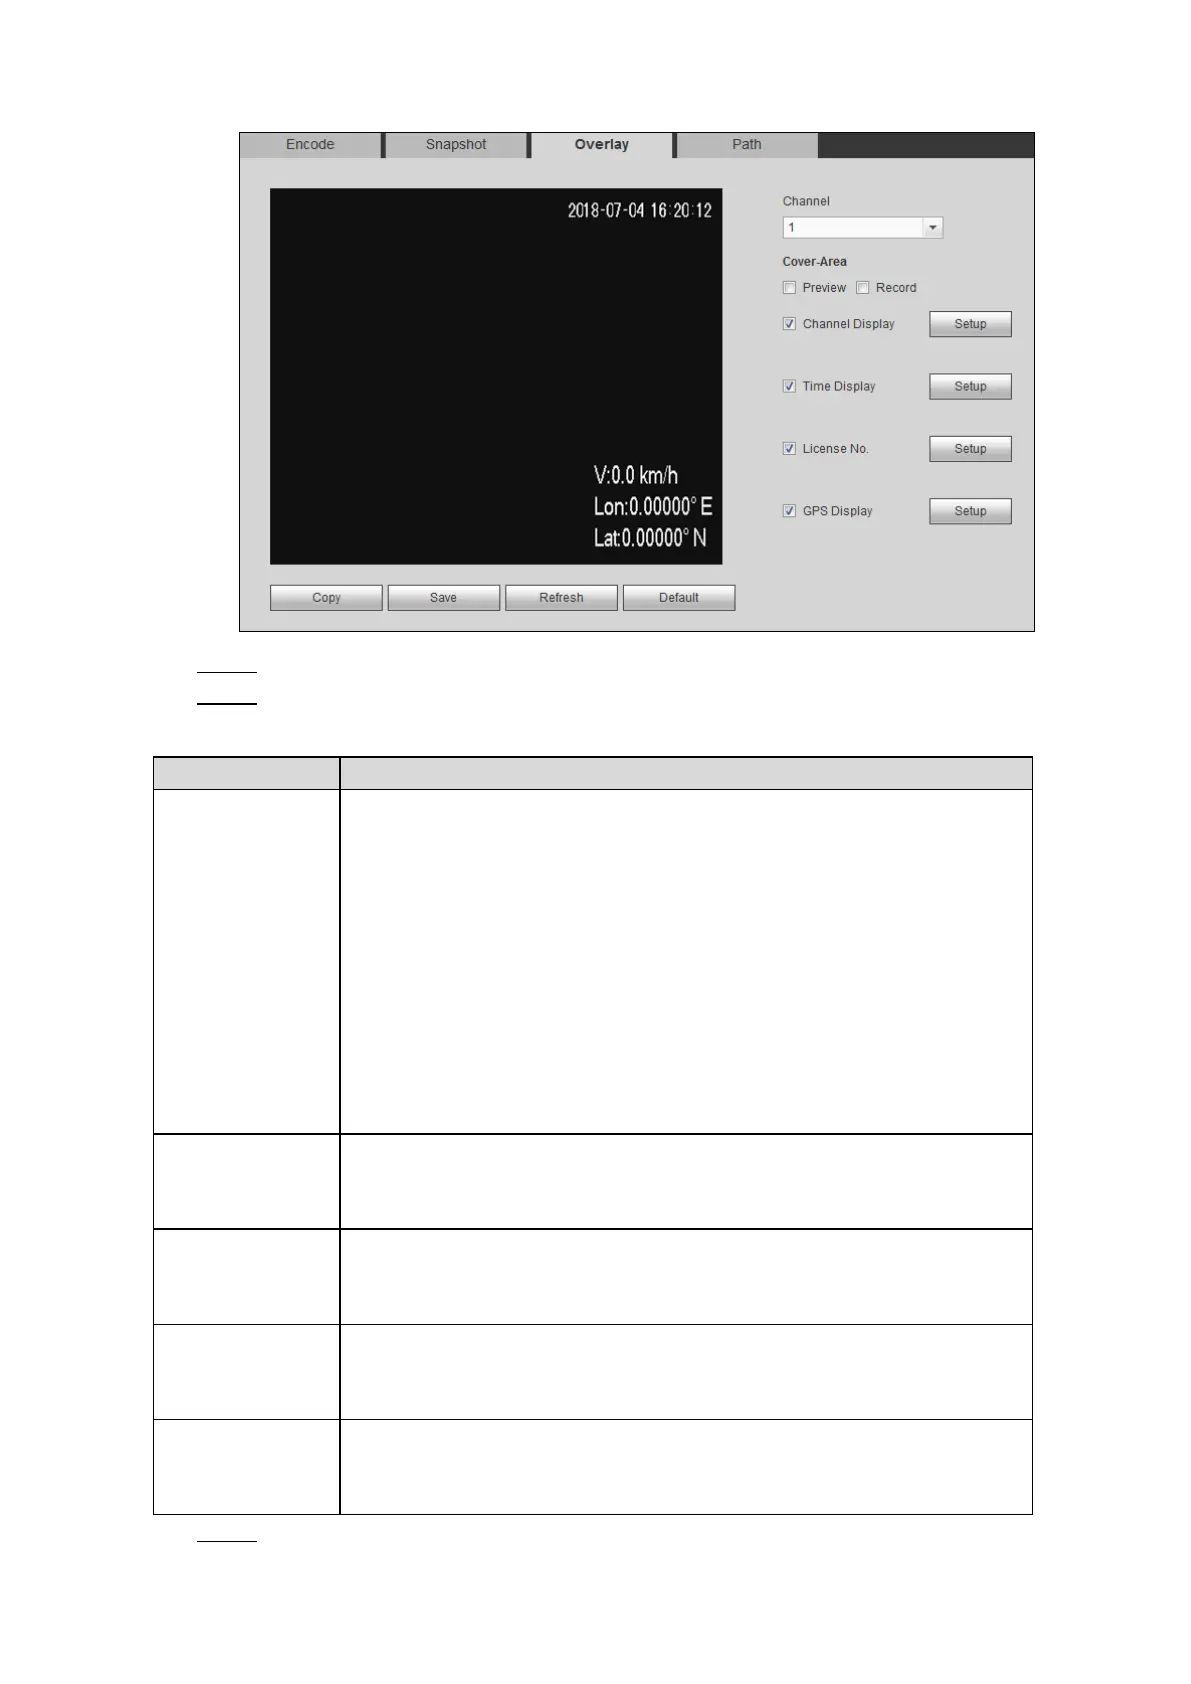
Overlay settings Figure 5-50
Select a channel. Step 2
Configure the parameters. For details, see Table 5-21. Step 3
Table 5-21 Overlay settings parameters description
Select the Preview check box or the Record check box, the Setup
button is displayed. Click Setup, and then hold down the left mouse
button to select the area that you want to cover.
When Channel 1 to Channel 8 is selected, both Preview and Record
check boxes are displayed. When Channel 9 to Channel 12 is selected,
only the Record check box is available.
Preview: The covered area is visible when output to VGA monitor or
small screen, but invisible when output to web or during recording.
Record: The covered area is invisible when output to VGA monitor
or small screen, but visible when output to web or during recording.
Maximum four covered areas can be set.
Select the Time Display check box, the Setup button is displayed. Then
click Setup, the time is displayed on the channel window, and then drag
it to a proper location.
Select the Channel Display check box, the Setup button is displayed.
Then click Setup, the channel display frame is displayed on the channel
window, and then drag it to a proper location.
Select the License No. check box, the Setup button is displayed. Then
click Setup, the license number is displayed on the channel window, and
then drag it to a proper location.
Select the GPS Display check box, the Setup button is displayed. Then
click Setup, the GPS display frame is displayed on the channel window,
and then drag it to a proper location.
Click Save. Step 4
 Loading...