Figures
1-1. Front panel of a 2U library ......1-1
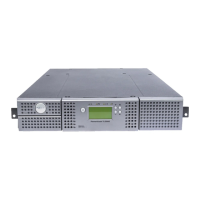
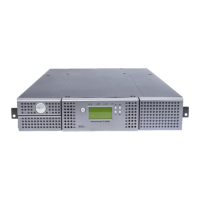
1-2. Front panel of a 4U library ......1-2
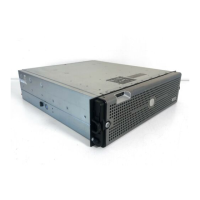
1-3. Rear panel of a 2U library with a SCSI drive 1-3
1-4. Rear panel of a 4U library with full height
Fibre Channel drive and half height SCSI
and SAS drives ..........1-4
1-5. Rear panel of a 2U library with a full height
dual port SAS drive .........1-4
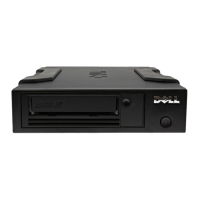
1-6. Library drive sled without ESD springs
(SCSI sled shown) .........1-9
1-7. Library drive sled with ESD springs [1]
(SAS sled shown) .........1-9
2-1. Power-ON screens .........2-2
2-2. Web User Interface login page .....2-6
2-3. 2U library System Status screen .....2-6
2-4. 4U library System Status screen .....2-6
2-5. 4U library System Status screen showing
media attention status ........2-7
2-6. 4U library System Status screen showing a
power supply failure ........2-7
3-1. Configuration of a one - partition system 3-4
3-2. Configuration of a two - partition system 3-4
3-3. Configuration of a three - partition system 3-5
3-4. Configuration of a four - partition system 3-5
3-5. Examples of SCSI element addressing 3-6
4-1. Installing foot pads on the bottom of the
library enclosure ..........4-4
4-2. Shipping lock and label .......4-5
4-3. Library shipping lock and label storage
location .............4-5
4-4. Rack Kit mounting hardware......4-7
4-5. Examples of EIA units for round hole and
square hole installations .......4-7
4-6. Rear view of a rack showing the narrow
part of the rail...........4-8
4-7. 2U library side screws to remove ....4-8
4-8. 2U library rack anchors and mounting
brackets .............4-9
4-9. Sliding the 2U library into the rack 4-9
4-10. Sliding the 4U library into the rack 4-10
4-11. Securing the 2U library to the rack 4-10
4-12. Securing the 4U library to the rack 4-11
4-13. Attaching a SCSI host interface cable to the
2U library ............4-12
4-14. Attaching host interface cables to the 4U
library .............4-12
4-15. Attaching a SAS interface cable to the 2U
library .............4-12
4-16. Removing the protective label from the
power receptacle .........4-13
4-17. Log in screen on the Web User Interface 4-18
4-18. The 2U library Configure Library: General
screen.............4-20
4-19. Example: The 4U library Configure
Library: General screen .......4-20
4-20. The 4U library Configure Library: Logical
Libraries page ..........4-21
4-21. The Configure Library: Path Failover
Feature Activation screen.......4-21
4-22. Feature Key verification screen .....4-22
4-23. Feature Activation Key screen .....4-22
4-24. Configure Library: Encryption Activation
screen.............4-23
4-25. The Configure Library: Drive screen 4-24
4-26. Configure Library: Network Page 4-25
4-27. Warning Screen ..........4-26
4-28. The Configure Library: User Access screen 4-27
4-29. The Configure Library: Date and Time
screen.............4-28
4-30. The Configure Library: Logs and Traces
screen.............4-28
4-31. The Configure Library: Email Notification
screen.............4-29
4-32. Configure Library: SNMP Page 4-30
4-33. 2U library left magazine .......4-33
4-34. 2U library right magazine ......4-33
4-35. 2U library I/O Station in the left magazine 4-34
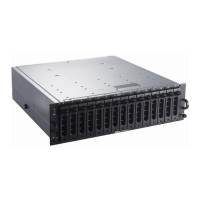
4-36. 4U library left magazines.......4-34
4-37. 4U library right magazines ......4-35
4-38. 4U library I/O Station in the lower left
magazine ............4-35
4-39. Finger Holes on back side of 4U library
I/O Station ...........4-36
5-1. 2U Library Control Keys .......5-8
5-2. 4U Library Control Keys .......5-8
5-3. Operator Control Panel Menu Tree 5-10
5-4. Monitor: Library menu .......5-11
5-5. Monitor: Drive menu ........5-13
5-6. Example of a 4U Monitor: Inventory menu 5-15
5-7. Overview of inventoried cartridges: Lower
Left Magazine of a 4U Library .....5-15
5-8. Detailed information on cartridges residing
in a magazine ..........5-16
5-9. Control: I/O Station menu ......5-16
5-10. Control: Move Cartridges menu 5-17
5-11. Control: Magazine menu .......5-17
5-12. Control: Re-Inventory menu......5-18
5-13. Configure: Logical Libraries menu 5-19
5-14. Configure: Library menu .......5-20
5-15. Configure: Drive menu .......5-23
5-16. Configure: Network menu ......5-24
5-17. Configure: Set Access PIN menu 5-26
5-18. Pound sign (#) shows accessible menus
when access PIN is enabled but before it is
entered.............5-27
5-19. Configure: Save/Restore menu .....5-27
5-20. Configure: Set Date and Time menu 5-29
5-21. Configure: Path Failover .......5-30
5-22. Service: Library Verify menu .....5-30
5-23. Service: Run Tests menu .......5-31
5-24. Service: Service menu ........5-32
vii