5. Left/Video-fan cable connector (FANR2)
6. Battery-cable connector (BATT1)
7. Primary M.2 solid state drive connector (SSD2)
8. Touchpad-cable connector (TPAD1)
9. Memory-module connectors (DIMM1 and DIMM2)
10. Wireless-card connector (WLAN1)
11. USH-board cable connector (CN661)
12. Secondary M.2 solid state drive connector (SSD1)
13. WWAN-module connector (WWAN1)
14. Speaker-cable connector (SPK1)
The following images indicate the location of the system board and provide a visual representation of the removal procedure.
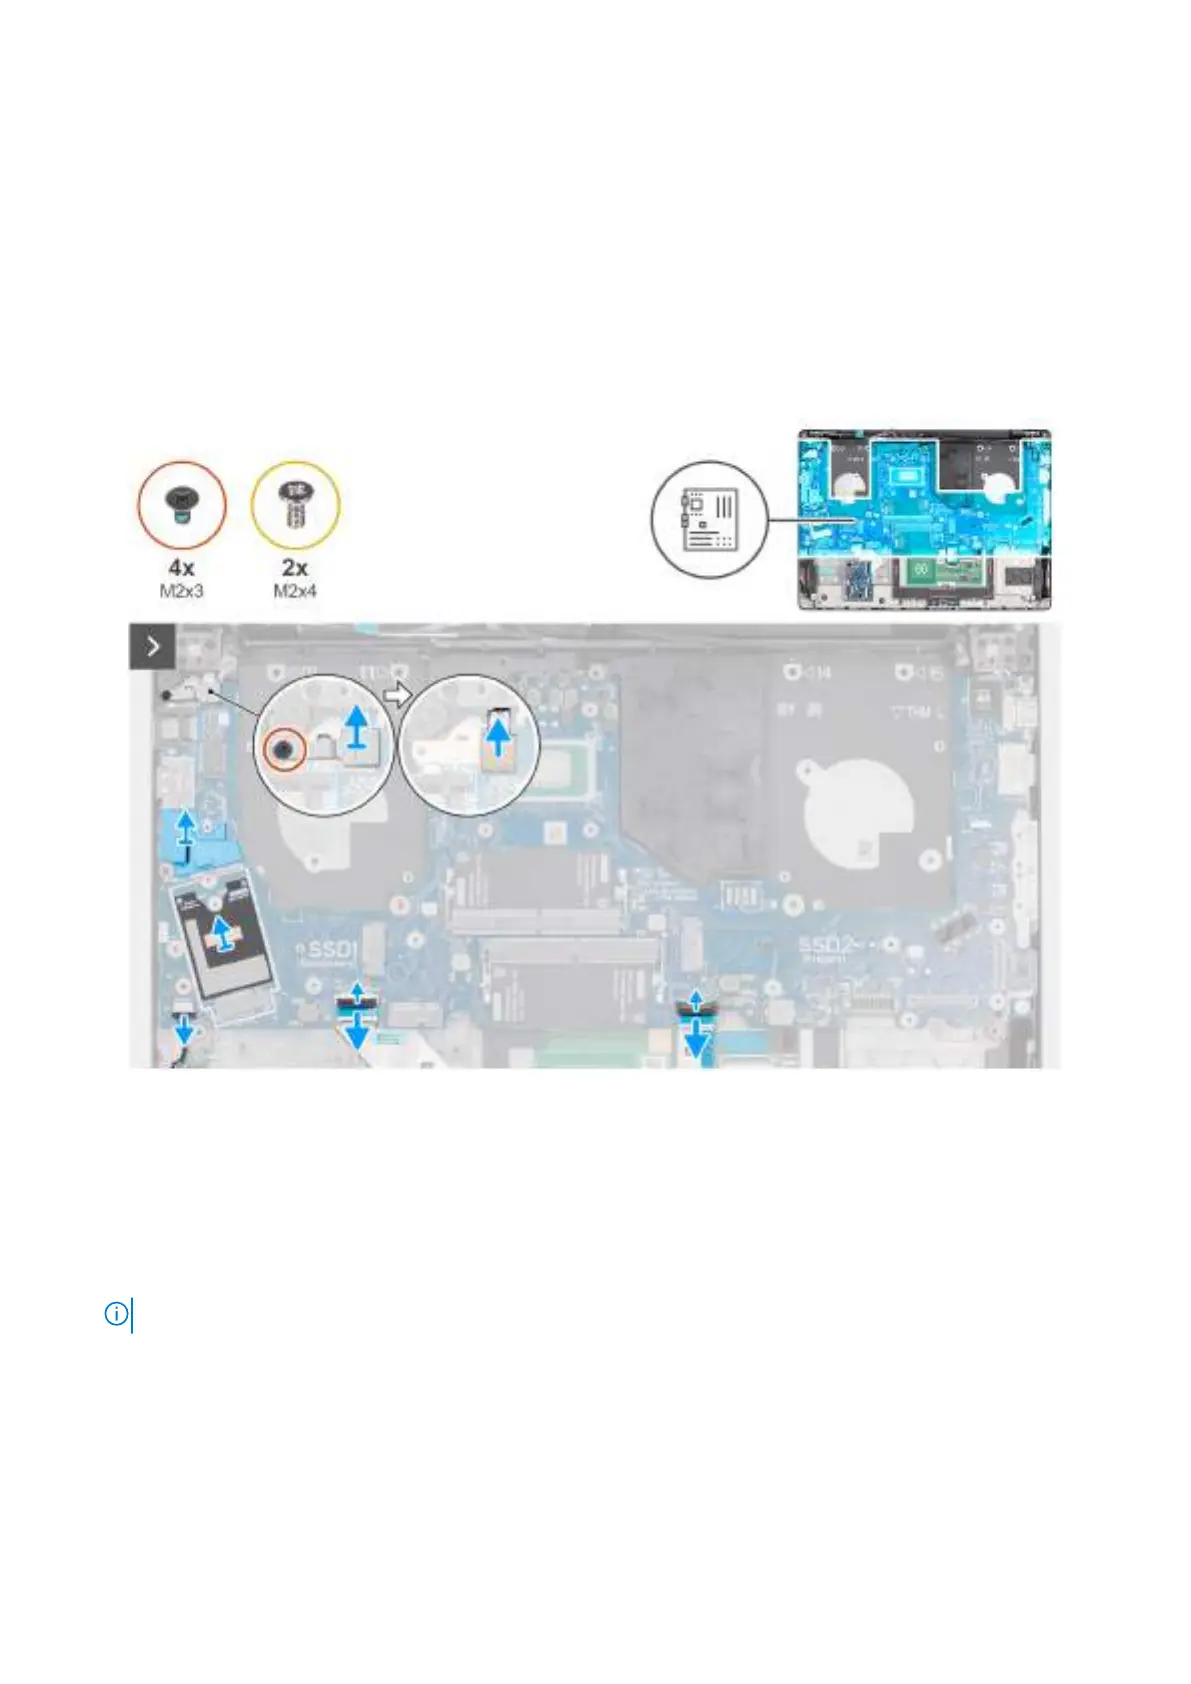
Figure 79. Removing the system board
Steps
1. Remove the reusable Mylar sheet with thermal pads from the system board and transfer it to the new replacement system
board.
2. Remove the reusable WWAN-antenna cable routing rubber guide from the system board and transfer it to the new
replacement system board.
3. Remove the screw (M2x3) that secures the fingerprint-reader bracket to the palm-rest assembly.
NOTE: Steps 1 to 3 apply only to computers shipped with a fingerprint reader installed.
4. Lift the fingerprint-reader bracket off the system board.
5. Disconnect the fingerprint-reader cable from the connector (FP1) on the system board.
6. Disconnect the following cables from the system board:
a. Speaker cable (SPK1)
b. Touchpad cable (TPAD1)
c. USH-board cable (CN661)
112
Removing and installing Field Replaceable Units (FRUs)