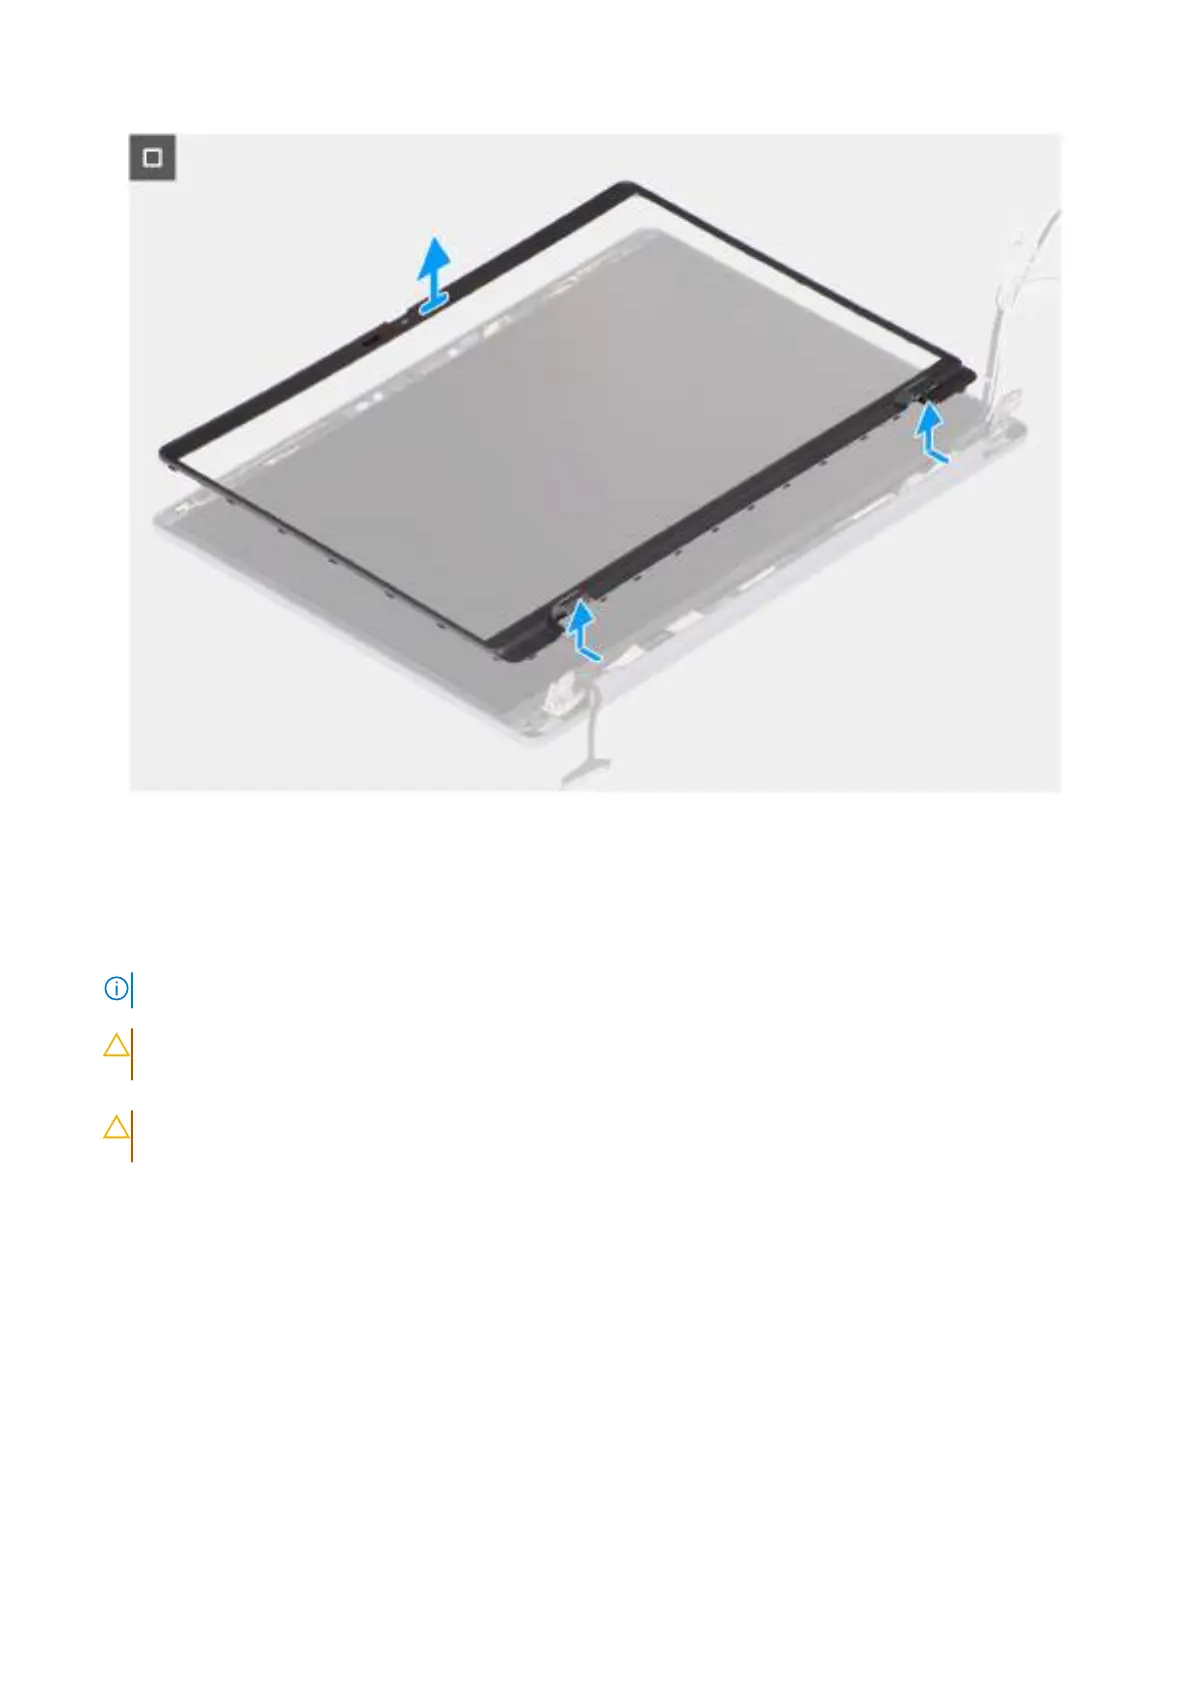
Figure 61. Removing the display bezel
Steps
1. Place the display assembly on a clean, flat surface and gently open the display hinges to at least 90 degrees.
2. At an angle, insert a flat-head slotted screwdriver (maximum width: 4 mm) into the slots on the bottom edge of the display
bezel, near the display hinges. Then gently pry open the display bezel at both ends, near the hinges.
NOTE: The display bezel may get damaged during this step. If this happens, replace the display bezel with a new one.
3.
CAUTION:
Do not use the flat-head slotted screwdriver to pry open the rest of the display bezel. Instead, use
a plastic scribe to continue prying along the display bezel.
CAUTION: When inserting the plastic scribe under the display bezel, ensure that it is parallel to the display
panel. Pressing it down can damage the display panel.
Carefully insert a plastic scribe into the openings near the right display hinge, parallel to the display panel, to release the
display bezel from the display.
4. Repeat step 4 near the left display hinge to release the display bezel from the display.
5. Keeping the plastic scribe parallel to the display panel, pry open the left, right, and top edges of the display bezel and
carefully release it from the latches and adhesive on the display assembly.
6. Carefully insert the plastic scribe into the display-hinge cap at an angle of 90 degrees and pry open the display-hinge cap.
7. Keeping the plastic scribe at an angle of 90 degrees to the display panel, continue prying the bottom edge of the display
bezel by sliding the scribe across the bottom edge and release it from the latches and adhesive on the display assembly.
8. Keeping the plastic scribe parallel to the right display hinge, insert the plastic scribe into the display bezel from the right
edge. Then, carefully release the bezel, above the right display hinge, from the latches and adhesive on the display panel.
9. Repeat step 8 to release the display bezel above the left display hinge.
10. Lift the bezel to an angle of 15 degrees and gently pry along the middle part of the bottom edge and release the bezel from
the latches and adhesive on the display panel.
94
Removing and installing Field Replaceable Units (FRUs)