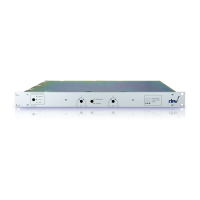
User Manual DEV 1951
Copyright DEV Systemtechnik GmbH 2004-2017 27
4.2.5 Installation and Exchange of Modules
The product is usually delivered with the ordered modules, which are already
installed. Therefore, you may proceed in reading the next chapter.
In case that a module has to be exchanged or if the DEV 1951 is to be upgraded
with an additional module, the following instructions are to be noticed:
Note:
Though the exchangeable modules are hot pluggable, it is recommended to
power down the device for exchange operations to avoid short circuits and for
safety reasons. There may be situations where a longer lasting interruption of
the signal transmission is not permitted, so -for instance- an exchange of a
power supply module has to be performed while the device is powered up. In
this situation, the operations as described below can be performed without
problems, but have to be carried out with the utmost caution.
After removing, adding, or exchanging a switch module (or a distribution
amplifier module) while the device is powered up, the device is to be restarted
to update the controller regarding the applied changes.
This can be done without interruption of the signal transmission.
If exchanging or installing optical modules, please especially refer to the
warnings regarding laser safety stated in chapter 2.3.
Note that in rare cases the insertion of a switch module may cause an auto-
matic device reset.
The device is to be equipped with at least one switch module (or one distribu-
tion amplifier module). If not a single switch (or distribution amplifier) module
is installed or detected, the device signalizes this by a permanent event
indication (please refer to chapters 3.1.1 & 6.1.2).
Removal of a module:
Any cable attached to the front side of the module is to be disconnected it in the
first step. For the removal, unscrew the two knurled head screws of the module (or
of the blind plate) before gently pulling out the module completely (or before
taking off the blind plate).
Installation of a module:
In the first step, plug in the module by inserting it into the two card guides of the
desired slot and by gently pushing the module into the chassis that it levels with the
rear side of the device. Screw in the two knurled head screws of the module, next.
Finally, (re-) connect the corresponding cables to the module.
4.2.6 Reset of the Device and the Restore of Factory Defaults
During power-up or after a restart the controller of the device performs a health
check and scans the assemblies of the device, e.g. to detect whether a module is
installed in a slot or not. If there is a module installed, the settings for this slot are
transferred to the module. This implies that a reset is necessary only if changes on
the modules population of the device were performed or if there were applied ele-
mentary changes, e.g. restoring the factory defaults via the Web Interface.