Interfaces Local Area Networks (LANs)
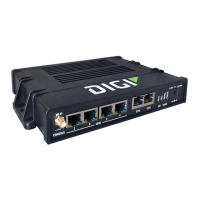
Digi Connect IT® 16/48 User Guide
134
Command line
1. Log into the Connect IT 16/48 command line as a user with full Admin access rights.
Depending on your device configuration, you may be presented with an Access selection
menu. Type admin to access the Admin CLI.
2. At the command line, type config to enter configuration mode:
> config
(config)>
3. Use the del command to delete the LAN. For example, to delete a LANnamed my_lan:
(config)> del network interface my_lan
4. Save the configuration and apply the change:
(config)> save
Configuration saved.
>
5. Type exit to exit the Admin CLI.
Depending on your device configuration, you may be presented with an Access selection
menu. Type quit to disconnect from the device.
DHCP servers
You can enable DHCP on your Connect IT 16/48 device to assign IP addresses to clients, using either:
n The DHCP server for the device's local network, which assigns IP addresses to clients on the
device's local network. Addresses are assigned from a specified pool of IPaddresses. For a
local network, the device uses the DHCP server that has the IPaddress pool in the same
IPsubnet as the local network.
When a host receives an IPconfiguration, the configuration is valid for a particular amount of
time, known as the lease time. After this lease time expires, the configuration must be
renewed. The host renews the lease time automatically.
n A DHCP relay server, which forwards DHCP requests from clients to a DHCP server that is
running on a separate device.
Configure a DHCP server
Note These instructions assume you are configuring the device to use its local DHCP server. For
instructions about configuring the device to use a DHCP relay server, see Configure DHCP relay.
Required configuration items
n Enable the DHCP server.
Additional configuration items
n The lease address pool: the range of IPaddresses issued by the DHCPserver to clients.
n Lease time: The length, in minutes, of the leases issued by the DHCP server.