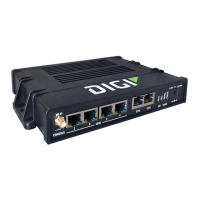
Interfaces Local Area Networks (LANs)
Digi Connect IT® 16/48 User Guide
131
5. Save the configuration and apply the change:
(config network interface LAN2)> save
Configuration saved.
>
6. Type exit to exit the Admin CLI.
Depending on your device configuration, you may be presented with an Access selection
menu. Type quit to disconnect from the device.
Task four: Verify the new configuration
The final step in this example is to verify the new configuration.
1. Verify that LAN1 is operating correctly:
a. Connect a device to LAN1 through the ETH1 Ethernet port, or by connecting to the
Example_AP Wi-Fi1 access point.
b. Verify that the device has been provided an IP address from the LAN DHCP server in the
192.168.3.* subnet.
2. Verify that LAN2 is operating correctly:
a. Connect a device to LAN2 through the ETH2 Ethernet port.
b. Verify that the device has been provided an IP address from the LAN2 DHCP server in the
192.168.4.* subnet.
Show LAN status and statistics
WebUI
1. Log into the Connect IT 16/48 WebUI as a user with Admin access.
2. From the menu, click Status.
3. Under Networking, click Interfaces.
Command line
1. Log into the Connect IT 16/48 command line as a user with Admin access.
Depending on your device configuration, you may be presented with an Access selection
menu. Type admin to access the Admin CLI.
2. Enter the show network command at the Admin CLI prompt:
> show network
Interface Proto Status Address
---------------- ----- ------- -------------------------------
defaultip IPv4 up 192.168.210.1/24
defaultlinklocal IPv4 up 169.254.100.100/16
eth1 IPv4 up 10.10.10.10/24
eth1 IPv6 up fe00:2404::240:f4ff:fe80:120/64
eth2 IPv4 up 192.168.2.1/24