Getting started with the XBee/XBee-PRO SX RF Module Development Kit Mesh network demonstration
XBee®/XBee-PRO SX RF Module User Guide
28
5. Click Start Range Test.
6. Range test data is represented in the chart. By default, 100 packets are sent for the test. XCTU
displays the instant local and remote RSSI in two separate controls, as well as the number of
packets sent and received. Remote devices only report their RSSI value when the local device
is operating in API mode (by setting AP to 1).
7. Test the wireless link by moving your laptop and local device setup away from the remote
device. Watch the range test status indicators: RSSI will decrease as you get farther away, and
eventually you will see the percentage of successful packets drop below 100%, indicating you
are approaching the limits of the range.
8. Click Stop Range Test to stop the process at any time.
Mesh network demonstration
1. Connect the two XBee PRO SX development boards and the XBIB-U-SS (with the XBee SX
installed) to your computer. Open XCTU and find the three XBee devices.
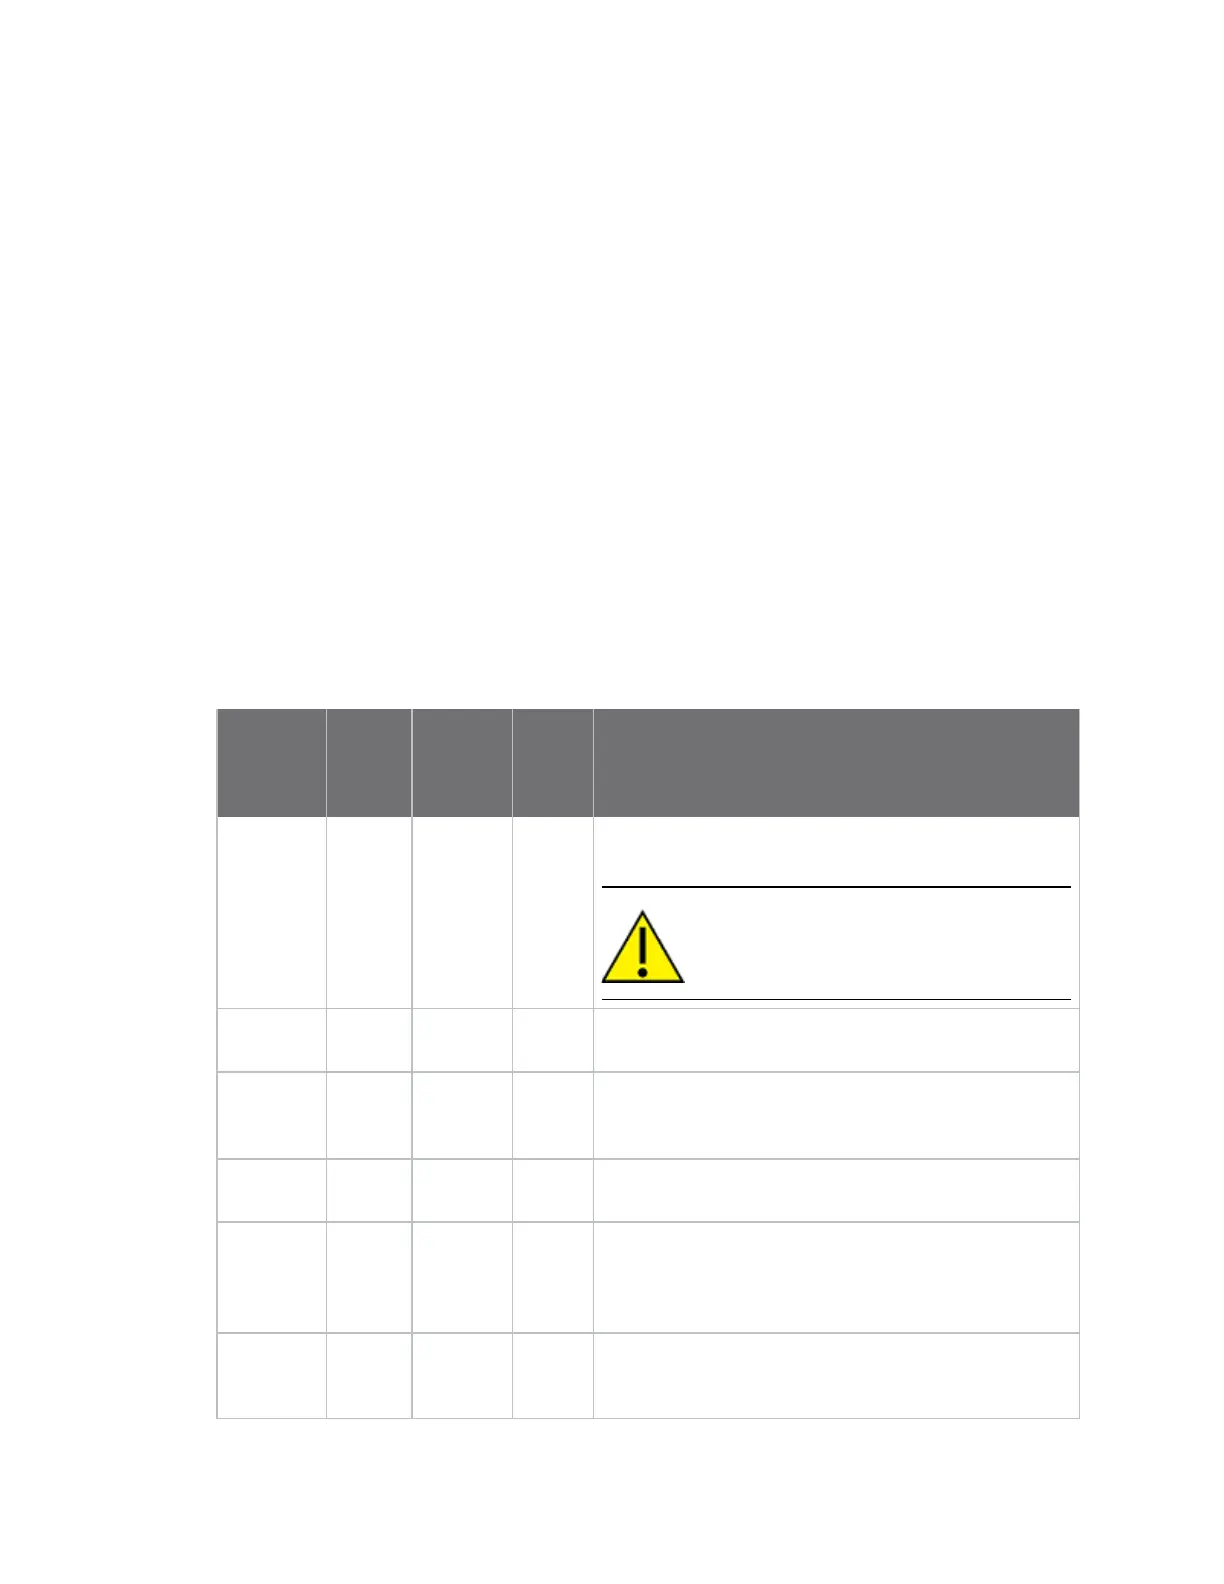
2. Configure all three devices with the following parameters and write the settings. Note that
XBee A (SENDER) should be the XBee SX device running on the XBIB-U-SS development board.
Parameter
XBee A
(XBee
SX)
XBee B
(XBee
PRO SX)
XBee C
(XBee
PRO
SX) Effect
NI SENDER RECEIVER BRIDGE Defines the node identifier, a human-friendly name for
the module.
CAUTION! The default NI value is a blank
space. Make sure to delete the space
when you change the value.
ID 2015 2015 2015 Defines the network that a device will attach to. This
must be the same for all devices in your network.
PL Lowest
[0]
Lowest
[0]
Lowest
[0]
Defines the transmitter output power level. Set it to
the lowest level to facilitate the execution of the
example.
DH 0 0 0 Defines the destination address (high part) to transmit
the data to.
DL FFFF FFFF FFFF Defines the destination address (low part) to transmit
the data to. You can use
the000000000000FFFFaddress to send a broadcast
message.
RP 5 5 5 Defines the time that the RSSI LED will be on when the
device receives a packet.
5 (hexadecimal) = 5 (decimal) x 100 ms = 500 ms.