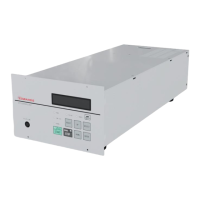
3.11.15 Parameter setting procedure
Refer to Figure 28 to Figure 33.
1. Press the "UP" and "SELECT" switches simultaneously to enter the Parameter Set Mode.
The setting options detailed from Section 3.11.1 to 3.11.13 is each displayed in order.
2. Press the "UP" switch to go to the next parameter, and press the "DOWN" switch to display the
previous parameter.
3. Press the "ENTER" switch to set the new parameter and to enter the next menu. However, note
that the new parameter is not accepted until it is stored (refer to step 6 below).
4. When the parameter is not required to be set, press the "SELECT" switch and go to the next
menu.
5. Use the same procedure 1 to 4 above to set the remaining parameters.
6. "STORAGE NO" is displayed on the preservation menu. Select "YES" with the "UP" or "DOWN"
switches and press "ENTER" to store the parameter.
The message on the LCD displays "STORAGE IN PROGRESS" shown the storage state. Then
the storage succeeds, "STORAGE OK" is displayed. However the storage fails, "STORAGE NOT
OK" is displayed.
7. When pressing the "SELECT" switch in the state of "STORAGE NOT OK" displayed, the
preservation is displayed. In this case, try to store it again.
8. Press the "ENTER" switch when the state "STORAGE OK" is displayed to enter the date/time
setting menu. The date and time currently set are displayed. Press "ENTER" switch to enter to the
year setting menu. If you do not want to set the date, press the "SERECT" switch, and return to
the operation mode.
9. The year can be changed with "UP" or "DOWN" switch. Press the "SELECT" or "ENTER" switch
to enter the month setting menu. However, note that the change of year is not accepted yet.
10. Display the date, hour and the minute with the "SELECT" or "ENTER" switch. Set them with "UP"
or "DOWN" switch.
11. The date/time and "ENTER to Cancel" are displayed on the confirmation menu. If you have made
an error when setting, press the "ENTER" switch to return to the date/time setting menu in 8).
12. After confirming the date/time on the confirmation menu, select the "apply" and then press the
"ENTER" switch.
13. Use the same procedure 1 to 4 above to set the EdCentra parameters.
Note: If no switch is pressed for approximately 1 minute, the display will automatically revert to
Operation mode. In this case, unsaved settings are not changed.
 Loading...