DSG-423 ENGINE
02-9
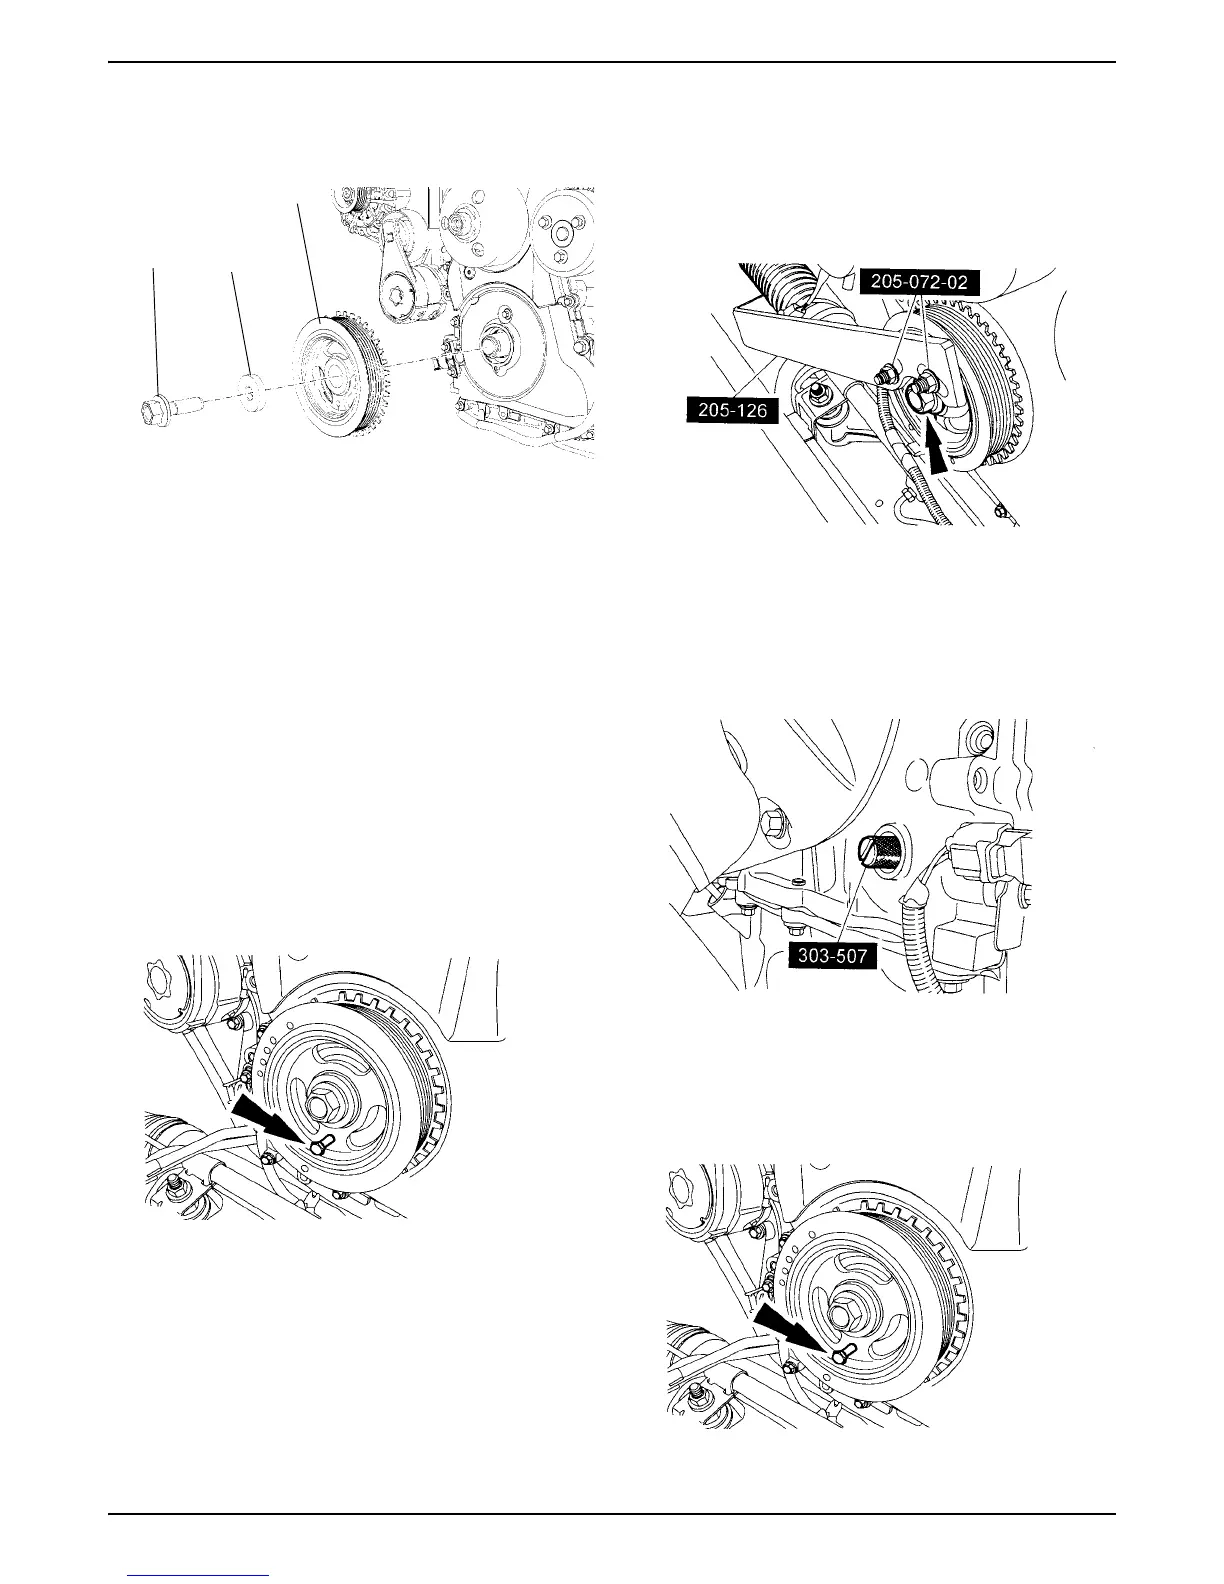
9. Remove bolt, washer and pulley. Discard crankshaft
pulley bolt.
Crankshaft Pulley - Installation
CAUTION: Do not reuse the crankshaft pulley bolt.
1. Apply clean engine oil on the crankshaft front seal
and install crankshaft pulley, washer and hand
tighten new bolt.
CAUTION: Only hand-tighten the bolt or damage to
the front cover can occur.
NOTE: This next step will correctly align the crankshaft
pulley to the crankshaft.
2. Install a standard 6mm x 18mm bolt as shown and
thread it into the front cover.
NOTE: Rotate the crankshaft pulley as necessary to
align the bolt hole.
CAUTION: Failure to hold the crankshaft pulley in
place during bolt tightening can cause damage to
the engine front cover.
3. Using special tools 205-126 and 205-072-02 to hold
the crankshaft pulley in place, tighten the crankshaft
pulley bolt in 2 stages:
• Stage 1: Tighten to 100 Nm (74 lb-ft).
• Stage 2: Rotate an additional 90 degrees.
4. Remove all special tools and 6 mm bolt.
CAUTION: Only turn the engine in the normal
direction of rotation.
5. Turn the engine 2 complete revolutions, then
continue to turn until piston is at TDC.
6. Install special tool 303-507.
CAUTION: Only hand tighten the bolt in the next
step or damage to the front cover can occur.
7. Using the 6mm x 18 mm bolt, check the position of
the crankshaft pulley. If it is not possible to install this
bolt, correct the engine timing.
Bolt
Washer
Pulley